
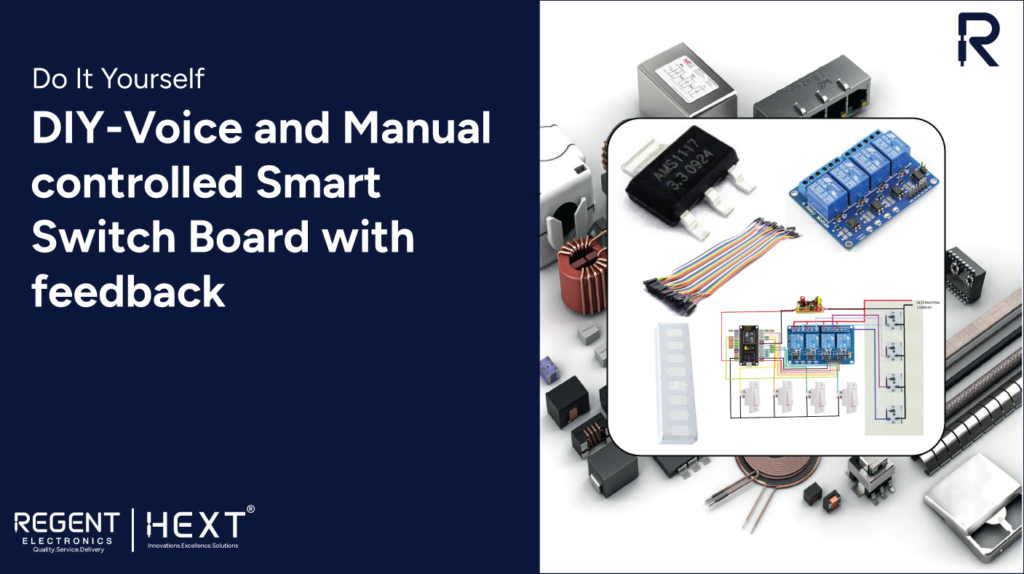
Voice and Manual Controlled Smart Switch Board with Real-Time Feedback: A Comprehensive Guide
In today’s fast-paced world, managing household tasks has become more challenging than ever. The need for efficient control over home appliances like lights, fans, air conditioners, and even washing machines has grown significantly. Imagine being able to control these devices remotely with just your voice, or having the convenience of manual switches when needed. The Voice and Manual Controlled Smart Switch Board with Real-Time Feedback from Regent Electronics brings this vision to life, allowing you to control your home appliances through voice commands via Alexa, the Alexa app, or manual switches. Plus, it offers real-time feedback to help you monitor the status of your appliances.
Objective
The core objective of this project is to enable control of electrical appliances through voice commands, the Alexa app, and manual switches—whether you are at home, at work, or anywhere in the world.
- Execute tasks with a simple voice command, making your life more convenient.
- Monitor the status of your appliances remotely using your smartphone.
- Manually control your appliances without an internet connection, providing flexibility when needed.
Applications
- Home Automation: Control lights, fans, ACs, and other home appliances remotely with your voice or app.
- Office Automation: Manage office appliances and equipment without leaving your desk.
- Smart Living: Improve the convenience and efficiency of your daily activities with voice-controlled automation.
- Energy Efficiency: Reduce energy consumption by monitoring and controlling appliances from anywhere.
Components Required
Hardware Components


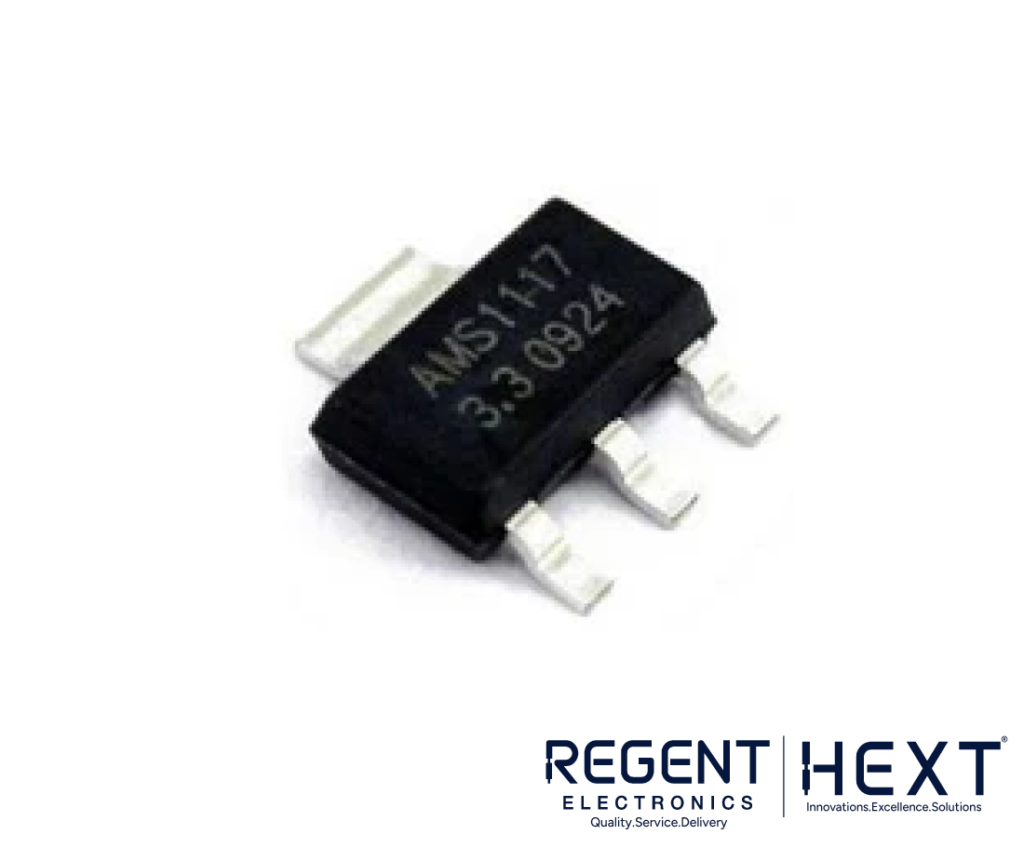
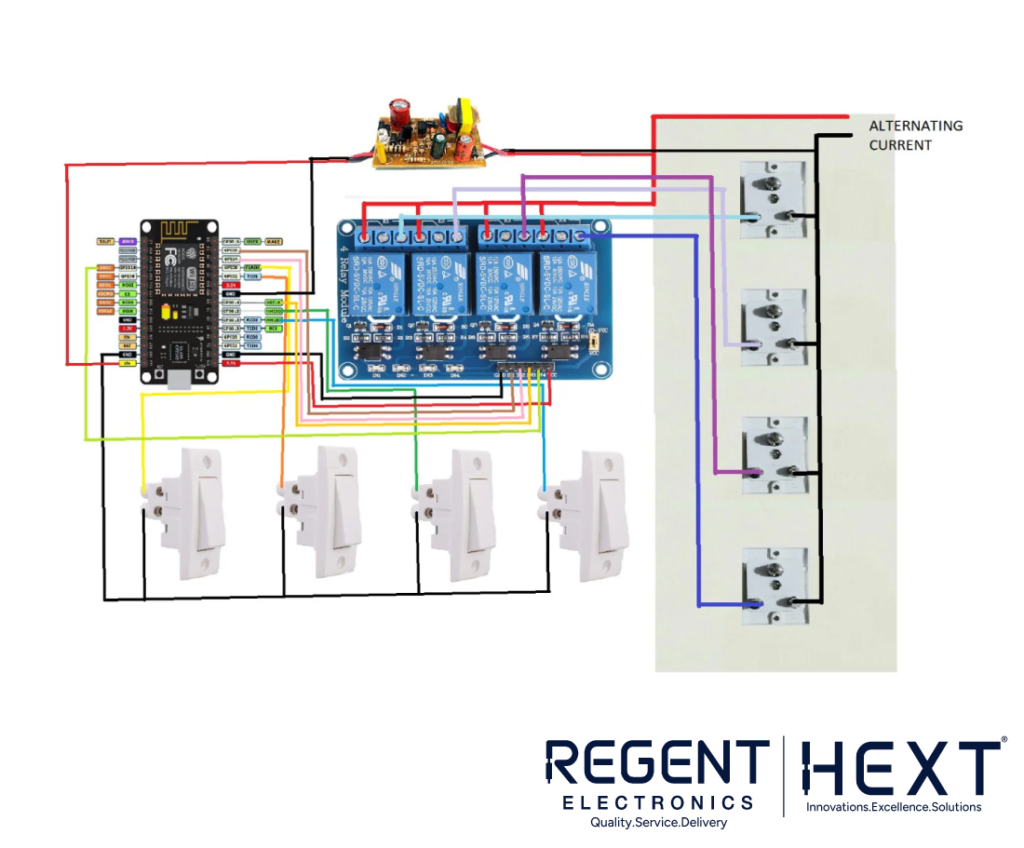
- Node MCU ESP8266 Board
The Node MCU board is the brain of this project, allowing you to upload your code and control the devices via Wi-Fi. It is compatible and widely used for IoT projects.
Note: Don’t forget to add a 3.3V voltage regulator (AMS 1117) for stable operation.
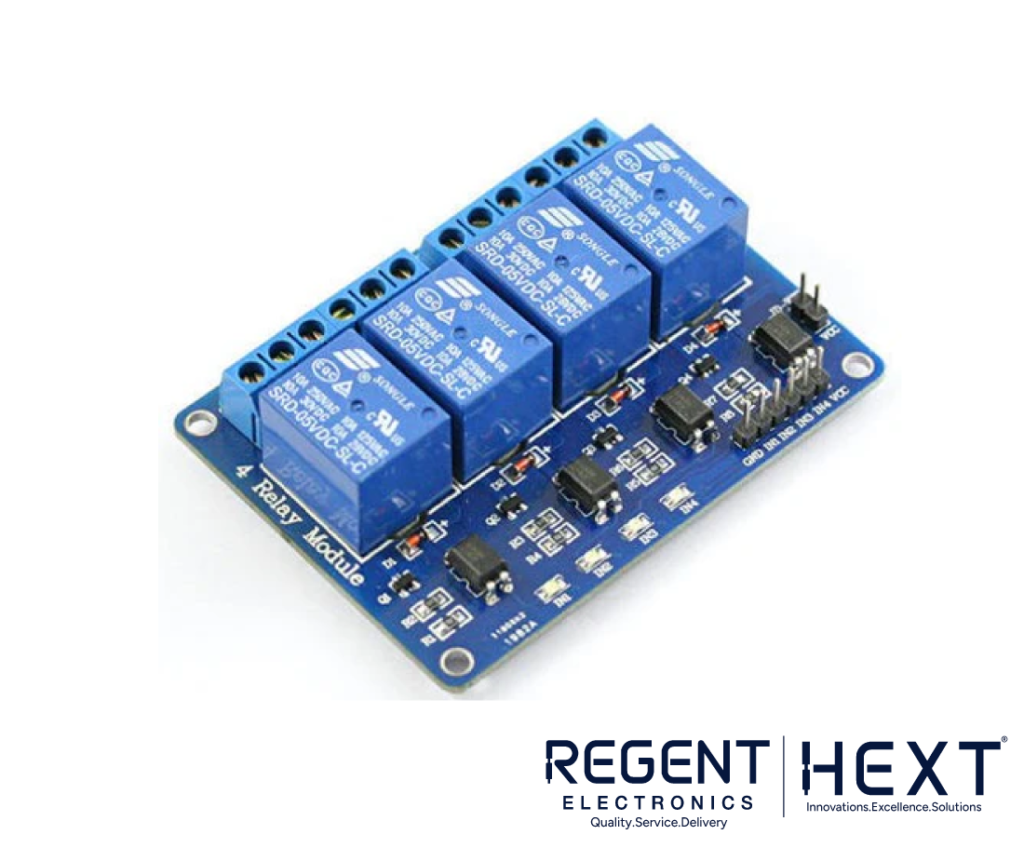
- 4-Channel Relay Board
The relay board acts as a switch that allows you to control high-voltage appliances with low-voltage control from the Node MCU.
- Jumper Wires
These wires connect the Node MCU, relay board, and switches together. They are essential for building the circuit.
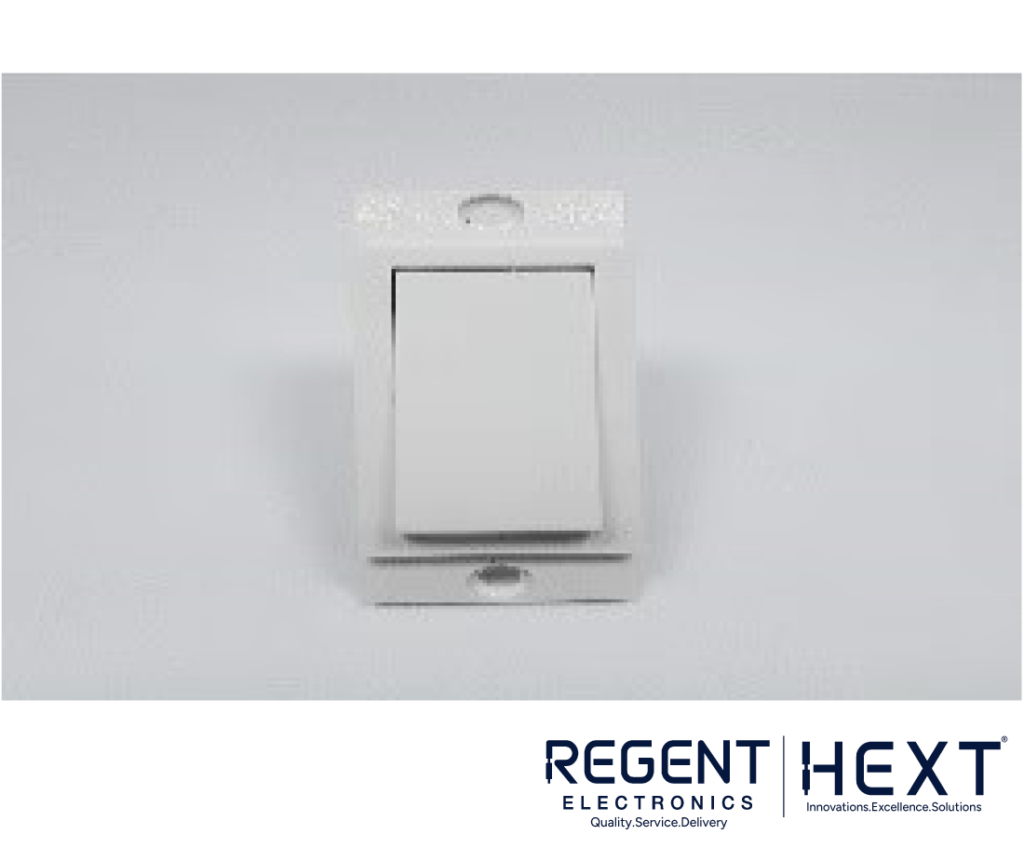
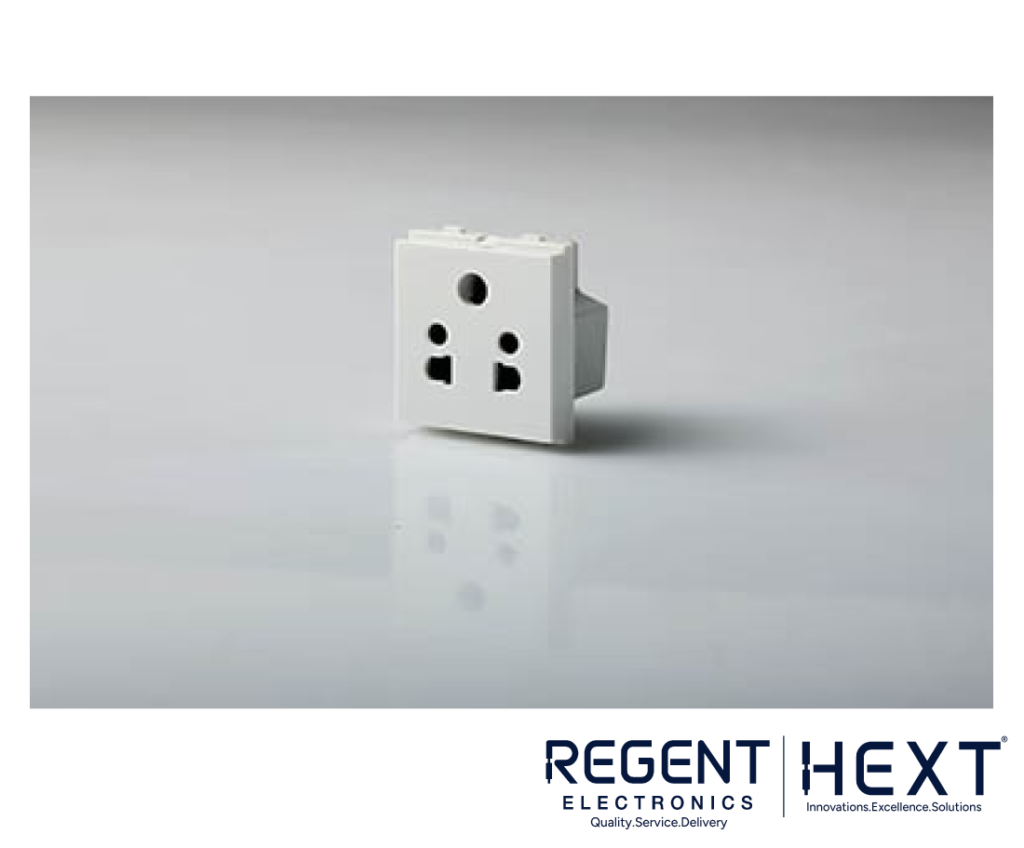
- Switches, Sockets, and 8-Way Gang Box
These components will allow manual control of appliances. You can find them at your local electrical shop. - Any Alexa Device
Alexa is a voice assistant that acts as the interface between you and the appliances. You can use any of the following Alexa devices:- Alexa Echo Dot 3rd Generation
- Alexa Echo Dot 4th Generation
- Alexa Echo Portable


Software Components
- Arduino IDE
The Arduino IDE is an open-source platform that helps you write and upload the code to the Node MCU board. It runs on Windows, Linux, and macOS.
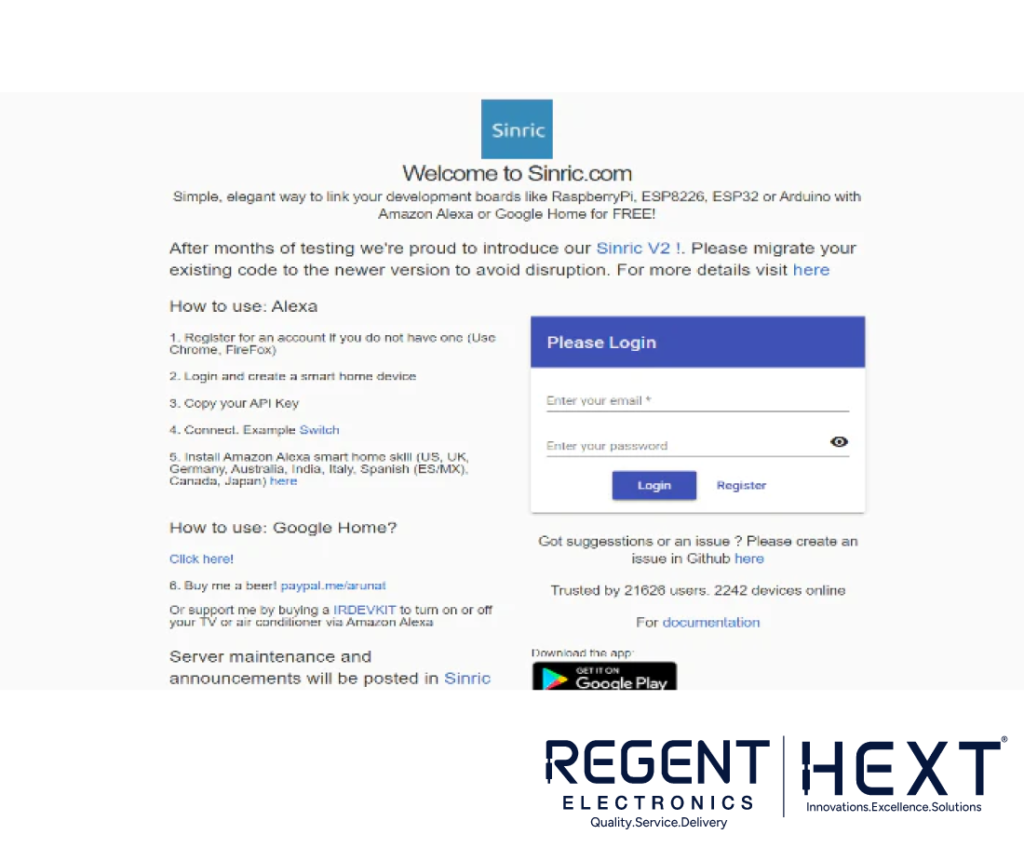
Download Arduino IDE - Sinric Account
Sinric is a platform that connects your devices to Alexa. You will need to create an account on Sinric to link your smart switch board to Alexa.- Visit Sinric to create your account and get your API keys and device IDs.
Note: Keep your API keys and device IDs secure.
- Visit Sinric to create your account and get your API keys and device IDs.
Step-by-Step Guide to Building the Smart Switch Board

Step 1: Setup Arduino IDE
Before you begin, you need to add the ESP8266 board to your Arduino IDE. Watch this tutorial to learn how to set up the ESP8266 in the Arduino IDE: Video Tutorial.
Step 2: Create Devices in Sinric
- Go to Sinric.com and log in with your account.
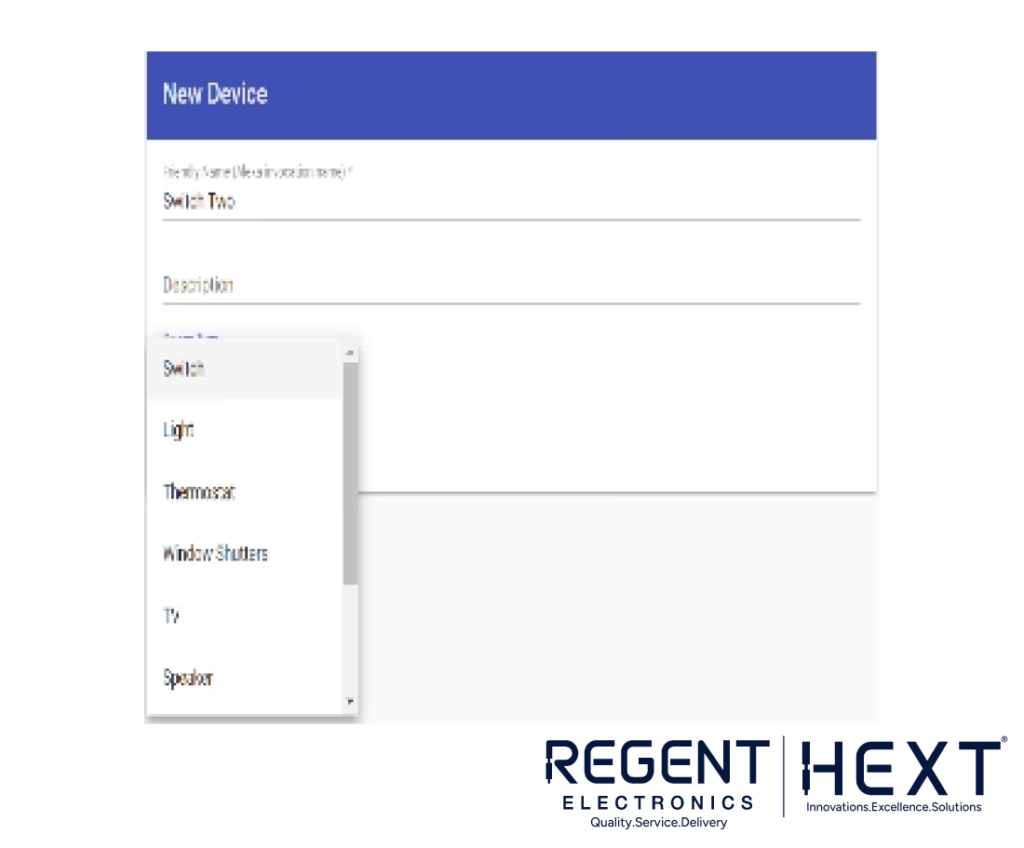
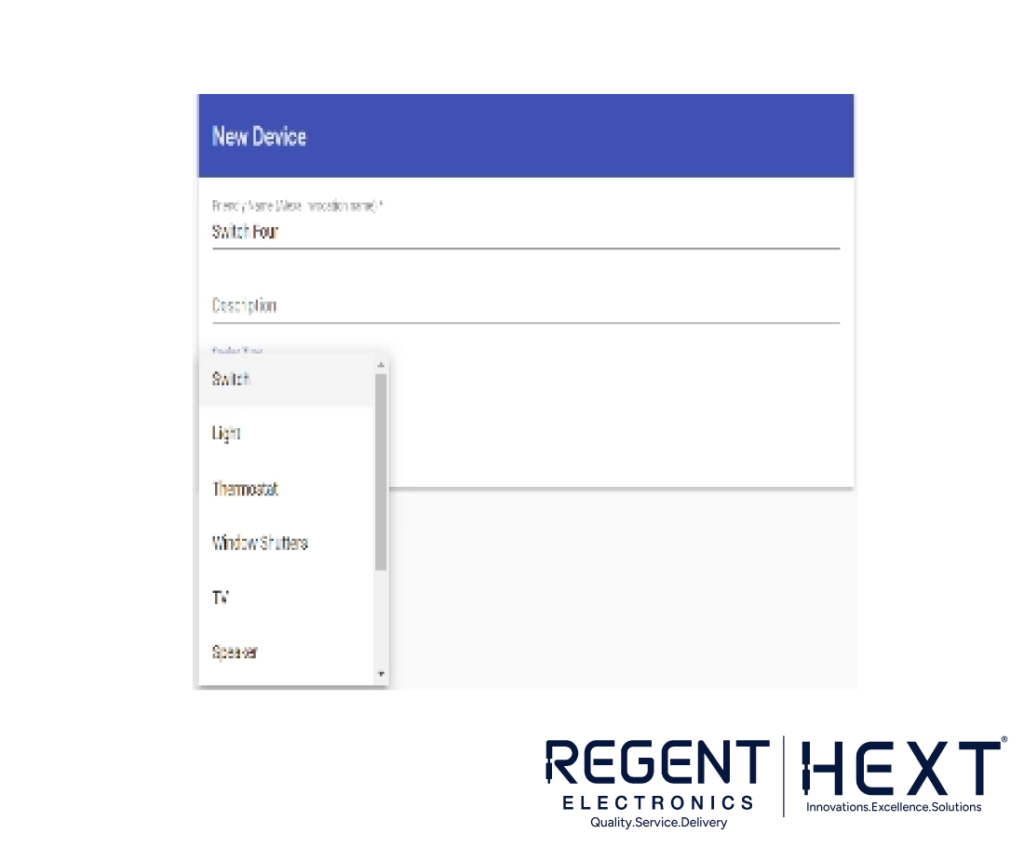
- Click on the “Add” button to create a new smart device.
- Name your device “Switch One,” select “Switch” as the device type, and click save.
- Repeat the process to add additional switches, naming them “Switch Two,” “Switch Three,” and “Switch Four.”
Step 3: Code the Arduino IDE
Once you’ve created the devices on Sinric, the next step is to upload the code to your Node MCU board using the Arduino IDE. Below is the sample code for this project. Make sure you have the necessary libraries installed in the IDE.
cpp
CopyEdit
#include <ESP8266WiFi.h>
#include <SinricPro.h>
#define WIFI_SSID “your-wifi-ssid”
#define WIFI_PASSWORD “your-wifi-password”
#define SWITCH_ONE “your-device-id-for-switch-one”
void setup() {
Serial.begin(115200);
WiFi.begin(WIFI_SSID, WIFI_PASSWORD);
while (WiFi.status() != WL_CONNECTED) {
delay(1000);
Serial.print(“.”);
}
Serial.println(“Connected to WiFi”);
SinricPro.begin();
}
void loop() {
SinricPro.handle();
}
void onSwitchState(String deviceId, bool state) {
if (deviceId == SWITCH_ONE) {
if (state) {
// Turn on the appliance
} else {
// Turn off the appliance
}
}
}
Step 4: Test and Operate the System
Once you’ve uploaded the code to your Node MCU board, use the Alexa app to link your Sinric account and control the devices. You can say things like:
- “Alexa, turn on Switch One.”
- “Alexa, turn off Switch Two.”
You’ll also be able to manually control the switches when needed, without relying on the internet.
Conclusion
With the Voice and Manual Controlled Smart Switch Board, you can easily manage your home appliances from anywhere in the world. Whether using Alexa’s voice commands, the Alexa app, or manual switches, this project provides flexibility and convenience. Plus, with real-time feedback, you can always stay informed about the status of your devices.
Shop Now at Regent Electronics for all the components you need to get started with your smart home automation projects.