
Interfacing SSD1306 I2C OLED Display with Arduino
Introduction
Welcome to Regent Electronics! If you’re interested in exploring modern display technology, OLEDs (Organic Light-Emitting Diodes) are the future. You’ve likely heard of AMOLED displays in flagship smartphones, but did you know you can integrate OLEDs into DIY electronics projects with Arduino? This guide will walk you through OLED basics and interfacing the SSD1306 I2C OLED display with Arduino.
What is an OLED?
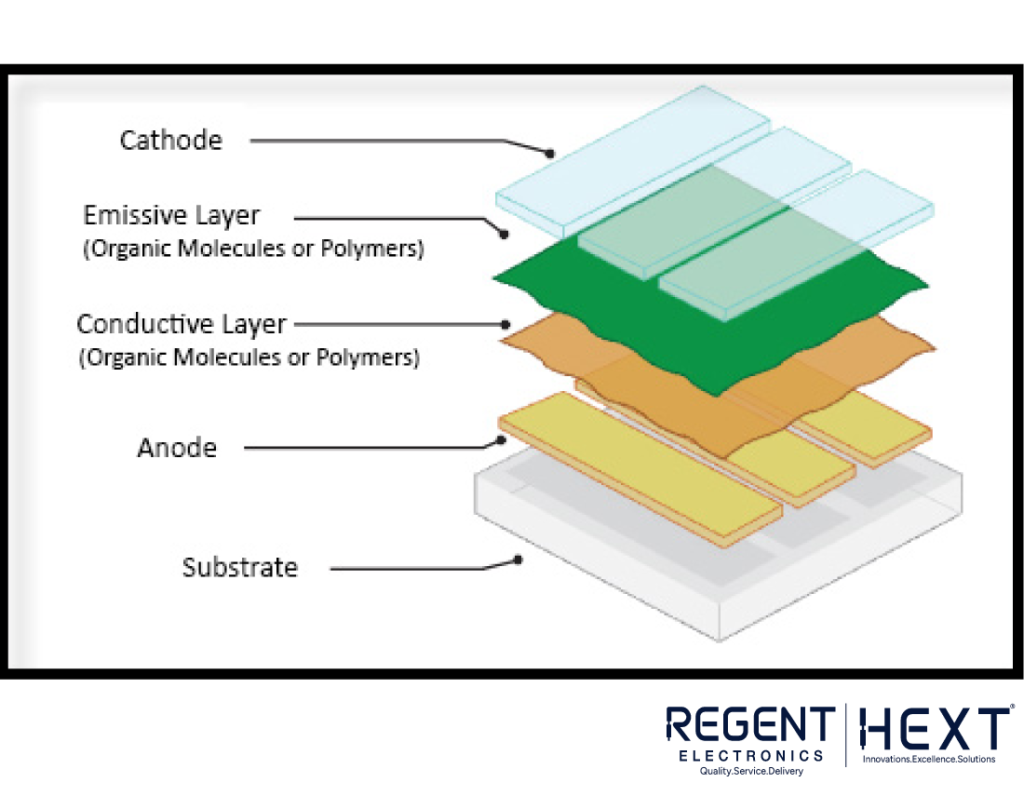
OLED displays work by placing thin organic films between two conductors, allowing them to emit light when electricity passes through. Unlike traditional LCDs, OLEDs don’t require a backlight, making them thinner, brighter, and more energy-efficient.
Why Choose an OLED?
OLED displays are becoming a preferred choice over LEDs and LCDs due to their numerous advantages:
- Thinner & Lighter: No need for bulky backlights.
- Brighter Display: Higher contrast ratios for superior image quality.
- Flexible Substrates: Can be manufactured using plastic instead of glass.
- Lower Power Consumption: Ideal for battery-operated devices like wearables and smartphones.
- Wider Viewing Angles: Up to 170-degree visibility.
Types of OLED Displays
There are several types of OLEDs available today:
- Passive-Matrix OLED (PMOLED) – Best for small displays and simple text/icons.
- Active-Matrix OLED (AMOLED) – Used in TVs and high-end smartphones due to lower power consumption and fast refresh rates.
- Transparent OLED – Allows light to pass through and is used in futuristic heads-up displays.
- Top-Emitting OLED – Works best for active-matrix designs.
- Foldable OLED – Used in foldable smartphones like Samsung Galaxy Fold and Motorola Razr.
- White OLED – Energy-efficient and ideal for general lighting applications.
Interfacing OLED with Arduino
Now, let’s see how to connect an SSD1306 I2C OLED display to an Arduino board and display simple text.
Components Required:
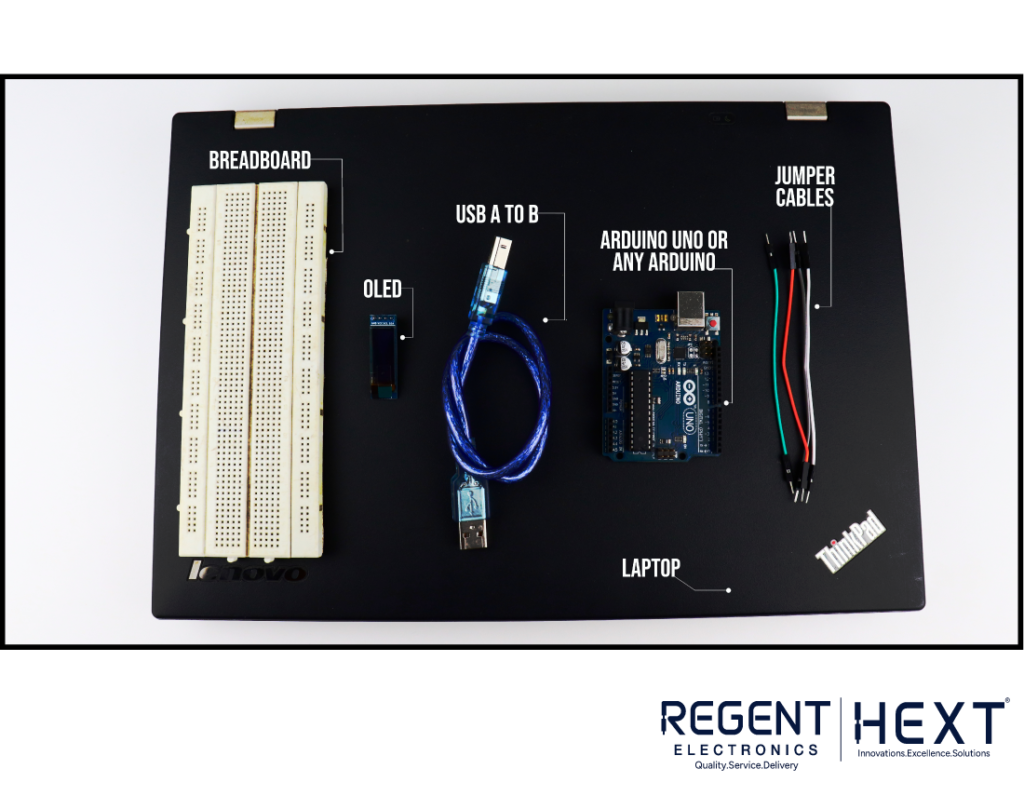
- Arduino Uno (or similar)
- 0.91-inch 128×32 OLED Display (I2C interface)
- Breadboard & Jumper Wires
- USB Cable for Power & Data Transfer
- Laptop with Arduino IDE Installed
Software Requirements:
- Arduino IDE – For writing and uploading code.
- Adafruit SSD1306 Library – Required for OLED control.
- Adafruit GFX Library – Provides graphical functions.
Circuit Connection:
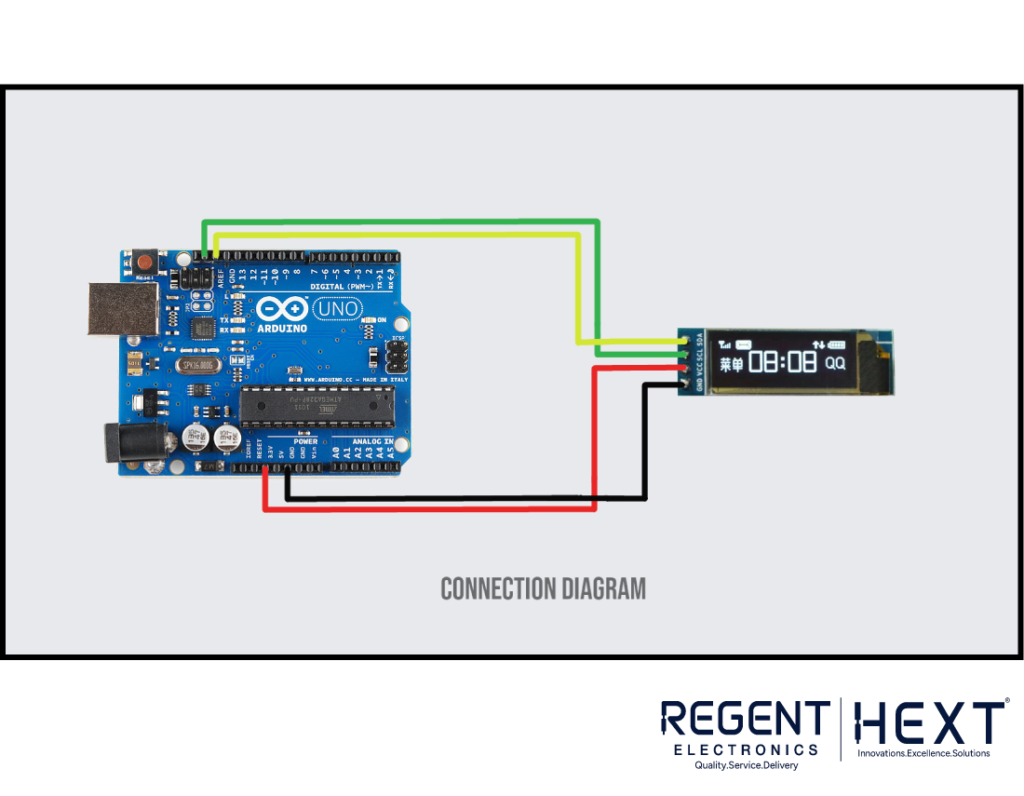
Connect the OLED module to Arduino as follows:
- VCC → 3.3V or 5V (Check your module’s voltage requirement)
- GND → GND
- SCL → SCL (A5 on Arduino Uno)
- SDA → SDA (A4 on Arduino Uno)
Arduino Code for OLED Display
Use the following code to display text on your OLED screen:
#include <SPI.h>
#include <Wire.h>
#include <Adafruit_GFX.h>
#include <Adafruit_SSD1306.h>
Adafruit_SSD1306 display(-1);
void setup() {
display.begin(SSD1306_SWITCHCAPVCC, 0x3C);
display.clearDisplay();
display.setTextSize(2);
display.setTextColor(WHITE);
display.setCursor(0, 15);
display.println(“Regent Electronics!”);
display.display();
delay(1000);
display.clearDisplay();
}
void loop() {}
Expected Output:
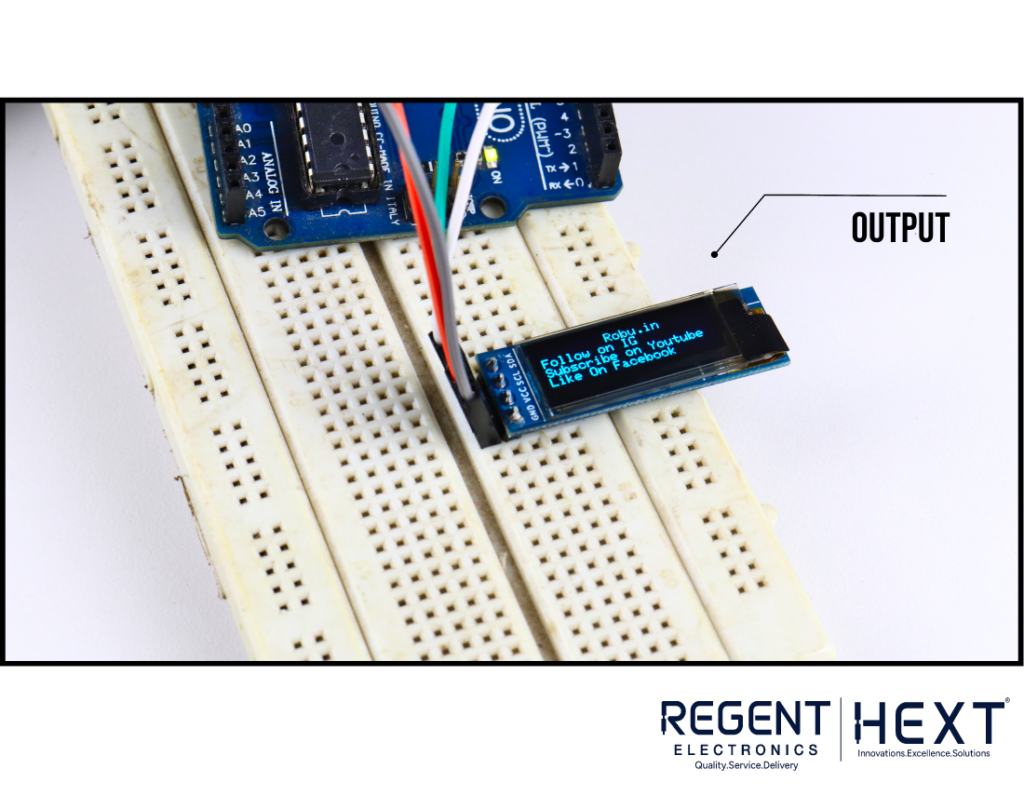
The OLED display should show “Regent Electronics!” on startup. You can modify the code to display other messages, images, or scrolling text.
Comparison: OLED vs. Standard LED
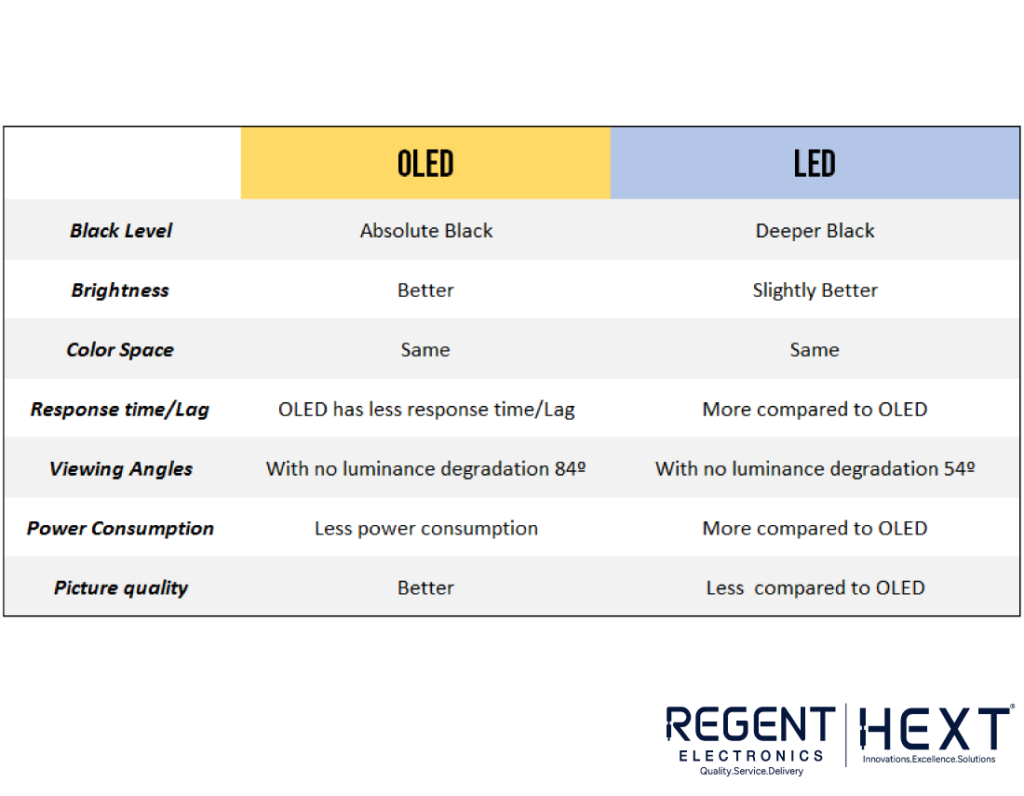
| Feature | OLED | Standard LED |
| Thickness | Ultra-thin | Thicker |
| Brightness | High | Moderate |
| Power Consumption | Low | High |
| Flexibility | Yes | No |
| Viewing Angle | 170° | 120° |
Conclusion
As we’ve explored, OLED displays offer significant advantages over traditional LED and LCD screens. They provide better brightness, energy efficiency, and flexibility, making them ideal for various applications.
By interfacing the SSD1306 OLED with Arduino, you can create custom projects like live data displays, graphical interfaces, or scrolling text screens. OLED technology is the future of displays, and Regent Electronics is here to help you integrate it into your projects.
Stay tuned for more tutorials, and let us know your thoughts in the comments section!
For the best OLED display modules and electronics components, check out Regent Electronics’ website!