
Create Your Own Sound Reactive WS2812B LED Strip Using Raspberry Pi Pico
Introduction
LED strips have become a popular lighting solution for various applications, including enhancing room ambiance, providing additional lighting for photography, and creating eye-catching festival decorations. One of the most versatile LED strips available is the WS2812B, which allows users to program custom patterns, color combinations, and animations.
In this project, we will use a Raspberry Pi Pico to program a WS2812B LED strip and make it react to sound. By using a microphone module, the LED patterns will sync with the beat of the music, creating a dynamic and interactive lighting experience.
Hardware Requirements
To build this project, you will need the following components:
- WS2812B LED strip
- Raspberry Pi Pico
- Micro USB cable
- 5V 3A power adapter
- LM393 sound detection sensor
- Jumper wires (F to F) – 4 pieces
Circuit Diagram

Make the connections as per the circuit diagram to ensure smooth functionality of the sound-reactive LED strip.
Installing Required Libraries
To control the WS2812B LED strip, you need to install the necessary libraries. Follow these steps:
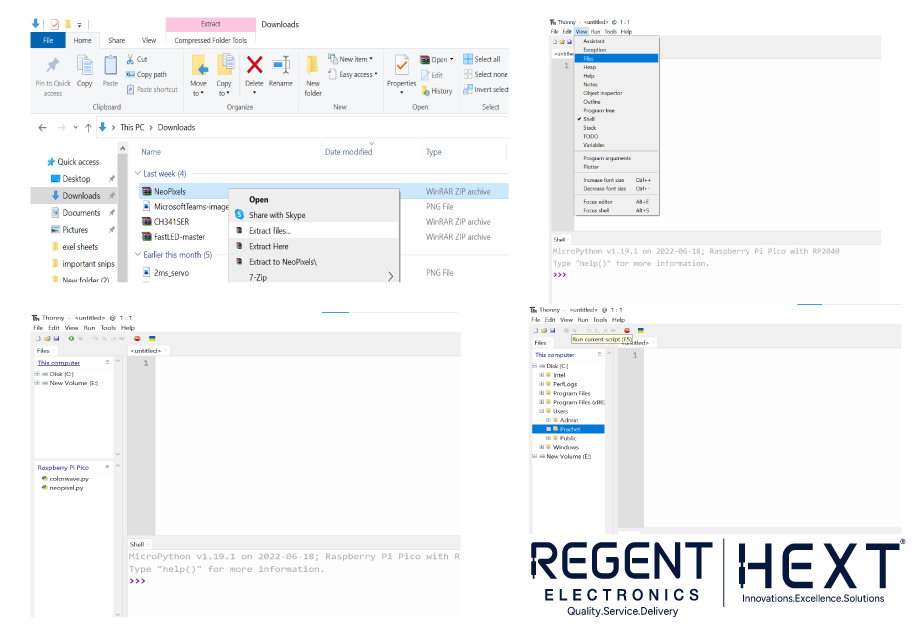
- Download the required zip folder and extract its contents.
- Open Thonny IDE and connect the Raspberry Pi Pico to your computer.
- Click on “View” and then “Files.”
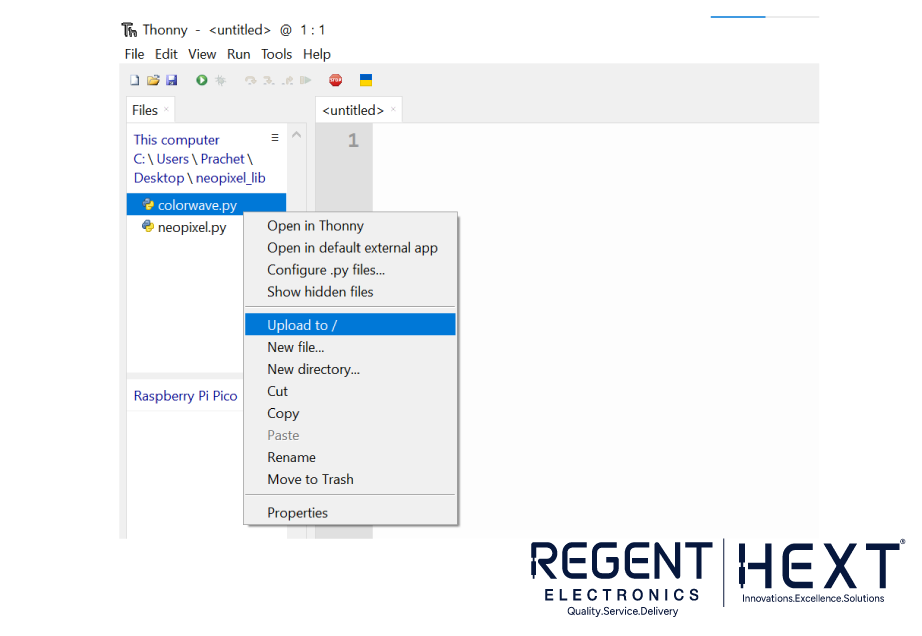
- Browse to the extracted folder and upload the neopixel.py and colorwave.py files to the Raspberry Pi Pico.
- The Neopixel library is now installed and ready for use.
Using the Neopixel Library
After importing the Neopixel library, create an object from the Neopixel class with the following parameters:
pix = Neopixel(Number of LEDs in strip, Machine state number, “GRB”)
Functions in the Library:
- brightness(value): Sets brightness (0 for minimum, 255 for maximum).
- show(): Updates and displays the changes.
- fill(RGB tuple): Sets all LEDs to a specific color.
- set_pixel_line(start, end, RGB tuple): Lights up a specific range of LEDs.
- set_line_gradient(start, end, RGB1, RGB2): Creates a smooth color gradient between two colors.
Programming Sound Reactive LED Effects
Sound Reactive Fading LED
To make the LED strip react to sound, we will read the ADC pin 26, where the microphone module is connected. The following Python code achieves this:
from machine import Pin, ADC
from neopixel import Neopixel
import time
mic = ADC(Pin(26))
pix = Neopixel(60, 0, 0, “GRB”)
c = 0
color_dict = {0:(255,100,0), 1:(255,50,0), 2:(0,255,0), 3:(0,0,255), 4:(255,0,0),
5:(0,255,100), 6:(255,255,255)}
while True:
mic_val = mic.read_u16()
print(mic_val)
if mic_val < 65535:
c += 1
for a in range(255, 0, -10):
pix.brightness(a)
pix.fill(color_dict[c % 7])
pix.show()
time.sleep_ms(1)
Code Explanation
- The microphone module detects sound, and the c variable increments.
- A loop reduces the brightness from 255 to 0, creating a fading effect.
- The color is selected from a dictionary and updated using the show() function.
Sound Reactive Running LED (Shooting Star Effect)
This effect simulates a shooting star effect by animating a small section of LEDs across the strip.
from machine import Pin, ADC
from neopixel import Neopixel
import time
mic = ADC(Pin(26))
c = 0
numpix = 60
pix = Neopixel(numpix, 0, 0, “GRB”)
color_dict = {0:(255,100,0), 1:(255,50,0), 2:(0,255,0), 3:(0,0,255), 4:(255,0,0),
5:(0,255,100), 6:(255,255,255)}
black = (0,0,0)
s = 4
while True:
pix.brightness(255)
mic_val = mic.read_u16()
print(mic_val)
if mic_val < 65535:
c += 1
pix.fill(color_dict[c % 7])
time.sleep_ms(10)
for i in range(0, 59-s, s):
pix.set_pixel_line(i, i+5, color_dict[c % 7])
pix.show()
time.sleep_ms(1)
pix.fill(black)
pix.show()
Code Explanation
- The LED strip initially flashes in a selected color.
- A loop animates a segment of five LEDs across the strip, creating a flowing effect.
- The strip resets after the effect completes and is ready to detect new sound input.
Conclusion
This project demonstrates how to use a Raspberry Pi Pico to program a WS2812B LED strip and create a sound-reactive lighting effect. With basic coding skills and creativity, you can modify the project to produce unique lighting patterns. If you have any questions, feel free to reach out in the comments.
For more exciting electronics projects, subscribe to our YouTube channel and stay updated with the latest innovations from Regent Electronics!