
DIY Water Level Indicator: A Simple Solution for Overflow and Water Conservation
In today’s world, many households rely on overhead water tanks. However, managing these tanks can be tricky without a proper monitoring system. Water tank overflow and running out of water unexpectedly are common issues that waste water and energy. This DIY Water Level Indicator project is a simple yet effective solution to monitor the water level in your tank, preventing wastage and making your water usage more efficient.
Components Required:
- Green LED
- Yellow LED
- Red LED
- Perf Board (Zero Board)
- Soldering Kit
- BC547 Transistors (x3)
- 220-ohm Resistors (x3)
- Connecting Wires
- Power Supply
Introduction to BC547 NPN Transistor

The BC547 is a popular Bipolar Junction NPN transistor widely used in various applications for both switching and amplification purposes. It is especially useful for controlling higher currents using smaller currents at the base. This makes it an ideal choice for controlling the LEDs in your water level indicator project.
Key Features of the BC547 Transistor:
- DC Current Gain (hFE): 110-800
- Continuous Collector Current (IC): 100mA
- Emitter-Base Voltage (VBE): 6 Volts
- Collector-Emitter Voltage (VCE): 30V
- Collector-Base Voltage (VCB): 30V
How It Works:
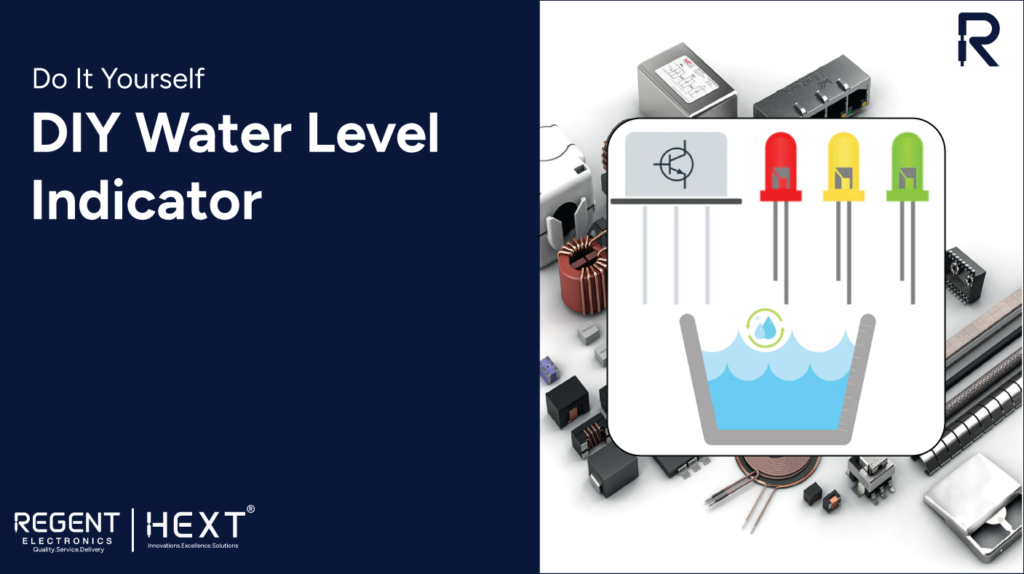
The working principle behind the water level indicator is simple: wires are submerged in the water tank at different levels. These wires are connected to the circuit via a transistor. When the water reaches a particular level, the circuit activates an LED to indicate the status of the water level.
The sensor wires are crucial in this setup, and their material selection is key. Since the water carries minerals, the wires can corrode or get calcified over time. To prevent this, it is recommended to use graphite probes as sensors because graphite is less likely to corrode or degrade over time.
Water Level Indicator Circuit Design:
In the circuit, the water tank has multiple sensors placed at different levels (such as low, medium, and full). Each sensor is connected to a transistor, which controls the activation of an LED (green for low, yellow for medium, and red for full). Additionally, a buzzer can be added to alert users when the water reaches certain levels.
Working with the BC547 Transistor:
- Base (B): When the water level reaches a particular probe, the sensor wire connects the base of the transistor to the common VCC line, which allows current to flow through the collector-emitter path.
- Collector (C): This will activate the connected LED, indicating the water level. If the water is full, the red LED will light up; if the water is halfway, the yellow LED will light up, and if the water is low, the green LED will be activated.
Circuit Diagram:

The circuit diagram shows how the transistors, LEDs, and sensor wires are connected to the power supply. The sensors at various levels control the activation of the LEDs based on the water level.
Conclusion:
This DIY Water Level Indicator is an effective and easy-to-build solution to monitor the water level in overhead tanks, preventing wastage and ensuring efficient water management. By utilizing components like the BC547 transistor and using durable materials for sensor wires, this project offers a reliable and low-maintenance system for households.
Get your water level indicator today from Regent Electronics and take a step towards better water conservation!