
How to Build Your Own Weather Station with DHT11 Temperature & Humidity Sensor and Arduino Uno
Creating your own weather station is easier than you think, especially with the help of Arduino and the DHT11 sensor. In this guide, you will learn how to use the DHT11 Temperature and Humidity Sensor Module with the Arduino Uno to build a simple yet functional weather station at home.
Components Required:
- Arduino Uno
- DHT11 Temperature & Humidity Sensor
- 16×2 LCD Display
- Connecting Wires
- Breadboard
- Power Supply
- 10k Ohm Potentiometer
- 5k Ohm Resistor
- 560 Ohm Resistor
What is a DHT11 Sensor?
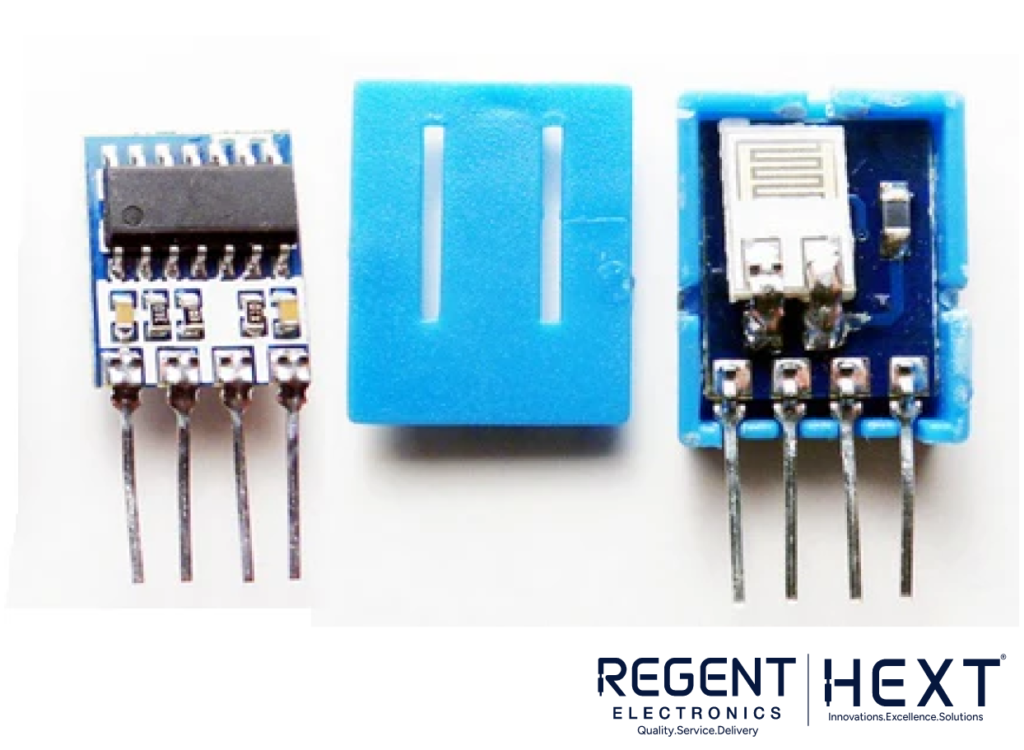
The DHT11 is a popular sensor used to measure temperature and humidity. It works by using digital signal processing to convert temperature and humidity readings into a format that a microcontroller, like the Arduino, can easily read. The sensor offers a temperature range of 0°C to 50°C, making it perfect for home weather stations and hobby projects.
The DHT11 sensor consists of three main components:
- A resistive type humidity sensor
- An NTC thermistor to measure temperature
- An 8-bit microcontroller that converts the analog signals from the sensor into digital readings
The DHT11 has four pins:
- VCC (3.5V to 5.5V power supply)
- Data Out (digital signal output)
- NC (not connected)
- GND (ground)
How the DHT11 Works
The DHT11 sensor sends out a series of 40 bits of data, which consists of:
- 8 bits for the integral humidity value
- 8 bits for the decimal humidity value
- 8 bits for the integral temperature value
- 8 bits for the decimal temperature value
- 8 bits for checksum data
To ensure data integrity, the checksum is calculated by adding the values of the humidity and temperature bits and comparing it to the checksum. If the data matches, the readings are correct.
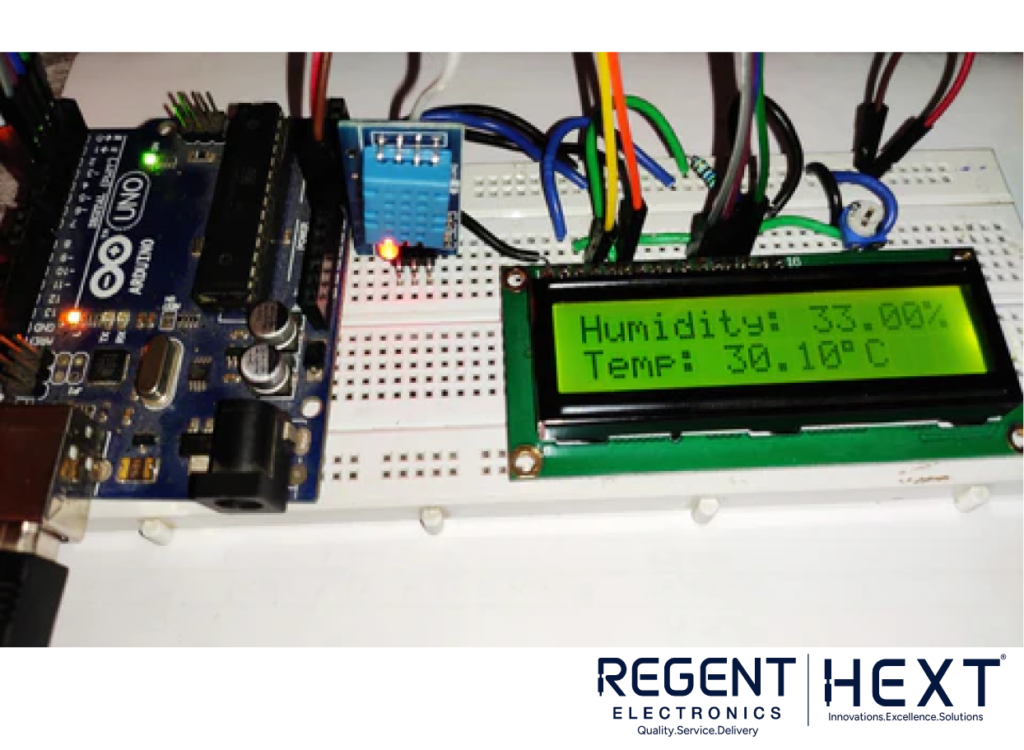
Interfacing the 16×2 LCD with Arduino Uno
The 16×2 LCD display is an essential component in Arduino-based projects that require visual output. In this project, we will use the LCD to display the temperature and humidity readings from the DHT11 sensor.
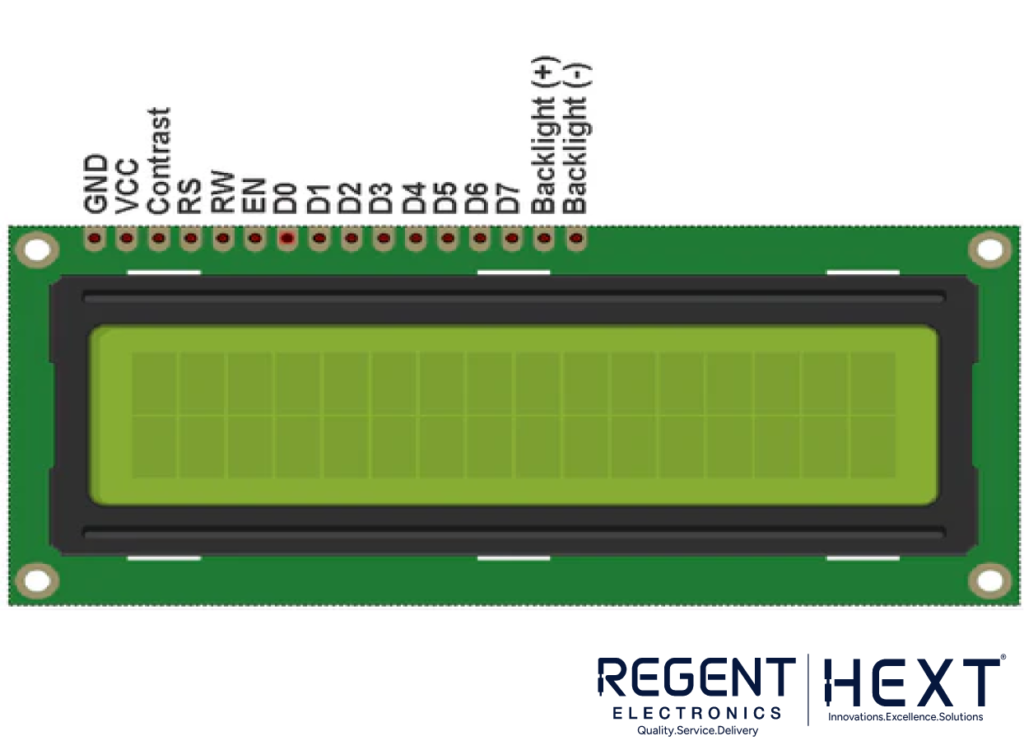
The LCD uses a 16×2 grid, meaning it can display 16 characters per row and 2 rows. The LCD module uses the HD44780 chipset, and in this setup, we will use it in 4-bit mode, reducing the number of connections required.
Pin Configuration for the LCD Module:
- Pin 1 (VSS): Ground pin
- Pin 2 (VCC): Power supply (+5V)
- Pin 3 (VEE): Contrast adjustment (controlled by a 10k potentiometer)
- Pin 4 (RS): Register select pin
- Pin 5 (R/W): Read/Write mode pin (set to GND for writing data)
- Pin 6 (E): Enable pin
- Pins 7-14 (DB0-DB7): Data pins for 4-bit mode
- Pin 15 (Backlight +): Anode for the backlight LED
- Pin 16 (Backlight -): Cathode for the backlight LED
The LCD is connected to the Arduino via digital pins. The RS, EN, and data pins (DB4-DB7) are connected to specific Arduino pins for control and data transmission.
Circuit Diagram:
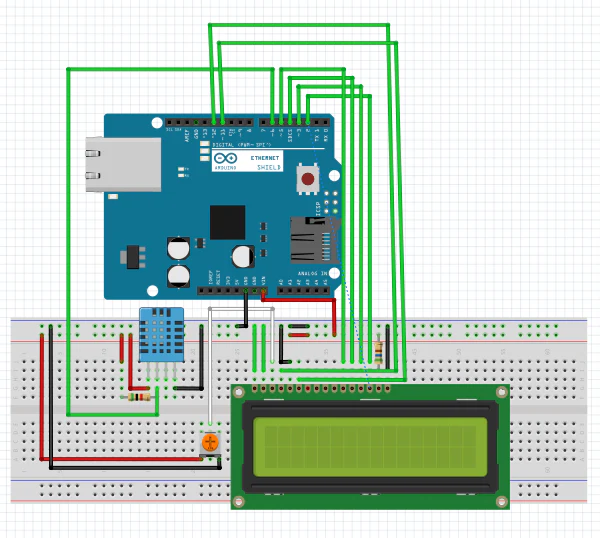
- Connect the RS pin to Arduino pin 12
- Connect the EN pin to Arduino pin 11
- Connect the data pins DB4-DB7 to Arduino pins 5, 4, 3, and 2
- Use a 10k potentiometer for contrast adjustment
- Connect the backlight pins to the 5V supply through a 560-ohm resistor
Programming the Arduino
To communicate with the DHT11 sensor and display the readings on the LCD, we will use the DHT and LiquidCrystal libraries. Here’s a breakdown of how the program works:
- DHT Library: Reads temperature and humidity data from the sensor.
- LiquidCrystal Library: Controls the LCD display.
Arduino Code:
cpp
CopyEdit
#include “DHT.h”
#include <LiquidCrystal.h>
#define DPIN 6 // Digital pin connected to the DHT11 sensor
#define DTYPE DHT11 // DHT 11 sensor type
const int rs = 12, en = 11, d4 = 5, d5 = 4, d6 = 3, d7 = 2;
LiquidCrystal lcd(rs, en, d4, d5, d6, d7);
DHT dht(DPIN, DTYPE);
void setup() {
Serial.begin(9600);
lcd.begin(16, 2);
dht.begin();
}
void loop() {
delay(500);
lcd.setCursor(0, 0);
lcd.print(“Humidity: “);
lcd.print(dht.readHumidity());
lcd.print(“%”);
lcd.setCursor(0, 1);
lcd.print(“Temp: “);
lcd.print(dht.readTemperature());
lcd.print((char)223);
lcd.print(“C”);
}
How the Code Works:
- Libraries: The code starts by including the DHT and LiquidCrystal libraries.
- Pin Definitions: We define the digital pin connected to the DHT11 sensor and set up the LCD pin connections.
- Setup: The setup() function initializes the serial communication, LCD, and DHT sensor.
- Loop: In the loop() function, we read the humidity and temperature values from the DHT11 sensor every 500 milliseconds and display them on the LCD.
Conclusion:
With the above components and simple code, you can easily create a home weather station using the DHT11 sensor and Arduino. This project is perfect for beginners looking to learn about sensors, LCD displays, and how to interface them with Arduino.
Get your DHT11 sensor and Arduino Uno from Regent Electronics today and start building your own weather station!