
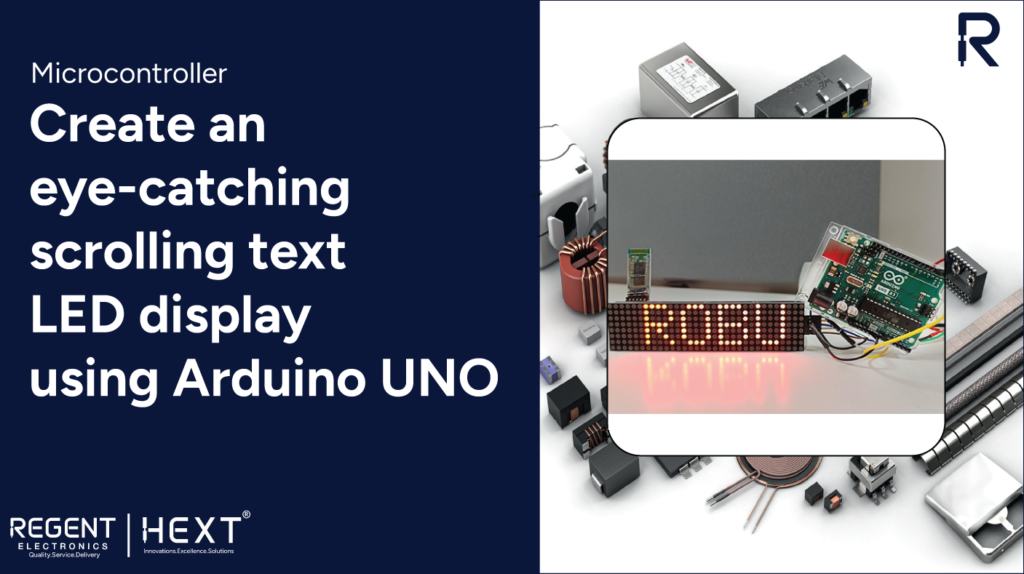
Create an Eye-Catching Scrolling Text LED Display with Arduino UNO
Scrolling text LED displays are widely used for displaying messages in public spaces such as railway stations, toll plazas, buses, and trains. They are ideal for conveying information to large audiences in both day and night settings, thanks to adjustable brightness levels. In this guide, we will walk you through the process of creating a scrolling text LED display using Arduino UNO and controlling it via a laptop or smartphone.
Required Components
- Arduino UNO
- MAX7219 LED display module
- HC-05 Bluetooth module
- 5V 2A power adapter
- Jumper wires (M to F) – 10 pieces
Wiring and Circuit Connection
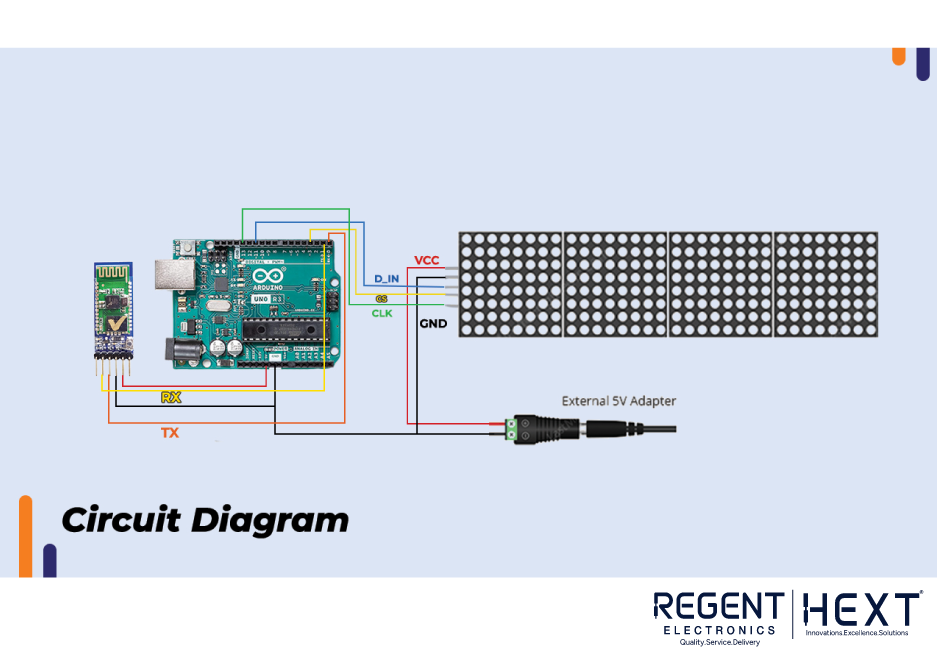
The setup involves connecting the components according to the following circuit diagram:
Hardware Explanation
The MAX7219 dot matrix display module (4-in-1) consists of four 8×8 LED matrices, forming an 8×32 display. The MAX7219 controller allows easy control of the matrix using SPI protocol, and it has built-in static RAM to store LED data. The brightness can be adjusted effortlessly.
The module includes five pins:
- VCC, GND – Connected to the 5V and GND of the power adapter.
- DIN (Data In) – Connected to Arduino’s MOSI (Pin 11).
- CLK (Clock Pin) – Connected to Arduino’s SCLK (Pin 13).
- CS (Chip Select) – Connected to Arduino’s Digital Pin 3.
The HC-05 Bluetooth module enables wireless communication for text input. It communicates via UART protocol and includes the following pins:
- VCC, GND – Connected to Arduino’s 5V and GND.
- TXD (Transmit Data) – Connected to Arduino’s RXD.
- RXD (Receive Data) – Connected to Arduino’s TXD.
Installing Required Libraries
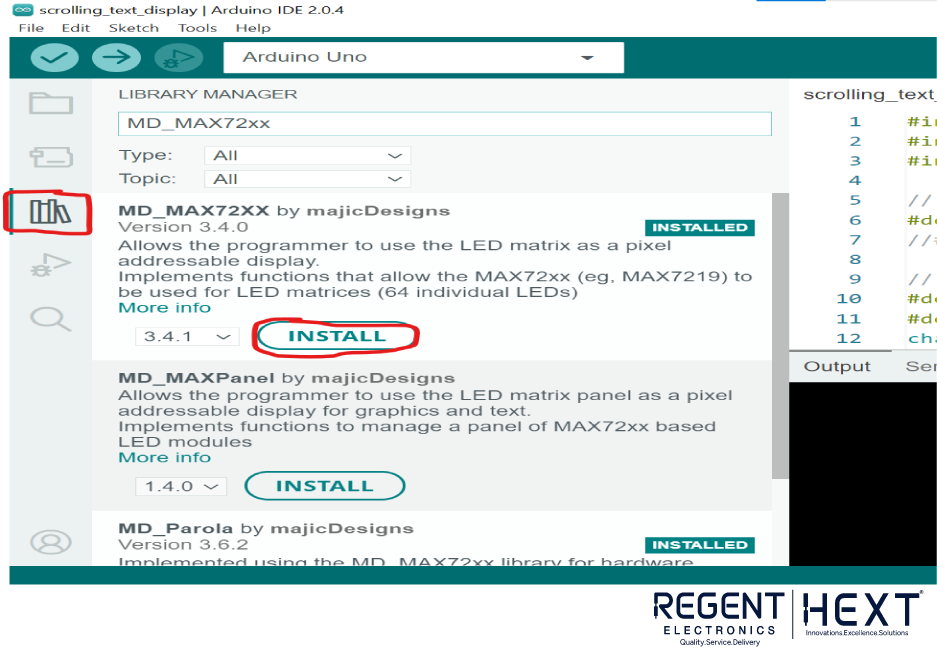

Before uploading the code, install the following libraries in the Arduino IDE:
- MD_MAX72XX
- MD_Parola
To install them:
- Open Arduino IDE and go to Library Manager.
- Search for MD_MAX72XX and MD_Parola.
- Install both libraries.
Arduino Code for Scrolling Text Display
#include <MD_Parola.h>
#include <MD_MAX72xx.h>
#include <SPI.h>
#define HARDWARE_TYPE MD_MAX72XX::FC16_HW
#define MAX_DEVICES 4
#define CS_PIN 3
char message[100] = “”;
MD_Parola myDisplay = MD_Parola(HARDWARE_TYPE, CS_PIN, MAX_DEVICES);
void setup() {
Serial.begin(9600);
myDisplay.begin();
myDisplay.setIntensity(8);
myDisplay.displayClear();
}
void loop() {
if (Serial.available() > 0) {
String mes = Serial.readString();
disp_name(mes);
Serial.println(message);
myDisplay.displayScroll(message, PA_CENTER, PA_SCROLL_LEFT, 100);
}
if (myDisplay.displayAnimate()) {
myDisplay.displayReset();
}
}
void disp_name(String word) {
for (int i = 0; i < (word.length() – 1); i++) {
message[i] = word[i];
}
}
Uploading and Testing the Code
- Upload the code to the Arduino board using the Arduino IDE.
- Open the Serial Monitor.
- Type the desired message and press enter – it will scroll on the LED display.
Sending Messages via Bluetooth
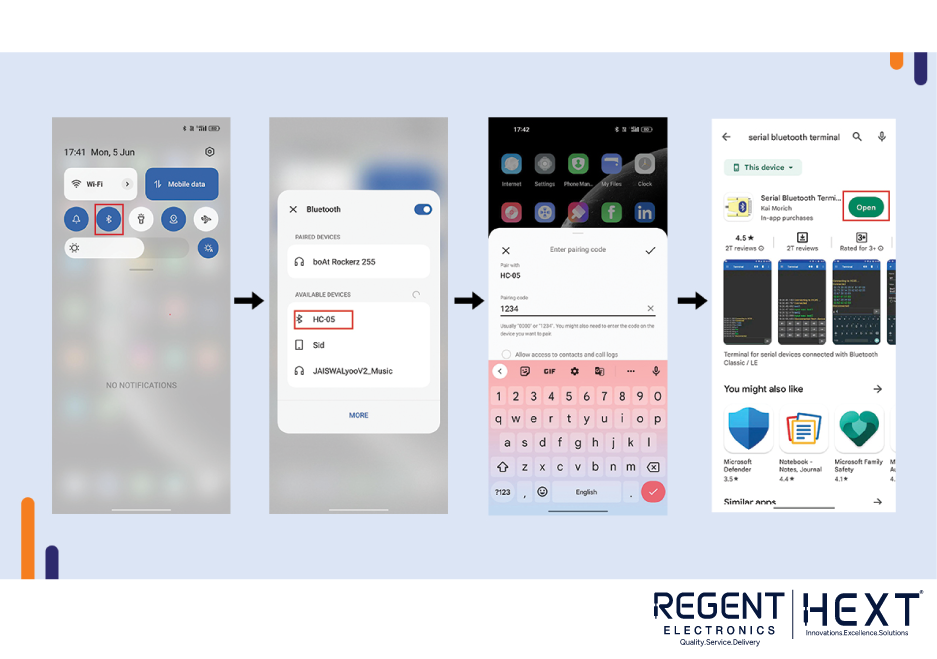
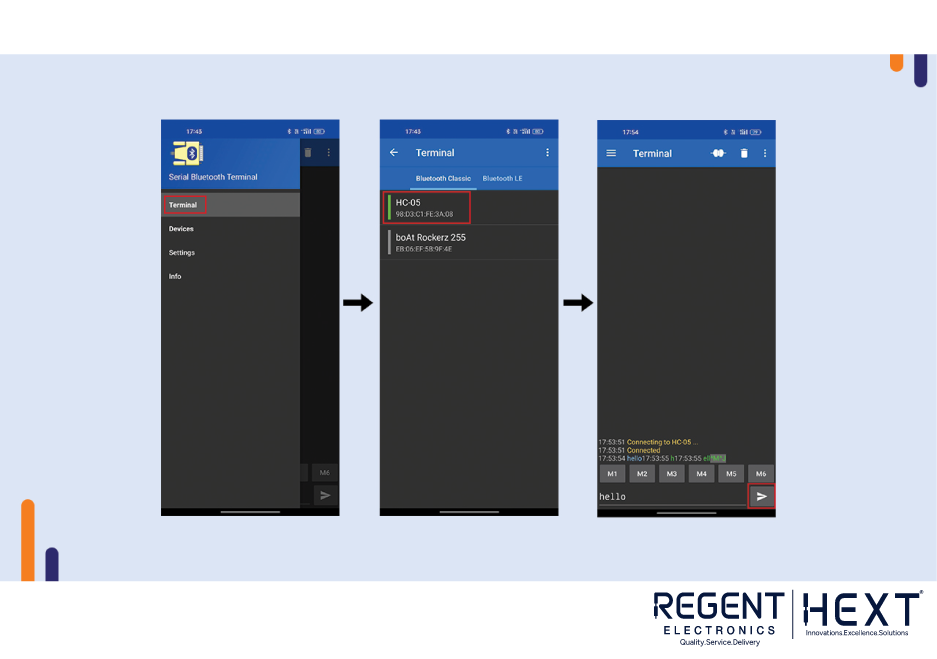
To make the display wireless, follow these steps:
- Enable Bluetooth on your smartphone.
- Pair with the HC-05 module (default password: 1234).
- Install the Serial Bluetooth Terminal app from the Play Store.
- Open the app, connect to HC-05, and start sending messages.
Troubleshooting and Tips
- If messages overlap, press the reset button on the Arduino before sending a new one.
- Ensure correct Bluetooth pairing before sending messages.
- Adjust brightness settings as needed for better visibility.
Conclusion
By following these steps, you can build a functional scrolling text LED display using Arduino UNO. Whether you control it via a laptop or smartphone, this project is a great introduction to working with LED displays and wireless communication. If you have any questions, feel free to leave a comment, and our team at Regent Electronics will assist you!