
How to Connect Raspberry Pi 4 to a Relay Module
Raspberry Pi | Tutorials
Introduction
Understanding how to interface a relay module with a Raspberry Pi 4 is essential for controlling high-power electrical devices. In this guide, we will cover the interfacing of 5V, 12V, and 24V relay modules with the Raspberry Pi GPIO and provide a Python code example for seamless integration.
What is a Relay Module?
A relay module is an electromagnetic switch widely used in automation and IoT applications. It requires minimal power to operate but can switch high-power devices. Due to its efficiency and affordability, relay modules are commonly used in home automation, industrial control systems, and embedded projects.
Components Required
To set up a relay module with the Raspberry Pi 4, you will need:
- Raspberry Pi 4
- Four-channel 5V Relay Module
- Jumper Wires
- Level Converter (for voltage adjustment)
Interfacing Raspberry Pi 4 with Relay Module
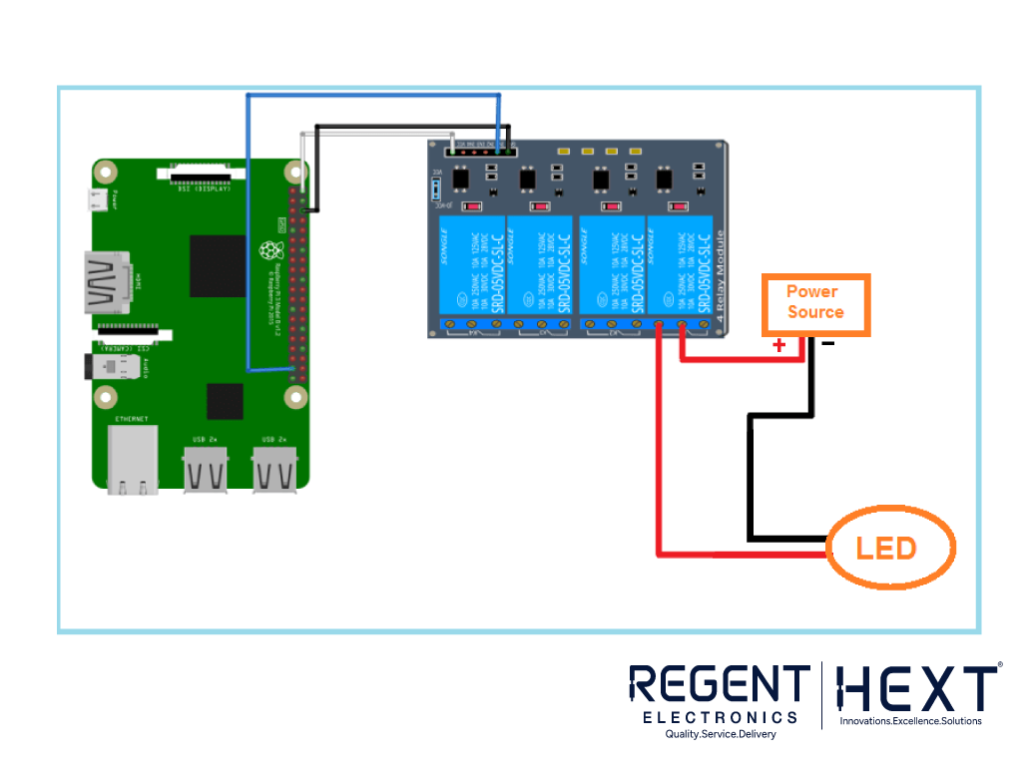
Since the Raspberry Pi GPIO operates at 3.3V, but most relay modules work at 5V, a level converter is necessary to ensure proper voltage matching. Level converters, using MOSFETs, help bridge the voltage gap effectively.
Wiring Diagram
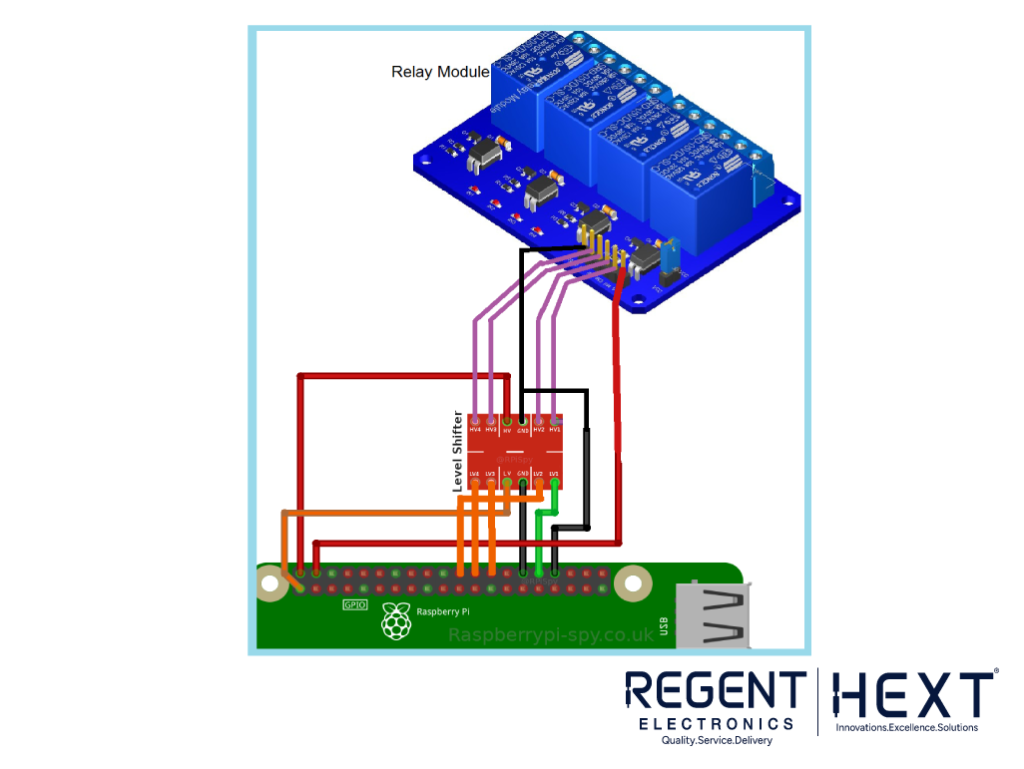
- Relay VCC → 5V on Raspberry Pi (via Level Converter)
- Relay GND → GND on Raspberry Pi
- Relay IN1, IN2, IN3, IN4 → Raspberry Pi GPIO Pins (via Level Converter)
Python Code for Controlling Relay Module
Now, let’s write a Python script to control the relay module.
import RPi.GPIO as GPIO
from time import sleep
# Set GPIO mode
GPIO.setmode(GPIO.BCM)
# Define GPIO pins for relays
Relay1_GPIO = 12
Relay2_GPIO = 7
Relay3_GPIO = 8
Relay4_GPIO = 25
# Set GPIO pins as output
GPIO.setup(Relay1_GPIO, GPIO.OUT)
GPIO.setup(Relay2_GPIO, GPIO.OUT)
GPIO.setup(Relay3_GPIO, GPIO.OUT)
GPIO.setup(Relay4_GPIO, GPIO.OUT)
# Toggle relays
for _ in range(5):
GPIO.output(Relay1_GPIO, GPIO.LOW)
sleep(1)
GPIO.output(Relay1_GPIO, GPIO.HIGH)
sleep(1)
# Cleanup GPIO setup
GPIO.cleanup()
How It Works
- We import the required RPi.GPIO and time libraries.
- Set the Raspberry Pi GPIO to BCM mode.
- Define the GPIO pins for relay control.
- Configure the pins as output to send signals to the relay.
- Use a loop to toggle the relay module ON and OFF with a 1-second delay.
- Finally, cleanup the GPIO setup to free resources.
Conclusion
In this tutorial, we covered how to interface a relay module with Raspberry Pi 4 and provided Python code to control it. Using this setup, you can automate electrical appliances and integrate them into IoT projects.
Stay tuned for our next tutorial, where we will discuss using Raspberry Pi to control relay modules via a web interface!