
How to Use Raspberry Pi Imager
Introduction
Raspberry Pi enthusiasts have long relied on tools like Win32Disk Imager and Balena Etcher to flash operating system images onto microSD cards. While these tools have been effective, Raspberry Pi has introduced a more streamlined and user-friendly option: Raspberry Pi Imager. This new utility simplifies the process of installing an OS on a Raspberry Pi, making it more accessible for beginners and experienced users alike. In this guide, we will explore how to use the Raspberry Pi Imager effectively.
Why Use Raspberry Pi Imager?
One of the biggest challenges when setting up a Raspberry Pi is ensuring that the microSD card is properly flashed with the correct operating system. Users often face compatibility issues across different platforms, such as Windows, macOS, and Linux. The Raspberry Pi Imager eliminates these complications by offering a unified and seamless flashing experience.
Benefits of Raspberry Pi Imager:
- Easy to Use: A straightforward interface makes it accessible for all users.
- Direct OS Downloads: Ensures you are using the most up-to-date images.
- Cross-Platform Compatibility: Available for Windows, macOS, and Ubuntu.
- Built-in Image Verification: Reduces the risk of corrupted installations.
How to Use Raspberry Pi Imager
Step 1: Download and Install Raspberry Pi Imager
To get started, download the Raspberry Pi Imager from the official Raspberry Pi website. Once downloaded, follow the installation instructions for your operating system.
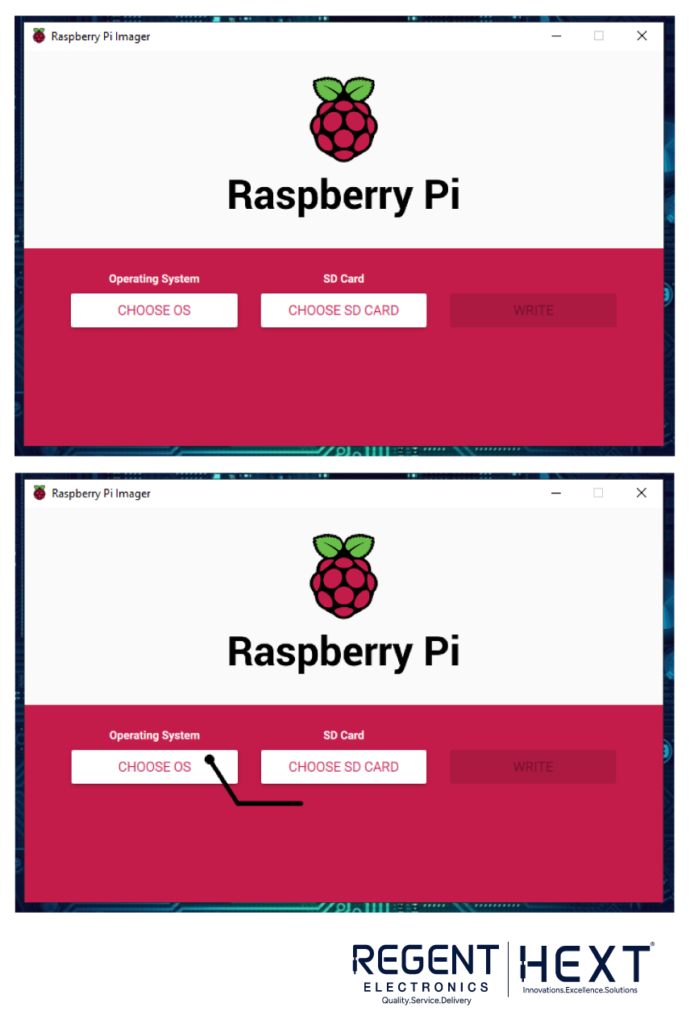
Step 2: Launch the Raspberry Pi Imager
After installation, open the Raspberry Pi Imager. You will see a simple interface with three main options:
- Choose OS
- Choose Storage
- Write
Step 3: Choose an Operating System
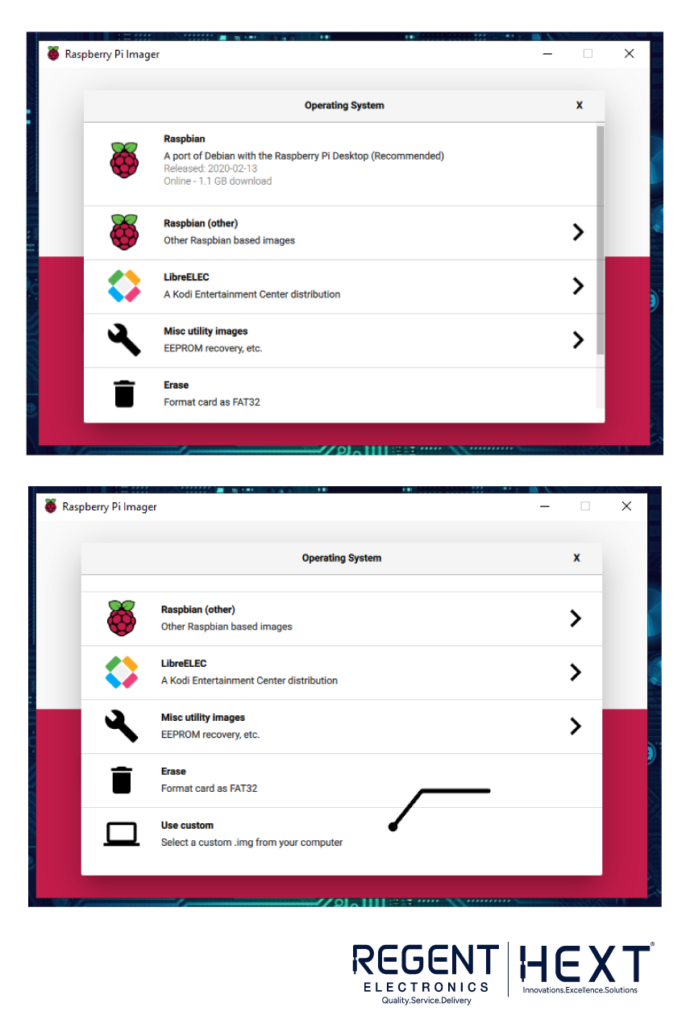
Click on the “Choose OS” button. You will be presented with a list of available operating systems, including:
- Raspberry Pi OS (formerly Raspbian)
- Ubuntu
- LibreELEC (for media centers)
- Other third-party OS options
If you have a custom image file, you can select the “Use Custom” option to flash it onto your microSD card.
Step 4: Choose Your Storage Device
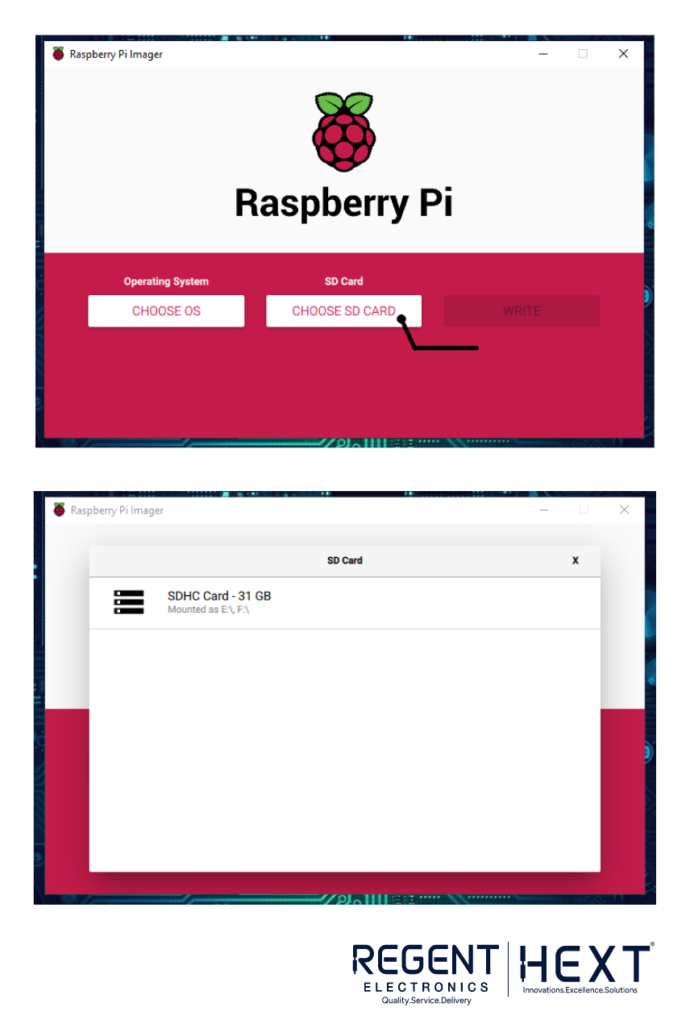
Click on the “Choose Storage” button and select the microSD card you want to flash. Ensure that you have backed up any important data before proceeding, as the process will erase all existing data on the card.
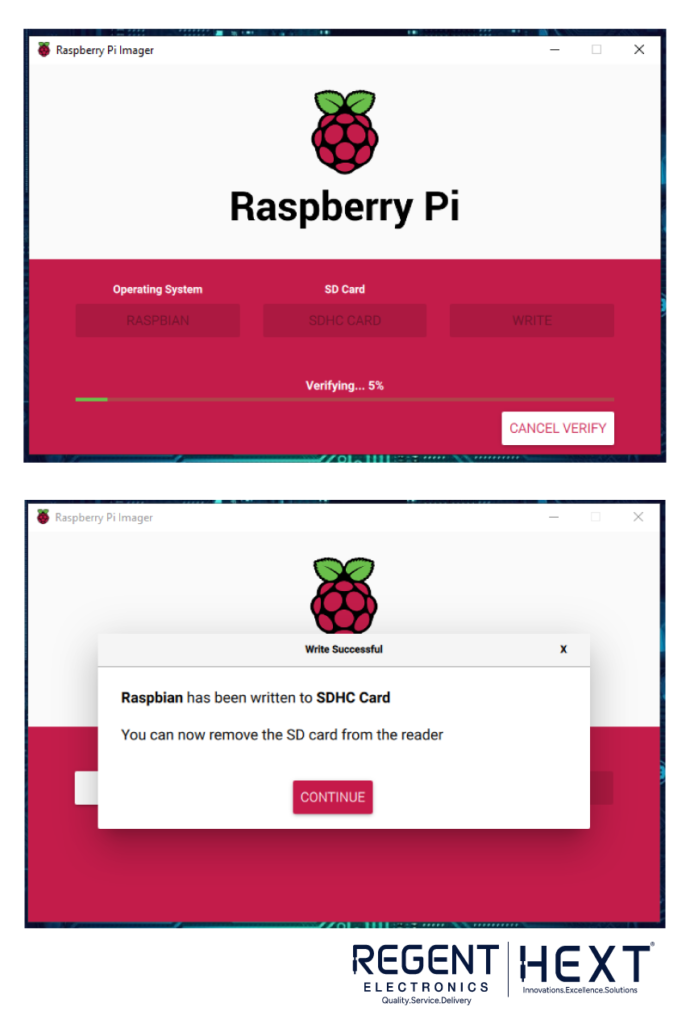
Step 5: Write the Image
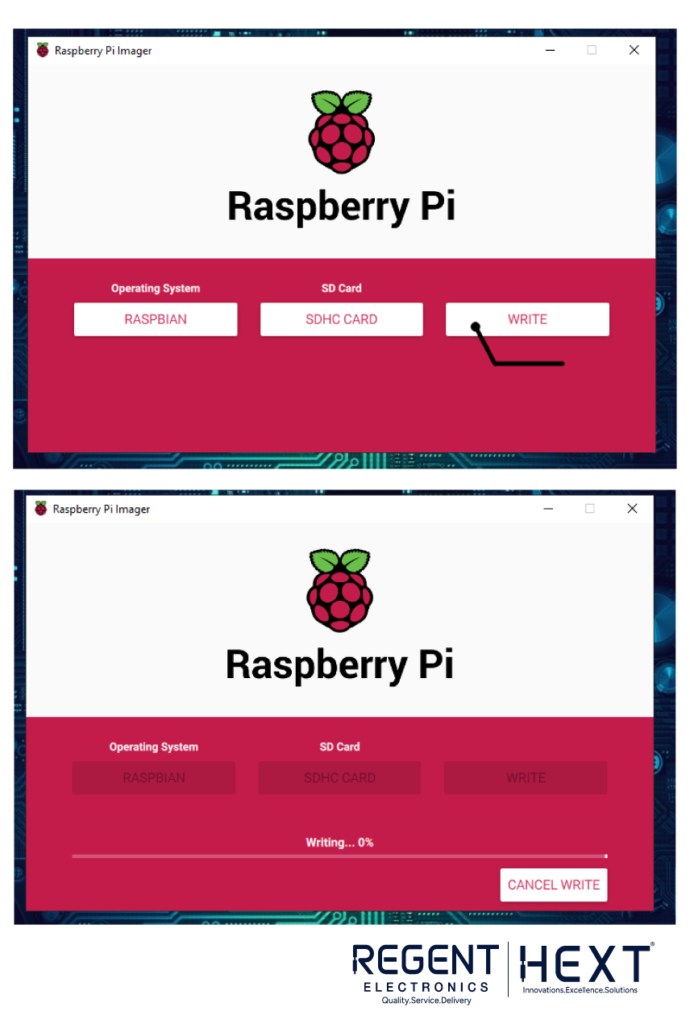
Once you have selected your OS and storage device, click on “Write”. The Raspberry Pi Imager will now:
- Download the necessary files (if not already available locally).
- Write the image onto the microSD card.
- Verify the installation to ensure it was written correctly.
- Automatically eject the microSD card when done.
Step 6: Insert the microSD Card into Your Raspberry Pi
After the writing process is complete, insert the microSD card into your Raspberry Pi, power it on, and follow the on-screen setup instructions.
Additional Features
Built-in OS Downloading
Instead of manually searching for the latest OS images, Raspberry Pi Imager automatically fetches the latest versions from the Raspberry Pi website, ensuring that you always install the most recent release.
Open-Source and Community Contributions
Raspberry Pi Imager is an open-source project, meaning developers can contribute to its improvement. You can find its source code on GitHub and even modify it to suit your needs.
Potential Future Improvements
While Raspberry Pi Imager is already a fantastic tool, the community is actively suggesting enhancements, such as:
- The ability to flash multiple microSD cards simultaneously.
- Additional OS support beyond the currently available options.
- A built-in feature for backing up existing microSD card data before flashing.
Conclusion
The Raspberry Pi Imager has revolutionized the way users install operating systems on their Raspberry Pi devices. Its simplicity, efficiency, and reliability make it the go-to tool for beginners and advanced users alike.
Download the Raspberry Pi Imager today and experience hassle-free OS installation for your Raspberry Pi projects!
If you have any questions or feedback, feel free to comment below. Happy coding with Raspberry Pi!
Keywords for SEO Optimization: Raspberry Pi Imager, Raspberry Pi OS installation, how to flash Raspberry Pi, best Raspberry Pi tools, Raspberry Pi setup guide, Raspberry Pi SD card flashing, install OS on Raspberry Pi, Raspberry Pi software tools.