

Real-time Face Detection Using Raspberry Pi – Connections and Code
Introduction
In this article, we will develop our own Face Recognition system using the OpenCV Library on Raspberry Pi.
A face detection system has gained immense popularity due to its enhanced security compared to fingerprint and typed passwords. You may have encountered face unlock features in smartphones, making access seamless. Additionally, face detection is widely used in airports, railway stations, and public surveillance systems.
Here, we will build a Face Recognition system using OpenCV on Raspberry Pi, making it an excellent portable surveillance tool. This system has been thoroughly tested and is guaranteed to work without issues.
Like any other Face Recognition system, our project involves two Python scripts: one for training the system with a set of images and creating a dataset (YML file), and another for recognizing detected faces using the trained model.
What is OpenCV and How to Use it for Face Recognition?
OpenCV is an open-source library used for computer vision, machine learning, and image processing. It plays a vital role in real-time operations, making it an essential tool for modern AI applications.
With OpenCV, users can process images and videos to identify objects, faces, and even handwriting. Integrated with libraries like NumPy and Python, OpenCV efficiently processes image data for analysis.
Before proceeding, ensure that OpenCV is installed on your Raspberry Pi.
Working Process
Face Detection and Face Recognition are distinct concepts. Face Detection involves identifying a face in an image, whereas Face Recognition not only detects but also recognizes the person. Detection must be performed before recognition.
A video feed from a webcam consists of a sequence of images. Various algorithms enable the software to detect and recognize faces from these images. OpenCV simplifies this process, eliminating the need for deep technical knowledge of image processing algorithms.
Installing Required Packages
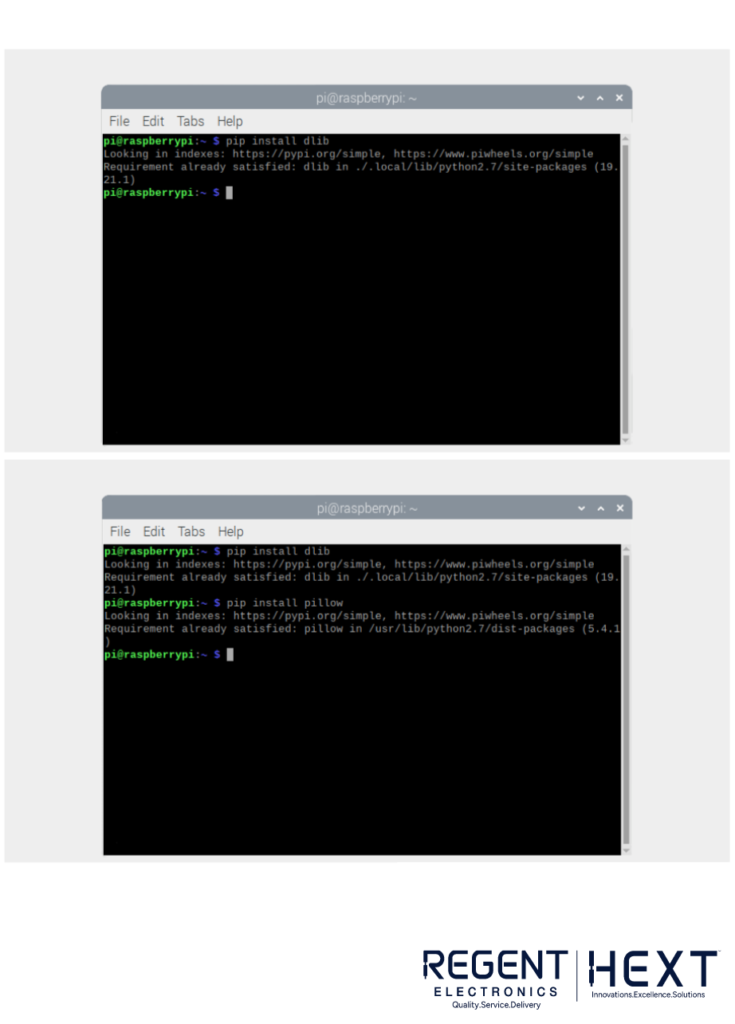
Before implementing the face detection system, install the necessary libraries:
- Dlib: A toolkit for Machine Learning applications:
- pip install dlib
- Pillow (PIL): Used for handling images:
- pip install pillow
- Face_Recognition: A Python library for face recognition:
- pip install face_recognition –no-cache-dir
Training the System
The Face_Trainer.py program processes images from the Face_Images directory to detect faces and train the model. Once detected, faces are converted to grayscale, transformed into NumPy arrays, and saved as face-trainner.yml.

Key Code Sections

- Import Required Libraries
- import cv2
- import numpy as np
- import os
- from PIL import Image
- Load Face Detection Classifier and Recognizer
- face_cascade = cv2.CascadeClassifier(‘haarcascade_frontalface_default.xml’)
- recognizer = cv2.face.LBPHFaceRecognizer_create()
- Prepare Training Data
- Face_Images = os.path.join(os.getcwd(), “Face_Images”)
- for root, dirs, files in os.walk(Face_Images):
- for file in files:
- if file.endswith(“jpeg”) or file.endswith(“jpg”) or file.endswith(“png”):
- path = os.path.join(root, file)
- person_name = os.path.basename(root)
- Convert Images to Grayscale and Train the Recognizer
- Gery_Image = Image.open(path).convert(“L”)
- Crop_Image = Gery_Image.resize((550,550), Image.ANTIALIAS)
- Final_Image = np.array(Crop_Image, “uint8”)
- faces = face_cascade.detectMultiScale(Final_Image, scaleFactor=1.5, minNeighbors=5)
- for (x,y,w,h) in faces:
- roi = Final_Image[y:y+h, x:x+w]
- x_train.append(roi)
- y_ID.append(Face_ID)
- Save Training Data
- recognizer.train(x_train, np.array(y_ID))
- recognizer.save(“face-trainner.yml”)

Face Detection and Recognition
Once the training process is complete, we can use the trained model to recognize faces in real-time using a webcam.
Key Code Sections
- Load Required Libraries and Recognizer
- import cv2
- import numpy as np
- from PIL import Image
- face_cascade = cv2.CascadeClassifier(‘haarcascade_frontalface_default.xml’)
- recognizer = cv2.face.LBPHFaceRecognizer_create()
- recognizer.read(“face-trainner.yml”)
- Capture Video from Webcam
- cap = cv2.VideoCapture(0)
- Detect and Recognize Faces
- while True:
- ret, img = cap.read()
- gray = cv2.cvtColor(img, cv2.COLOR_BGR2GRAY)
- faces = face_cascade.detectMultiScale(gray, scaleFactor=1.5, minNeighbors=5)
- for (x, y, w, h) in faces:
- roi_gray = gray[y:y+h, x:x+w]
- id_, conf = recognizer.predict(roi_gray)
- if conf >= 80:
- cv2.putText(img, str(id_), (x,y), cv2.FONT_HERSHEY_SIMPLEX, 1, (0,0,255), 2)
- cv2.rectangle(img, (x,y), (x+w,y+h), (0,255,0), 2)
- cv2.imshow(‘Preview’, img)
- if cv2.waitKey(20) & 0xFF == ord(‘q’):
- break
- Release Resources
- cap.release()
- cv2.destroyAllWindows()
Conclusion
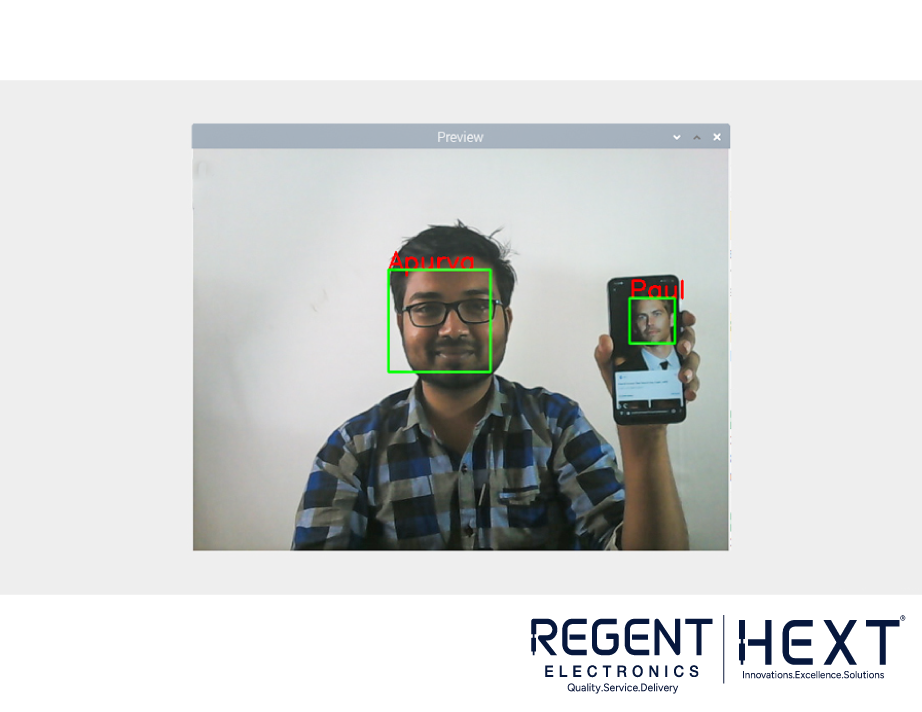
In this tutorial, we successfully built a Face Detection and Recognition system using Raspberry Pi. We trained the model with images, converted them into a structured dataset, and implemented real-time face recognition. This project can be extended for various applications, including security systems and smart access controls.
Have any questions or issues? Comment below, and we’ll be happy to help!
Until next time, happy coding!