

Complete Guide to Interfacing an RFID Sensor with Arduino
Introduction
We live in a world where seamless access control, effortless payments, and smart retail experiences have become the norm. One of the key technologies enabling these innovations is RFID (Radio Frequency Identification). RFID technology allows wireless data transmission, making it an essential component in security systems, automated payments, and inventory tracking.
In this blog, we will explore RFID technology and its practical implementation by creating an RFID-based access management system using an RC522 RFID Reader, RFID Tags, and an Arduino Uno.
Table of Contents
- Introduction to RFID
- How RFID Works
- Advantages of RFID Over Barcodes and QR Codes
- Required Hardware & Software
- Circuit Diagram
- RFID-Based Access Control System Code
- Step-by-Step Procedure
- Conclusion
What is RFID?
RFID (Radio Frequency Identification) is a wireless technology used for identifying and tracking objects. It is widely used in applications such as contactless payments, metro card systems, self-checkout stores, and automatic toll collection.
How RFID Works
An RFID system consists of two primary components:
- RFID Tags: These are either active (powered) or passive (no power required). Passive tags are more commonly used due to their affordability and low maintenance.
- RFID Readers: The reader emits radio waves to detect and communicate with RFID tags. When a tag comes into range, it transmits data to the reader.
RFID Frequency Ranges
RFID systems operate at different frequencies:
- LF (Low Frequency – 125-134KHz)
- HF (High Frequency – 13.56MHz)
- UHF (Ultra High Frequency – 840-960MHz)
Advantages of RFID Over Barcodes and QR Codes
- Longer Reading Distance: RFID can read tags from up to 20 meters away.
- No Line-of-Sight Needed: Unlike barcodes, RFID tags do not require direct visibility.
- Longer Lifespan: RFID tags are more durable than printed barcodes.
- Simultaneous Multi-Tag Scanning: Multiple RFID tags can be scanned at once.
- Higher Storage Capacity: RFID tags can store up to 64Kbits of data, whereas barcodes and QR codes have limited storage.
Creating an RFID-Based Access Control System with Arduino
To demonstrate RFID technology in action, we will create an RFID-based access control system using an Arduino Uno and an RC522 RFID Reader.
Hardware Requirements
- RC522 RFID Reader with RFID Tags
- Arduino Uno
- Breadboard & Jumper Wires
- LEDs (Red & Green)
- Servo Motor
- USB Cable for Arduino
Software Requirements
- Arduino IDE
Circuit Diagram
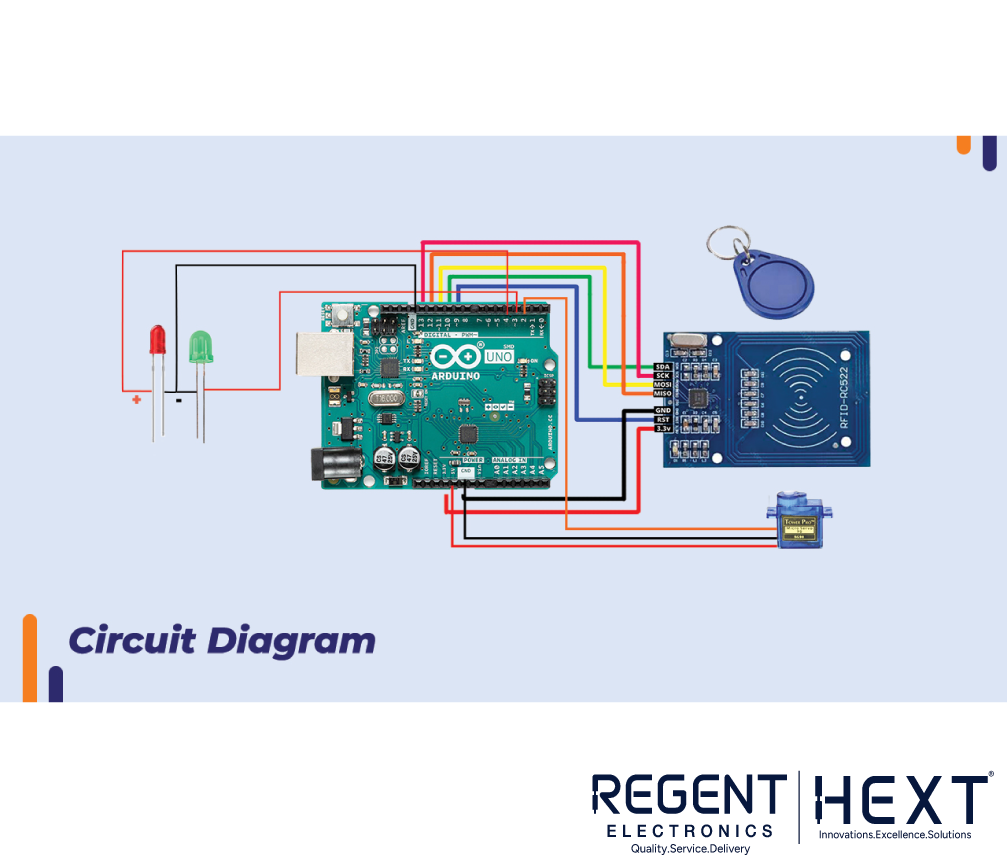
(Insert image of circuit diagram here)
Code for RFID-Based Access System
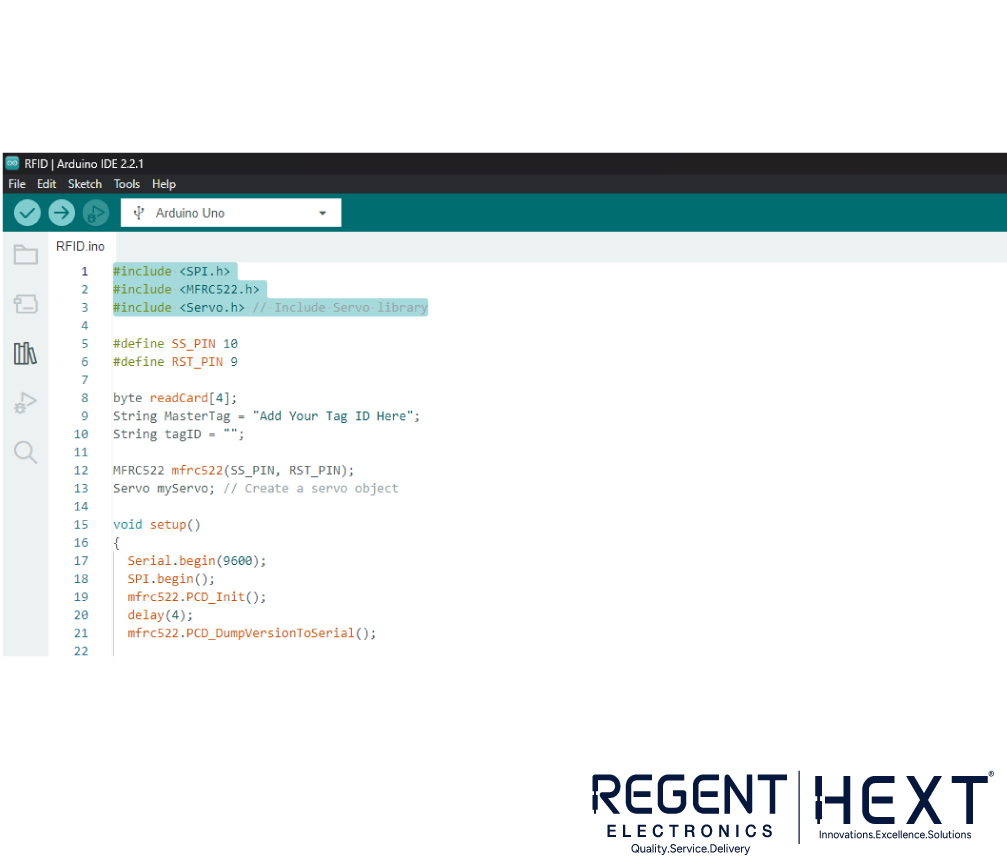
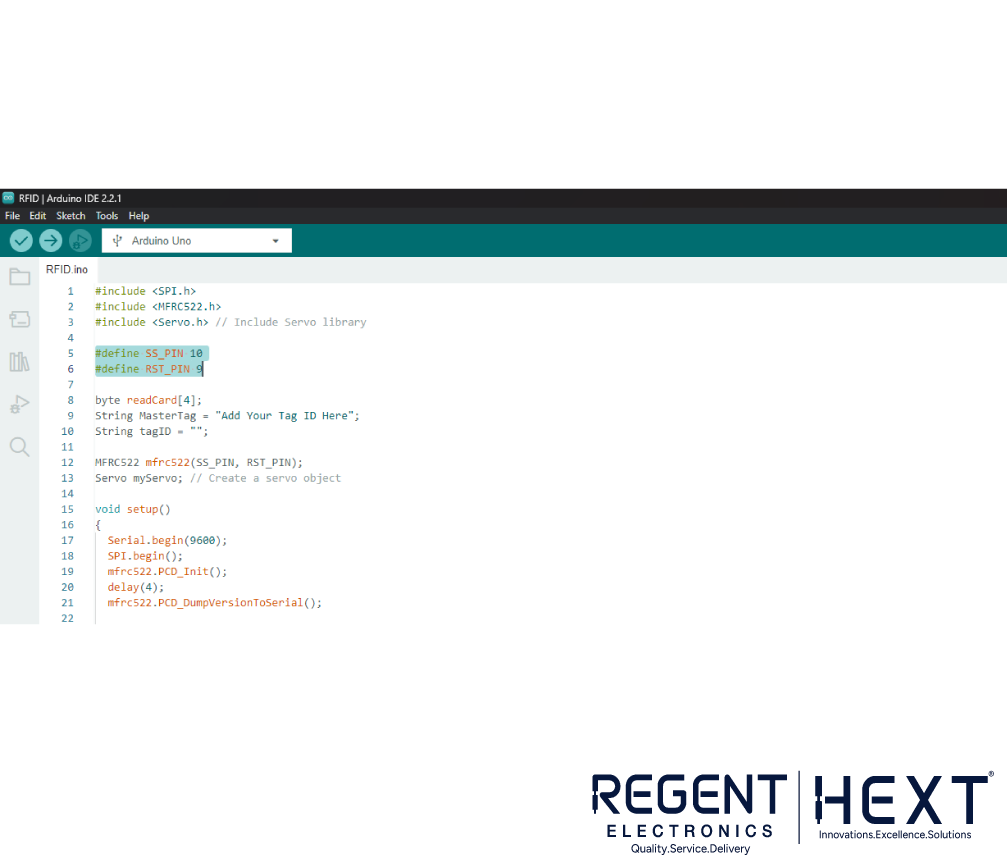
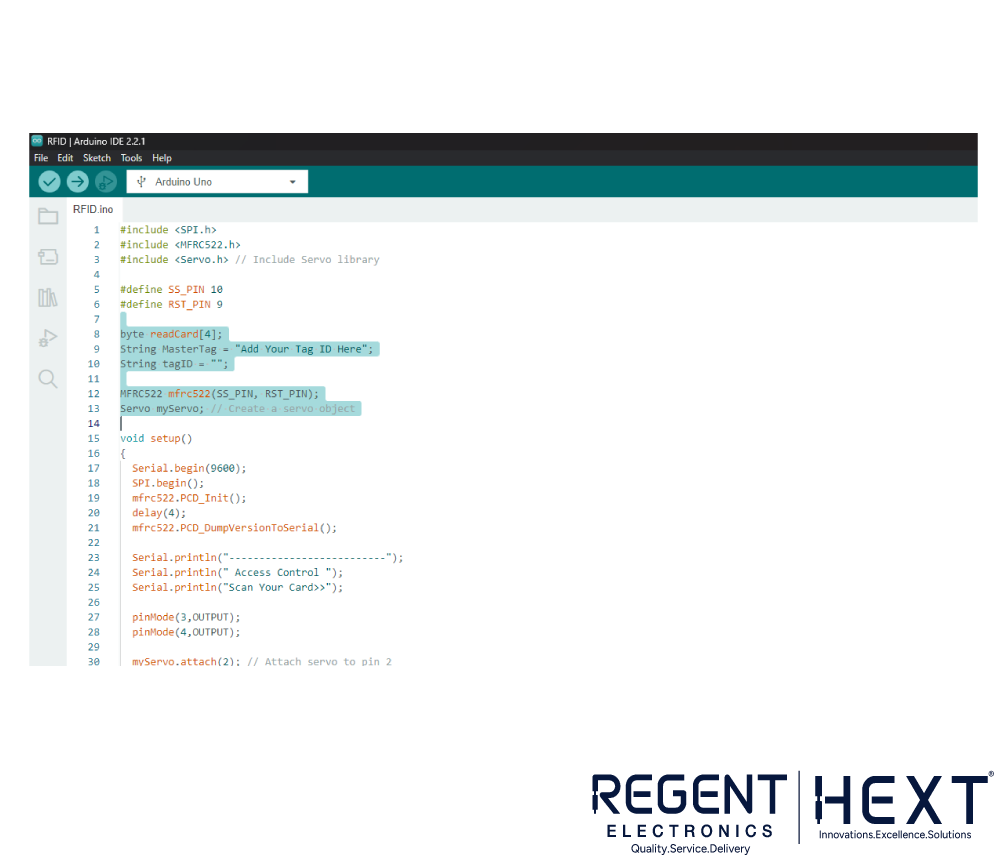
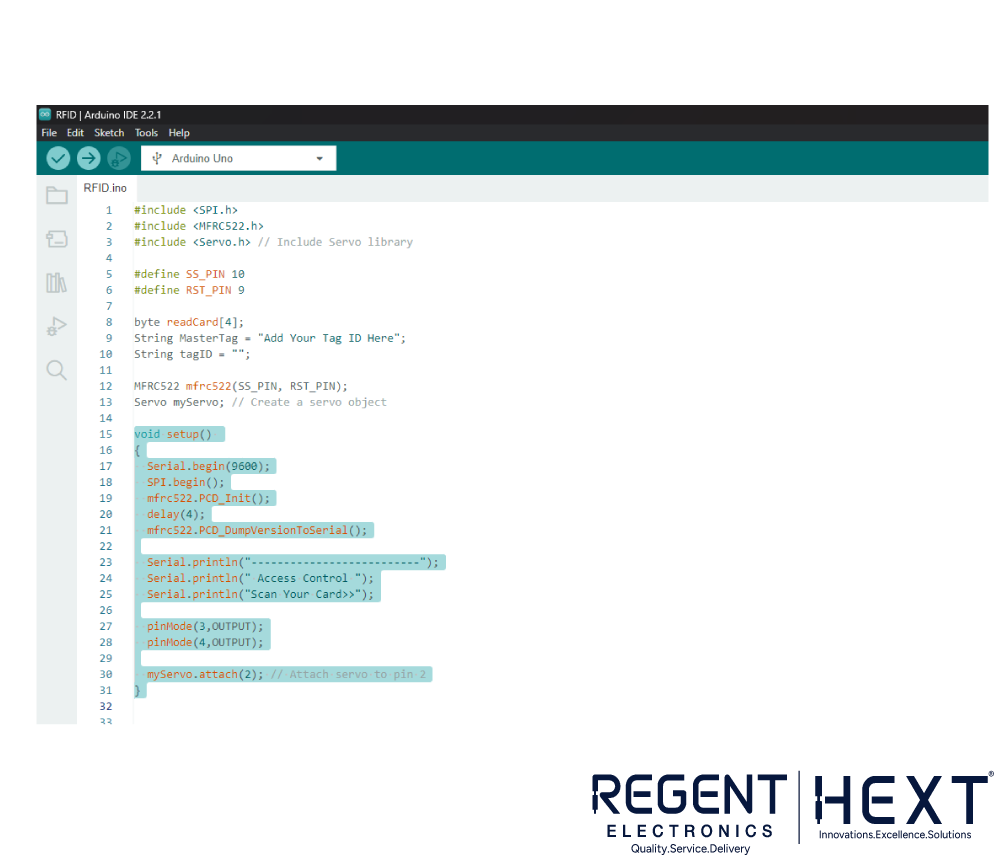
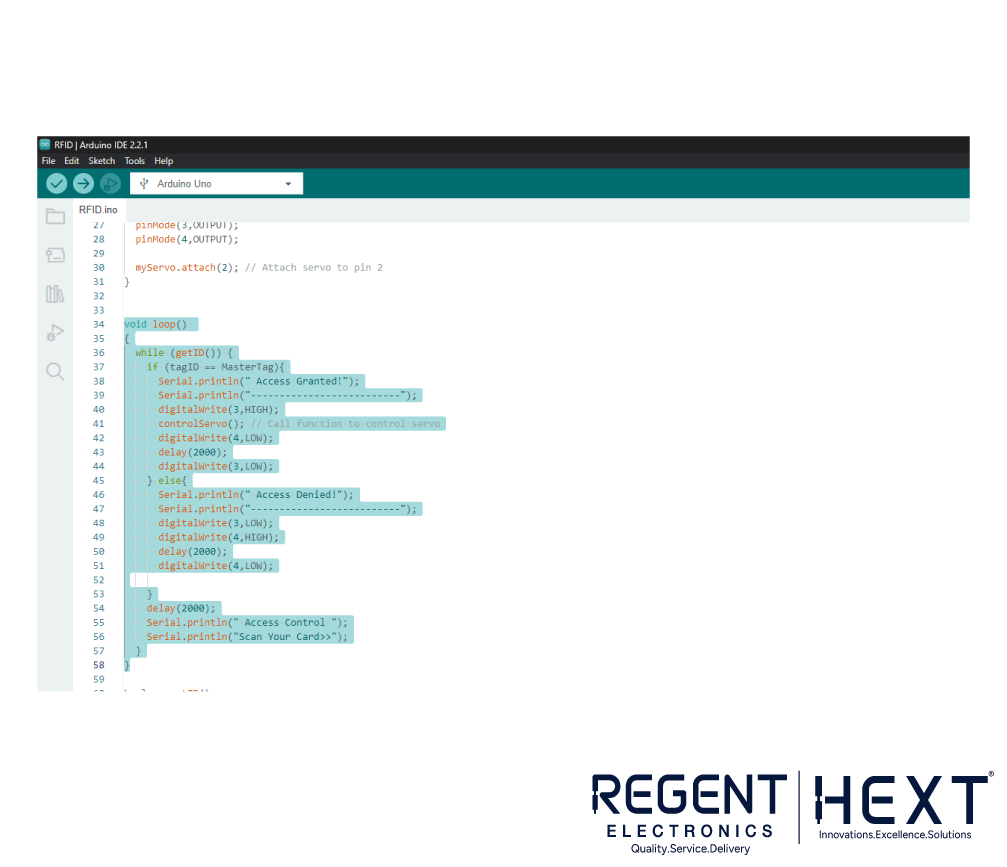
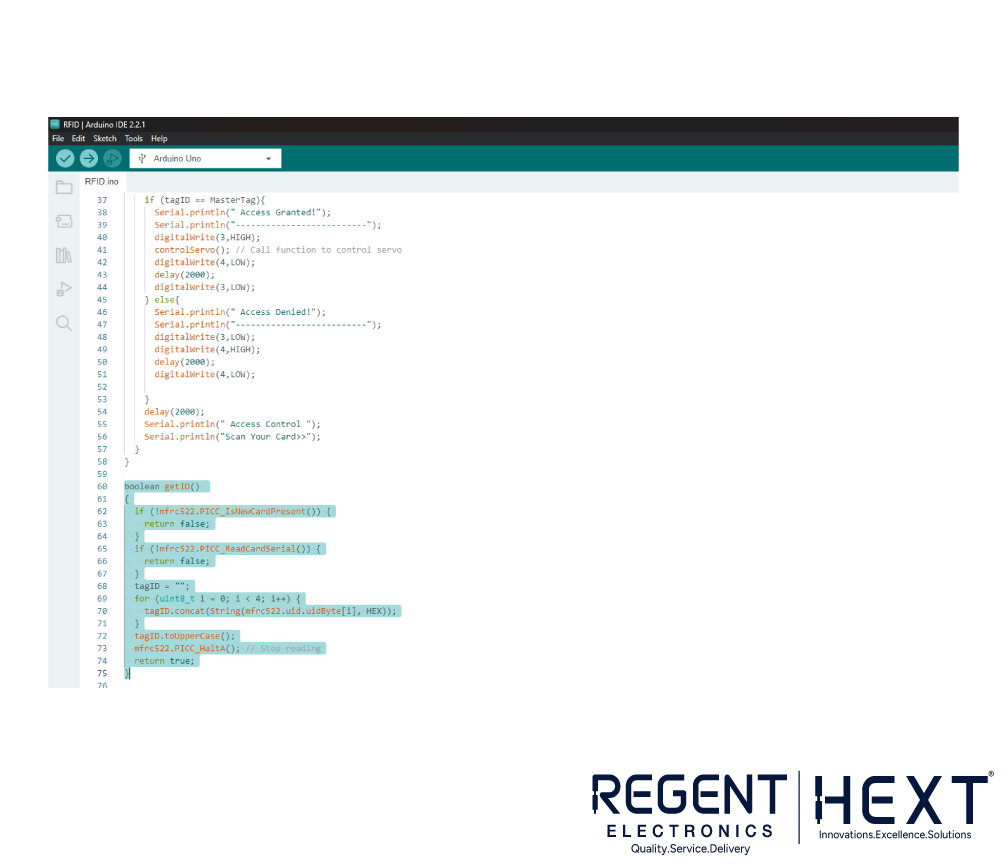

We have written a program that:
- Includes necessary libraries.
- Defines the RFID reader’s RST and SS pins.
- Stores authorized tag IDs.
- Initializes the servo motor and LEDs.
- Reads the scanned tag ID and compares it with stored IDs.
- Grants or denies access based on the tag ID.
Full Code Available Here:
GitHub Repository for RFID Access System
Step-by-Step Procedure
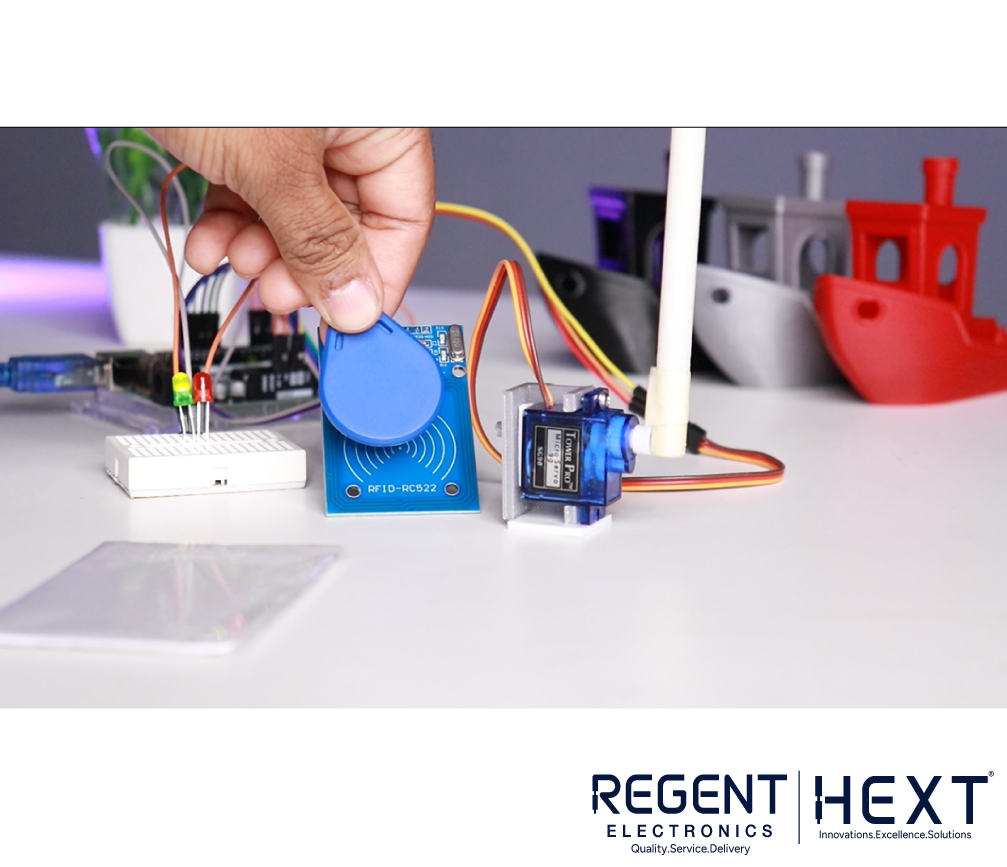
- Connect the RFID Reader to Arduino as per the circuit diagram.
- Upload the Code to the Arduino using the Arduino IDE.
- Place an RFID Tag Near the Reader:
- If the tag is authorized, the servo motor will rotate and the green LED will turn ON.
- If the tag is unauthorized, the red LED will turn ON, and access will be denied.
Conclusion
RFID technology has revolutionized multiple industries, from security and transportation to retail and automation. By integrating RFID with Arduino, you can develop smart access control systems, automate processes, and enhance security in your projects.
Experiment with RFID modules, servo motors, and additional sensors to create more advanced applications.
For more DIY electronics projects and tutorials, stay tuned for our upcoming blogs!
Explore More
- Follow us for more Arduino and RFID projects.
- Have questions? Drop them in the comments!
🚀 Unlock the power of RFID and take your tech projects to the next level!