
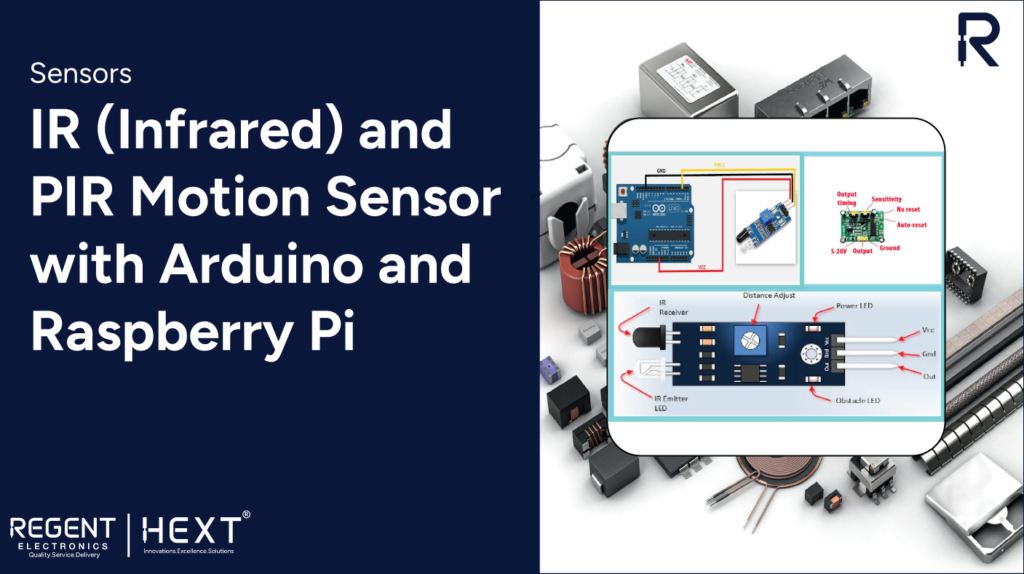
IR (Infrared) and PIR Motion Sensor with Arduino and Raspberry Pi
Introduction In this blog, we will explore different types of infrared (IR) sensors and discuss how to interface an IR sensor with Raspberry Pi 4 and Arduino.
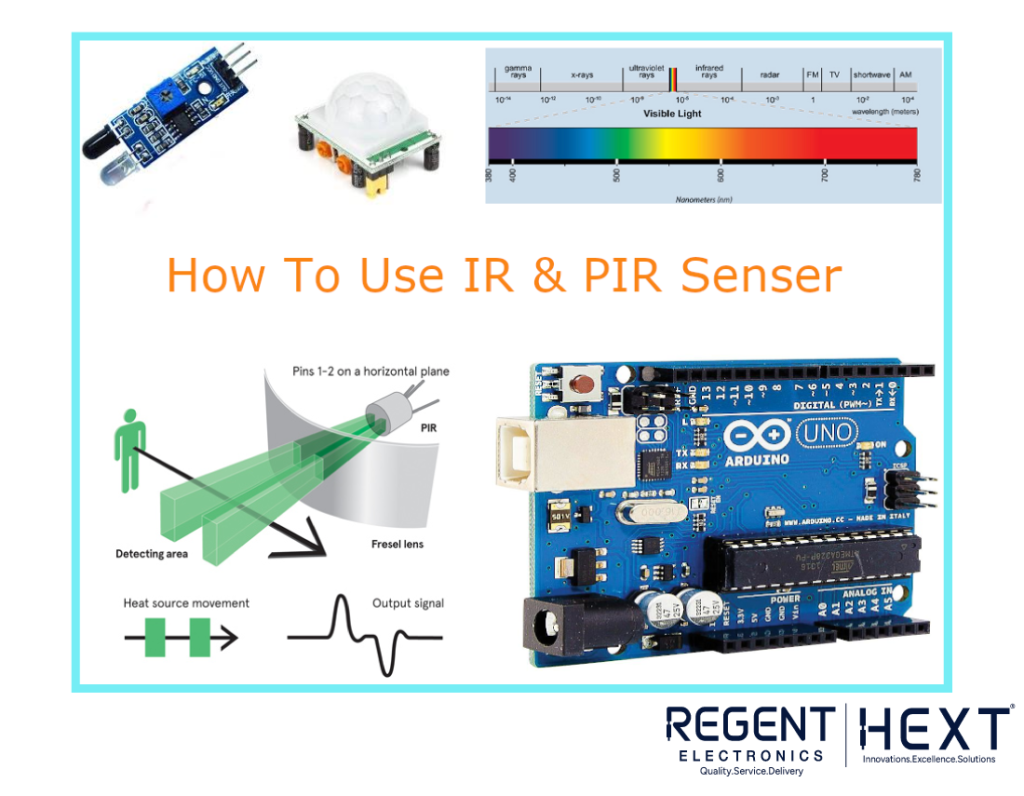
IR sensors play a crucial role in applications such as line follower robots and 3D printing machines, where they are used as IR limit switches. But how does an IR sensor work? Let’s dive into the details.
What is an Infrared Sensor?
An infrared (IR) sensor is an electronic device that detects infrared radiation emitted by objects. It consists of a transmitter and a receiver that help detect objects based on the reflected signal. IR sensors are mainly categorized into two types:
- Active IR Sensor
- Passive IR Sensor (PIR Sensor)
Active IR Sensor
An active IR sensor consists of a transmitter (usually an IR LED) that emits infrared light and a receiver that detects the reflected signal. These sensors are commonly used in object detection applications.
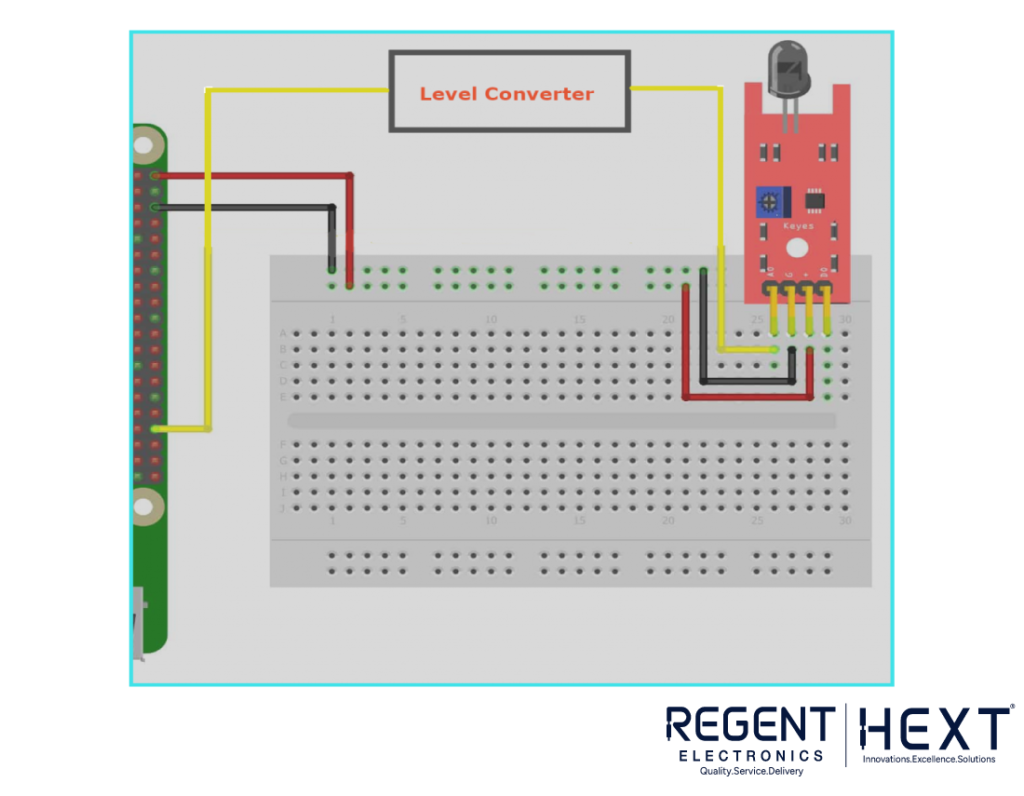
Interfacing an Active IR Sensor with Arduino and Raspberry Pi
Components Required:
- IR Sensor
- Arduino Board
- Raspberry Pi Board
- Connecting Cables
- Arduino IDE
- Thonny IDE (for Raspberry Pi)
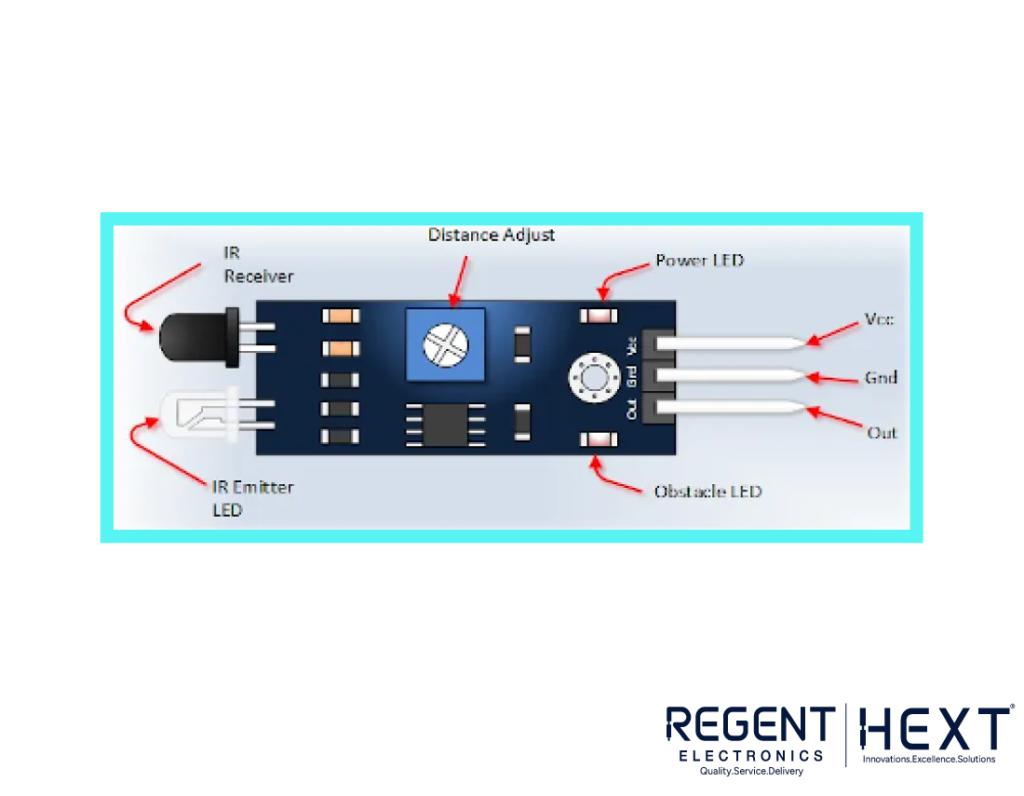
Understanding the IR Sensor Module
The IR sensor module consists of three pins: GND, VCC, and Signal. The GND and VCC are used for power, while the Signal pin provides output.
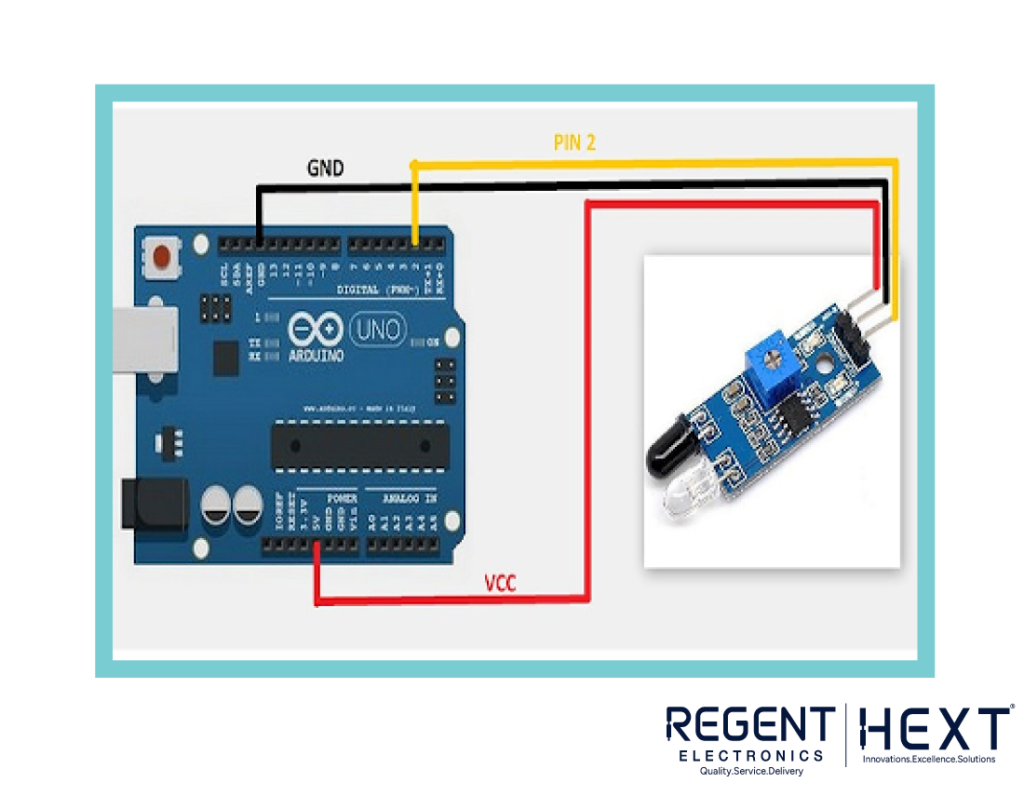
Arduino Code for IR Sensor
int SignalPin = 2;
void setup() {
pinMode(SignalPin, INPUT);
Serial.begin(9600);
}
void loop() {
int Object = digitalRead(SignalPin);
if (Object == LOW) {
Serial.println(“Object Not Found”);
} else {
Serial.println(“Obstacle Found”);
}
delay(100);
}
Python Code for IR Sensor with Raspberry Pi
import RPi.GPIO as GPIO
def button_callback(Detection):
print(“Object Is detected”)
GPIO.setwarnings(False)
GPIO.setmode(GPIO.BOARD)
GPIO.setup(34, GPIO.IN, pull_up_down=GPIO.PUD_DOWN)
GPIO.add_event_detect(10, GPIO.RISING, Detection=button_callback)
GPIO.cleanup()
PIR Motion Sensor: Introduction
Unlike active IR sensors, Passive Infrared (PIR) sensors do not require separate transmitters and receivers. Instead, they detect ambient infrared radiation, making them ideal for motion detection applications, such as home security systems.
Adjusting Sensitivity and Delay in PIR Motion Sensor
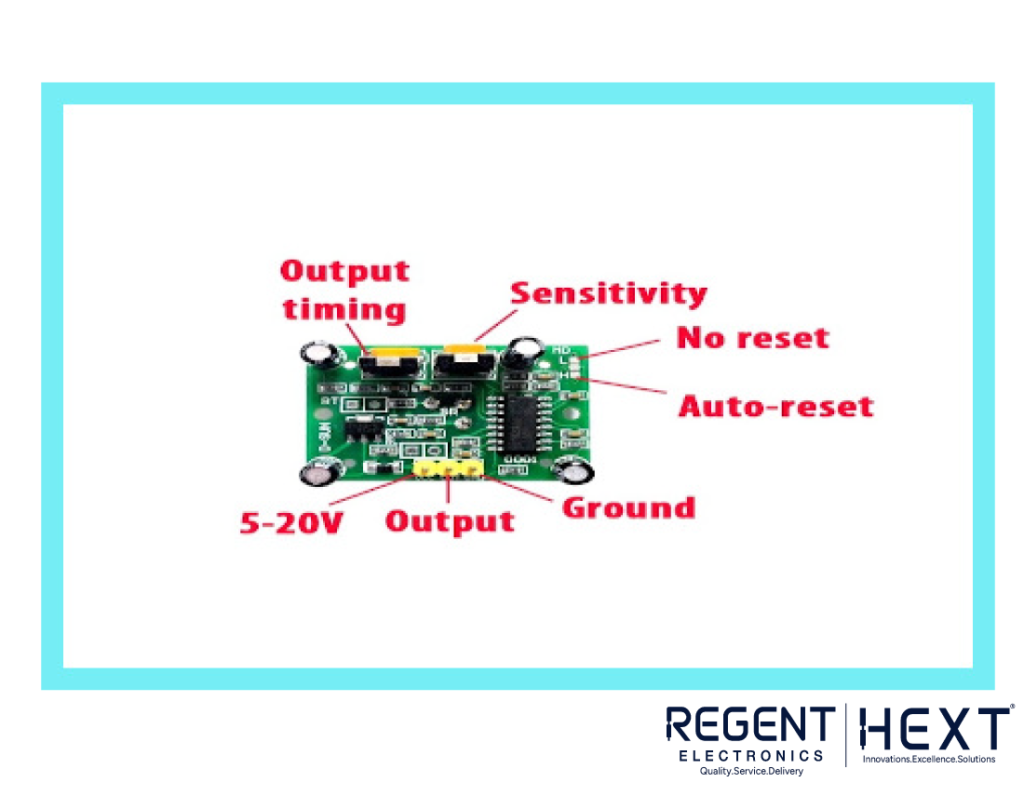
PIR sensors come with two potentiometers:
- Sensitivity Adjustment: Used to control the detection range.
- Output Timing Adjustment: Used to set the delay before the sensor resets.
Common PIR Sensor Issues and Solutions
- Sensor not working in the first minute: PIR sensors need time to stabilize after being powered on.
- Unstable output: This may be caused by excessive sensitivity or improper placement.
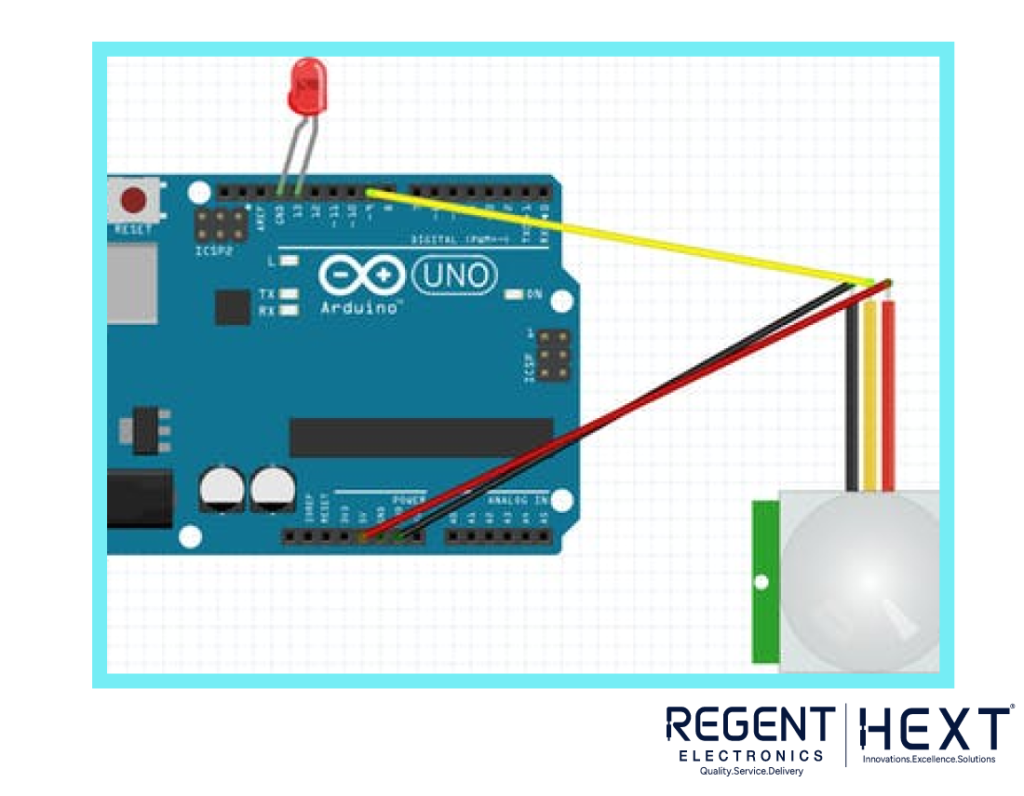
Interfacing PIR Sensor with Arduino
int led = 13;
int sensor = 9;
int state = LOW;
int val = 0;
void setup() {
pinMode(led, OUTPUT);
pinMode(sensor, INPUT);
Serial.begin(9600);
}
void loop() {
val = digitalRead(sensor);
if (val == HIGH) {
digitalWrite(led, HIGH);
delay(100);
if (state == LOW) {
Serial.println(“Motion detected!”);
state = HIGH;
}
}
}
Python Code for PIR Sensor with Raspberry Pi

import RPi.GPIO as GPIO
from time import sleep
GPIO.setwarnings(False)
GPIO.setmode(GPIO.BOARD)
GPIO.setup(14, GPIO.IN)
while True:
input = GPIO.input(11)
if input == 0:
print(“No object detected”, input)
sleep(0.1)
elif input == 1:
print(“Object detected”, input)
sleep(0.1)
Conclusion
This blog provides an in-depth understanding of IR and PIR sensors, their working principles, and their integration with Arduino and Raspberry Pi.
If you have any queries, feel free to ask in the comments section, and we will be happy to assist you!