
Exploring the Arduino UNO: A Beginner’s Guide to DIY Electronics
In the world of DIY electronics, the Arduino UNO is a game-changer for both hobbyists and professionals. Its simplicity, versatility, and affordability make it an excellent entry point for beginners while offering advanced capabilities for seasoned makers. With endless possibilities for experimentation and innovation, the Arduino UNO is the perfect tool to bring your creative ideas to life.
Understanding the Arduino UNO
What is Arduino UNO?
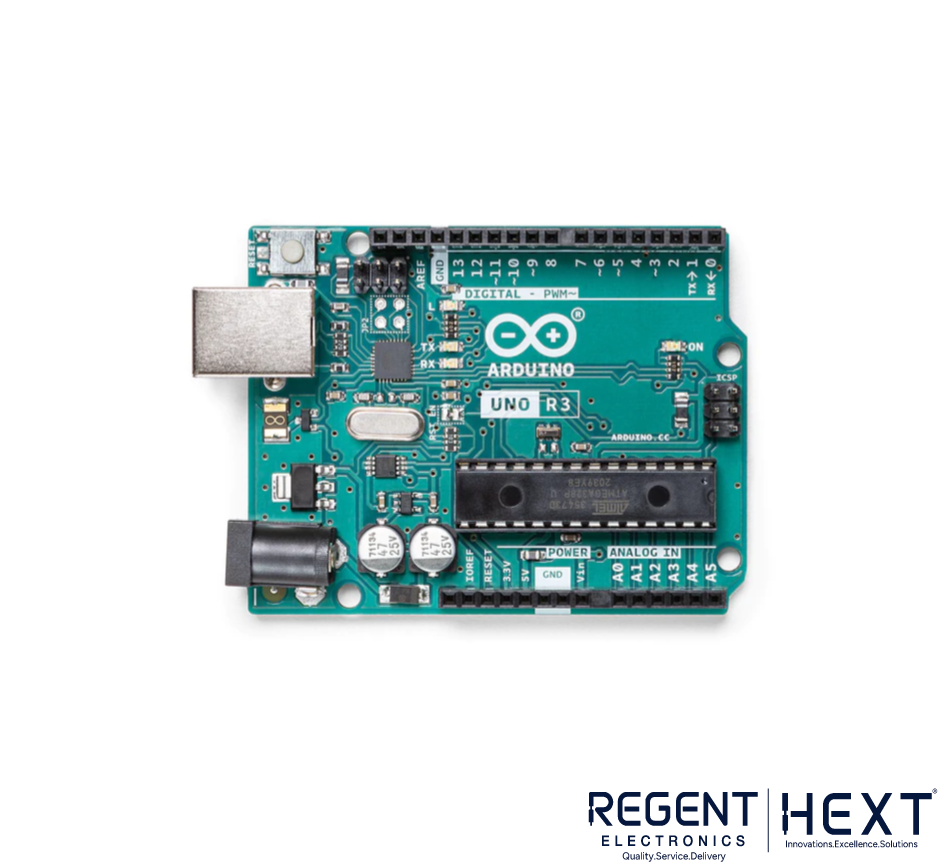
The Arduino UNO is an open-source microcontroller board based on the ATmega328P microcontroller. Developed by Arduino.cc in 2010, the name “UNO” (meaning “one” in Italian) was chosen to signify a major redesign of Arduino boards. The ATmega328P comes preprogrammed with a bootloader, allowing easy code uploads without needing an external hardware programmer.
Variants of Arduino UNO
Several versions of the Arduino UNO exist, including:
- Arduino UNO R1 to R3
- Arduino UNO R4 Minima and R4 Wi-Fi
- Arduino MKR boards
The standard Arduino UNO R3 features a 16MHz ATmega328P processor, 32KB flash memory (with 0.5KB used by the bootloader), 2KB SRAM, and 1KB EEPROM. It also includes 14 digital pins (6 supporting PWM), 6 analog input pins, and built-in communication interfaces like I2C, SPI, and UART. Additionally, the ATmega16U2 serves as a USB-to-serial converter, eliminating the need for an FTDI chip.
[Get the Original Arduino UNO R3 here.]
Setting Up Arduino UNO
To get started with the Arduino UNO:
- Download the Arduino IDE from the official website and install it.
- Install drivers if required for your board.
- Connect the board to your computer via USB.
- Write your first sketch (Blink LED example) and upload it.
Once the onboard LED starts blinking, you are ready to dive into the exciting world of Arduino programming.
Basics of Input/Output in Arduino UNO
Digital Pins
To use a digital pin, first declare it in the setup() function:
pinMode(4, OUTPUT);
To control the pin:
digitalWrite(4, HIGH); // Turns the pin ON
digitalWrite(4, LOW); // Turns the pin OFF
Analog Pins
Analog pins allow reading variable voltage values:
pinMode(A0, INPUT);
int sensorValue = analogRead(A0);
Digital vs Analog Pins
| Digital Pins | Analog Pins |
| Two states (0V or 5V) | Reads values between 0V to 5V |
| Used for output tasks | Used for input tasks |
| Controls LEDs, motors, and relays | Reads sensor values |
| Reads HIGH/LOW states | Reads a range of values |
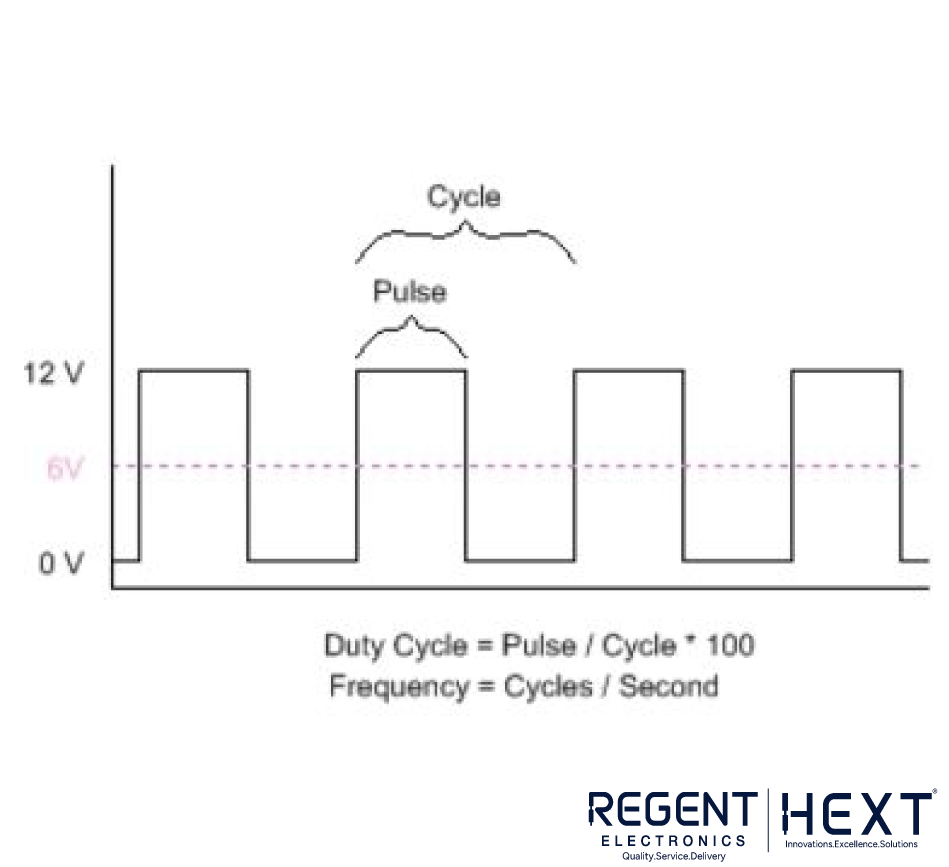
PWM (Pulse Width Modulation) on Digital Pins

PWM allows controlling devices like LEDs and motors with varying intensity. Only pins 3, 5, 6, 9, 10, 11 support PWM:
analogWrite(9, 127); // 50% brightness
Communication Protocols: SPI and I2C
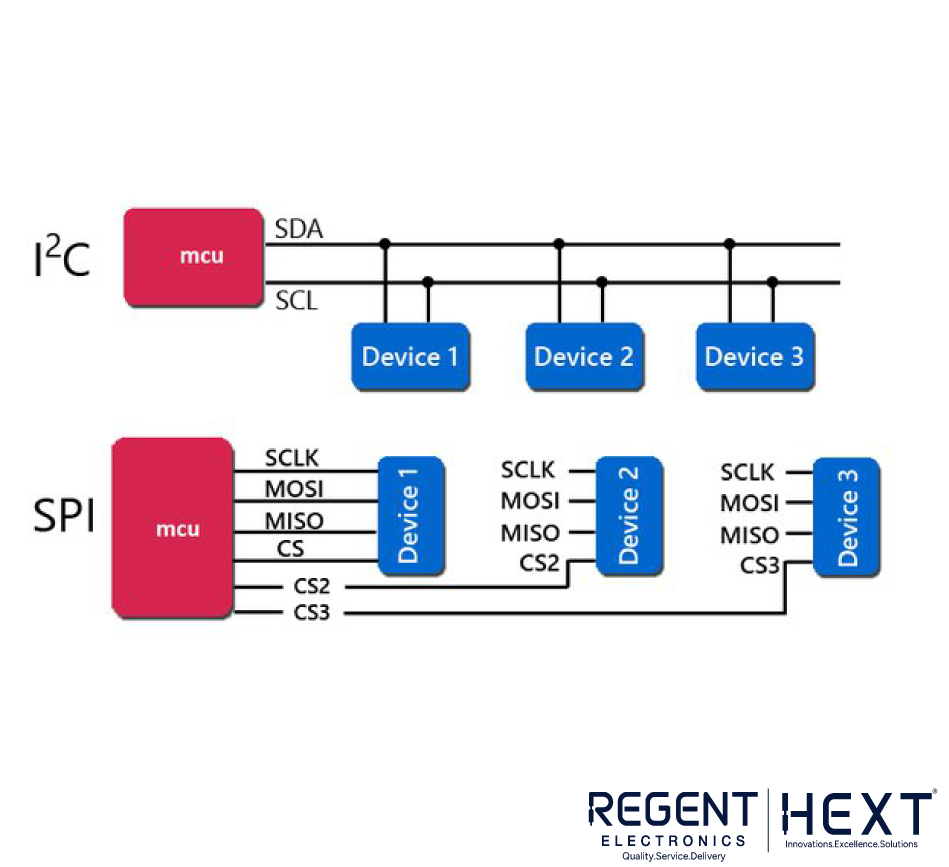
SPI (Serial Peripheral Interface)
Used to interface with SD cards, RFID readers, and other high-speed peripherals.
I2C (Inter-Integrated Circuit)
Useful for connecting multiple devices like LCDs, OLEDs, and sensors using only two wires (SDA and SCL). It supports up to 127 devices with unique addresses.
Handling Interrupts in Arduino
Interrupts allow the Arduino to respond to external events efficiently without constant polling.
const int buttonPin = 2;
const int ledPin = 13;
volatile bool ledOn = false;
void setup() {
pinMode(buttonPin, INPUT);
pinMode(ledPin, OUTPUT);
attachInterrupt(digitalPinToInterrupt(buttonPin), buttonInterrupt, CHANGE);
}
void loop() {
// Main loop remains free
}
void buttonInterrupt() {
ledOn = !ledOn;
digitalWrite(ledPin, ledOn ? HIGH : LOW);
}
Memory Management Best Practices
Since the Arduino UNO has limited memory, efficient coding is crucial:
- Use appropriate data types (e.g., uint8_t instead of int when values range from 0-255).
- Minimize global variables and prefer local variables.
- Avoid floating-point arithmetic unless necessary.
- Use character arrays (char[]) instead of the String class to save memory.
- Avoid dynamic memory allocation (malloc() and free()) to prevent fragmentation.
- Use bitwise operations for efficient data manipulation.
- Profile performance using tools like the Serial Monitor.
Conclusion
Whether you’re a hobbyist experimenting at home or a professional prototyping the next big invention, the Arduino UNO provides an accessible and powerful platform for electronic projects. By mastering its basics and exploring advanced features, you can unlock endless possibilities.
So, grab your Arduino UNO and start building! For more tutorials and inspiration, follow us on our YouTube channel, where we regularly share exciting new projects and ideas to power your creativity. Happy tinkering!