

Learn IoT Quickly with the Arduino Opla IoT Kit
Introduction
The world of IoT (Internet of Things) is growing rapidly, and getting started has never been easier. The Arduino Opla IoT Kit is an all-in-one solution designed for beginners and experienced developers alike. It includes the Arduino MKR 1010 Wi-Fi board along with a feature-rich MKR IoT Carrier Board, allowing users to dive straight into IoT development without needing additional components. In this guide, we will explore everything you need to know about this kit, from hardware and software setup to coding and project implementation.
What’s Inside the Arduino Opla IoT Kit?
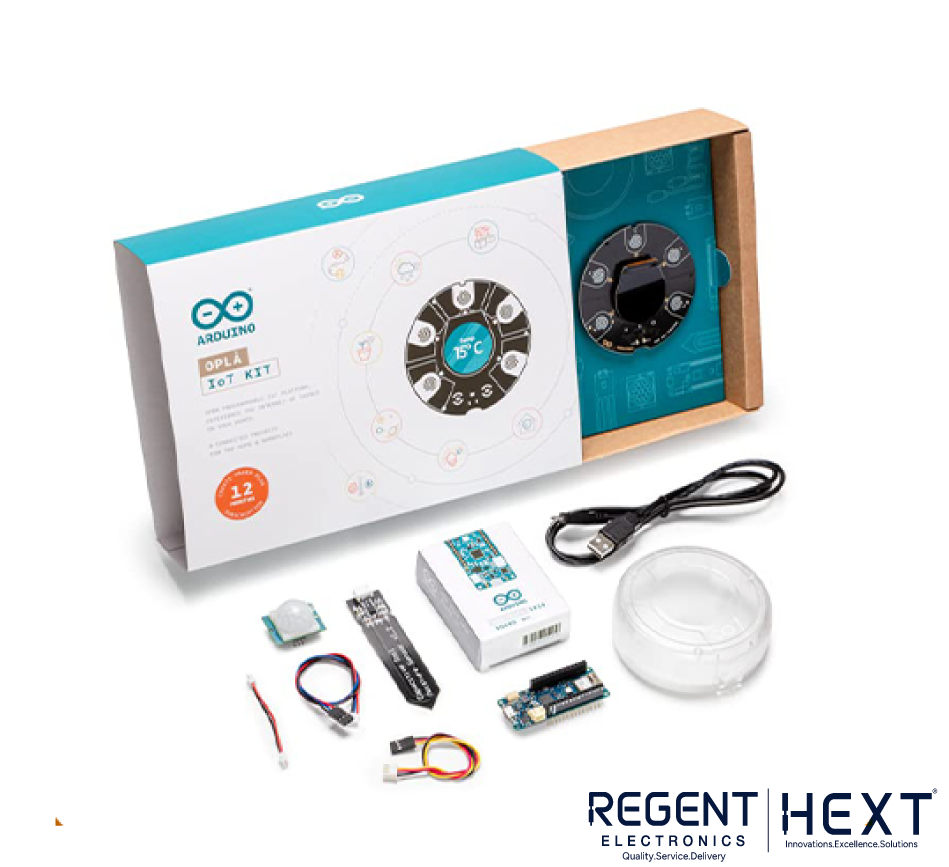
The kit is designed for a seamless IoT development experience and includes:
Hardware Components
- Arduino MKR 1010 Wi-Fi Development Board
- MKR IoT Carrier Board
- Motion Sensor
- Moisture Sensor
- Plastic Enclosure
- Battery Cable
- Plug-and-Play Component Cables
- USB Cable
Built-in Sensors on the MKR IoT Carrier Board
- Temperature Sensor
- Humidity Sensor
- Color Sensor
- Pressure Sensor
- Light Sensor
- IMU (Inertial Measurement Unit) Sensor
- Gesture Sensor
Additionally, the board features two 24V relays, five capacitive touch pads, five RGB LEDs, and an 18650 battery holder with a built-in charging circuit, allowing for portable IoT applications.
Setting Up the Arduino Opla IoT Kit
Hardware Setup
Setting up the hardware is simple:
- Mount the Arduino MKR 1010 Wi-Fi board onto the MKR Carrier Board.
- Connect the necessary components (e.g., sensors, USB cable).
- Ensure the board is securely placed inside the plastic enclosure.
Note: The enclosure does not interfere with the capacitive touch buttons. To enable touch functionality within the enclosure, set CARRIER_CASE = true in the void setup() function.
Software Requirements
To program the board, you’ll need the following:
- Arduino Create Agent
- Google Chrome or Mozilla Firefox (as the web editor does not support other browsers)
Installing the Arduino Create Agent

- Download the Arduino Create Agent from the official Arduino website.
- Follow the on-screen instructions to complete the installation.
- Connect the Arduino MKR 1010 board via USB and verify its detection in the Arduino Web Editor.
Programming the Arduino Opla IoT Kit
Once the board is set up, it’s time to upload some code.
Steps to Upload Code
- Open the Arduino Web Editor.
- Copy and paste the test code into a new sketch.
- Select the correct board and port.
- Click Compile and Upload.
If the board is not detected, check the following:
- Ensure the Arduino Create Agent is installed correctly.
- Verify that you are using a compatible web browser (Chrome or Firefox).
Testing the Arduino Opla IoT Kit
After uploading the test code, the Carrier Board will cycle through its various components and sensors, prompting you to interact with them. This demo will test:
- Capacitive Touch Buttons
- Temperature, Humidity, and Barometric Pressure Sensors
- 6-Axis IMU Motion Sensor
- Color Detection Sensor
- Gesture Sensor
- Two Relay Modules
Following these tests, you’ll gain hands-on experience with the Arduino Opla IoT Kit, preparing you to build and deploy your own IoT projects.
Final Thoughts
With the Arduino Opla IoT Kit, getting started with IoT is simple and efficient. Whether you are a beginner looking to learn IoT fundamentals or an experienced developer prototyping new applications, this kit provides everything you need. By mastering the setup and coding techniques, you can create innovative IoT solutions to tackle real-world problems.
Ready to build your first IoT project? Start experimenting today and explore the limitless possibilities of the Arduino Opla IoT Kit!
Stay Connected
Follow Regent Electronics for more tutorials, projects, and tips on Arduino and IoT development. Stay tuned for more insights to help you bring your creative ideas to life!