
Complete Guide to Arduino MKR Wi-Fi 1010 IoT Board – Regent Electronics
Introduction
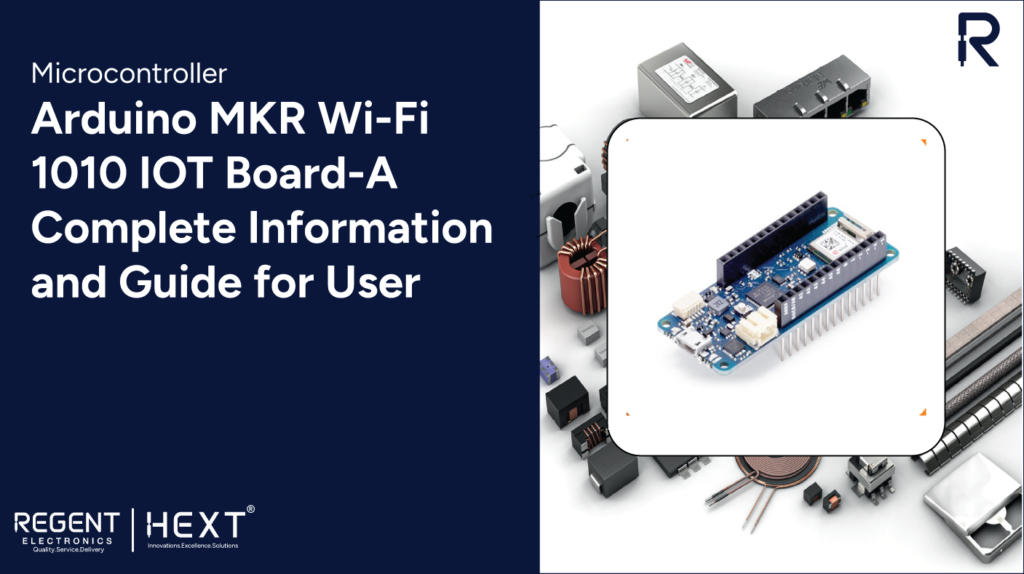
The Arduino MKR Wi-Fi 1010 is a powerful development board that integrates Wi-Fi, Bluetooth, and BLE capabilities, making it an excellent choice for IoT projects. With support for Arduino Cloud, users can program and manage the board remotely, enabling seamless connectivity and smart automation.
Features of Arduino MKR Wi-Fi 1010
- Built-in Wi-Fi (2.4 GHz, up to 13 channels)
- Bluetooth & BLE (Supports 79 channels with speeds up to 3 Mbps)
- SAMD21 Cortex-M0+ (32-bit low-power ARM microcontroller)
- 8 Digital I/O pins and 12 PWM pins
- 256 KB Flash Memory & 32 KB SRAM
- Integrated Nina W102 Module and ATECC508 Crypto Chip
- Onboard BQ24125L USB/Adapter Charger (92% efficiency for battery charging and power supply)
Understanding the Arduino MKR Wi-Fi 1010 Board
This board combines the power of ARM Cortex-M0+ with built-in connectivity options, making it suitable for smart home automation, IoT applications, and sensor networks.
With Wi-Fi and Bluetooth support, the MKR 1010 board can function as a BLE device, transmitting sensor data to mobile devices or acting as a Wi-Fi client for remote monitoring applications.
For official documentation, visit the Arduino website.
How to Program the Arduino MKR Wi-Fi 1010
You can program the MKR Wi-Fi 1010 using two methods:
- Arduino Desktop IDE (Offline)
- Arduino Web Editor (Online)
1. Programming with Arduino Desktop IDE
Steps to Set Up:
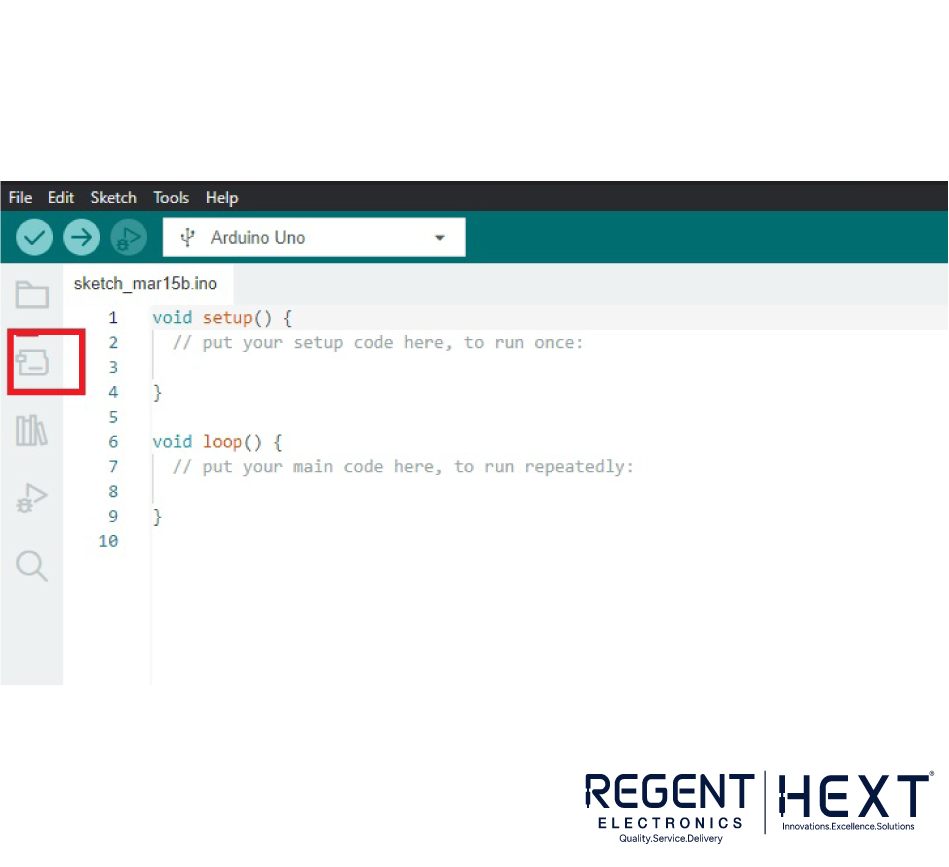
- Download and install Arduino Desktop IDE from the official site.
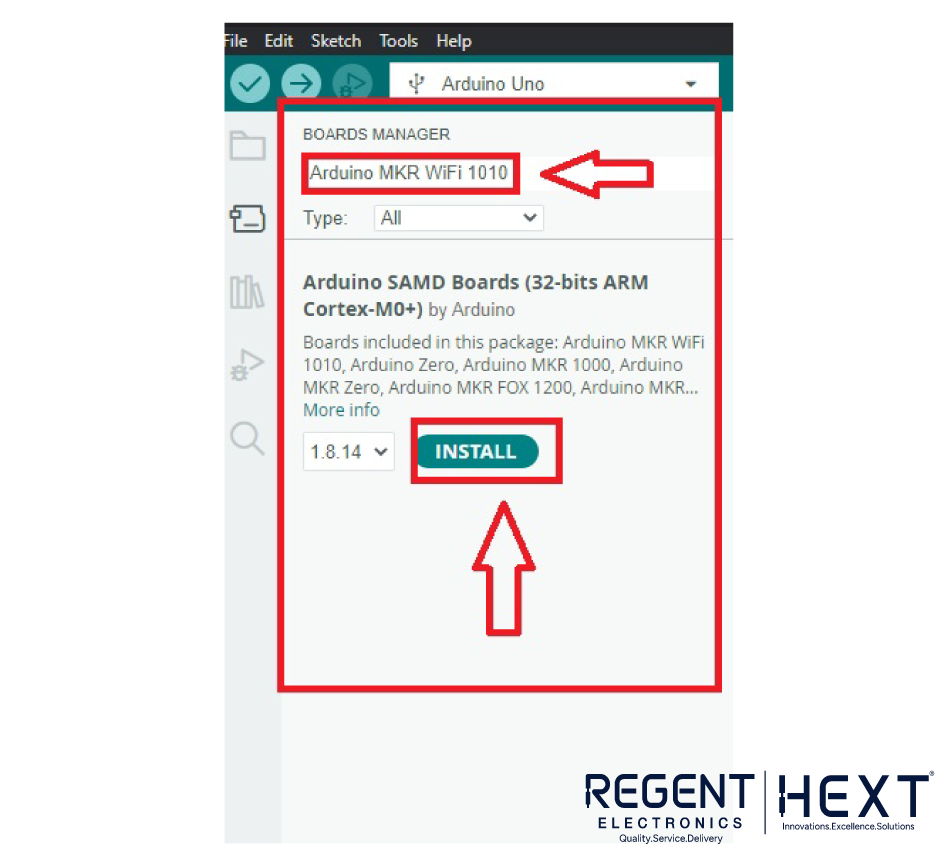
- Open the Board Manager and search for MKR 1010.
- Click Install to add the board support package.
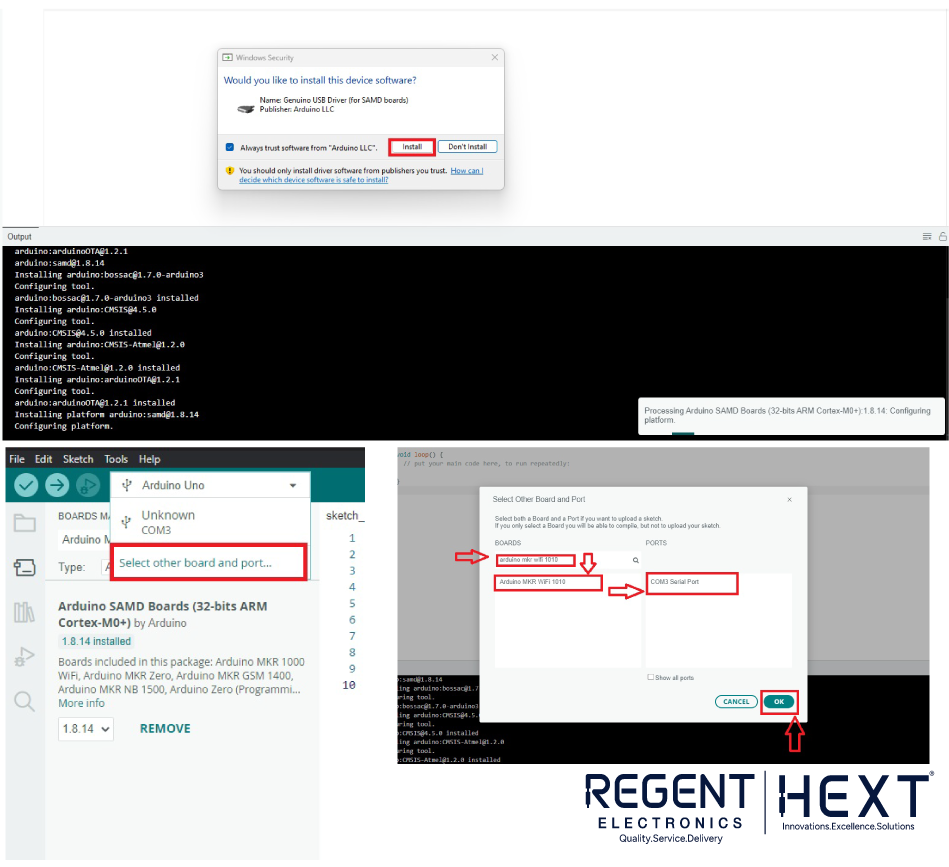
- Connect the board to your PC using a Micro-USB cable.
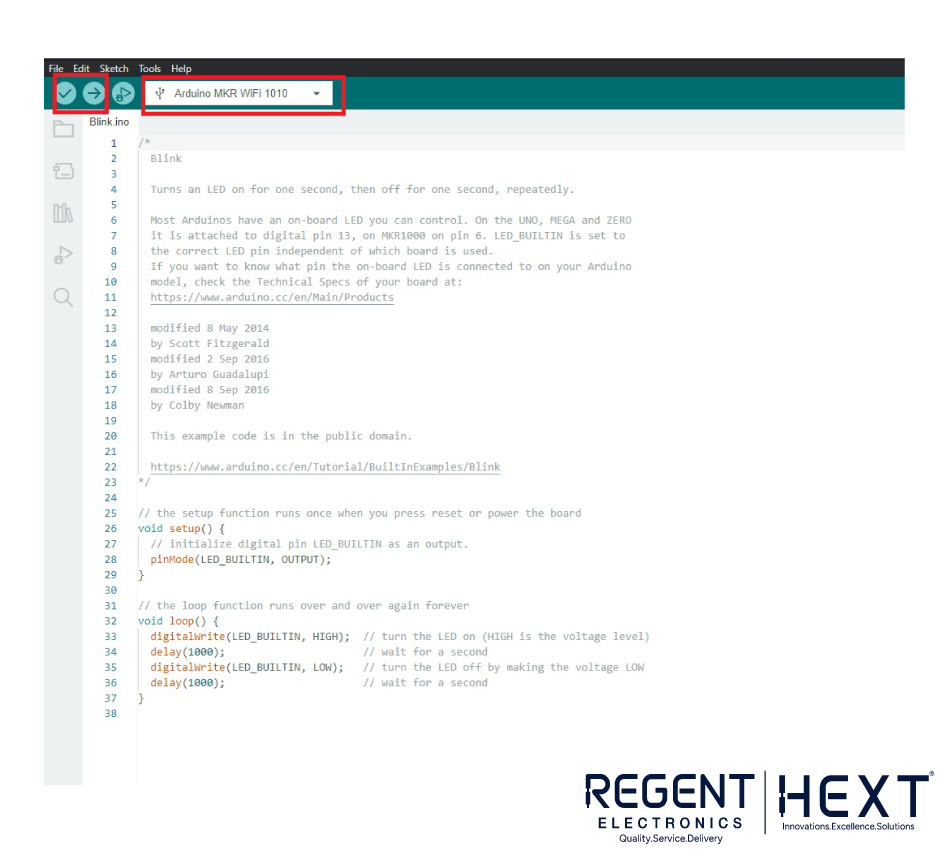
- Select the correct Board and Port.
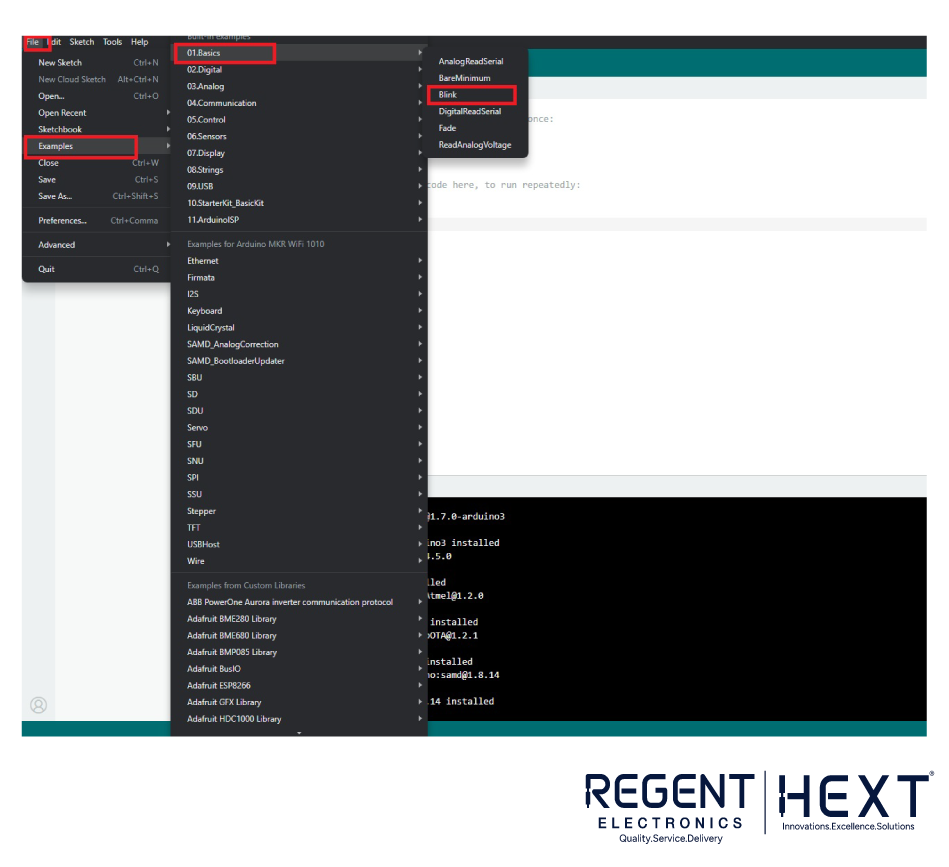
- Open the Blink Example Code and upload it.
Once the upload is complete, you have successfully programmed the Arduino MKR Wi-Fi 1010!
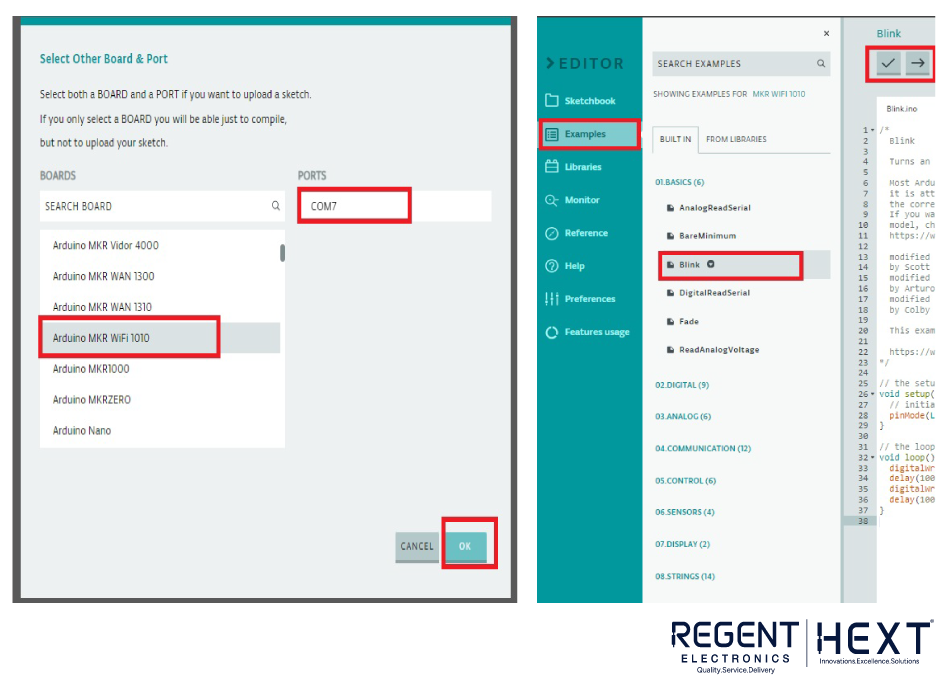
2. Programming with Arduino Web Editor
As an IoT-enabled board, the MKR Wi-Fi 1010 can be programmed using the Arduino Web Editor, allowing cloud-based coding and remote access.
Steps to Program via Web Editor:
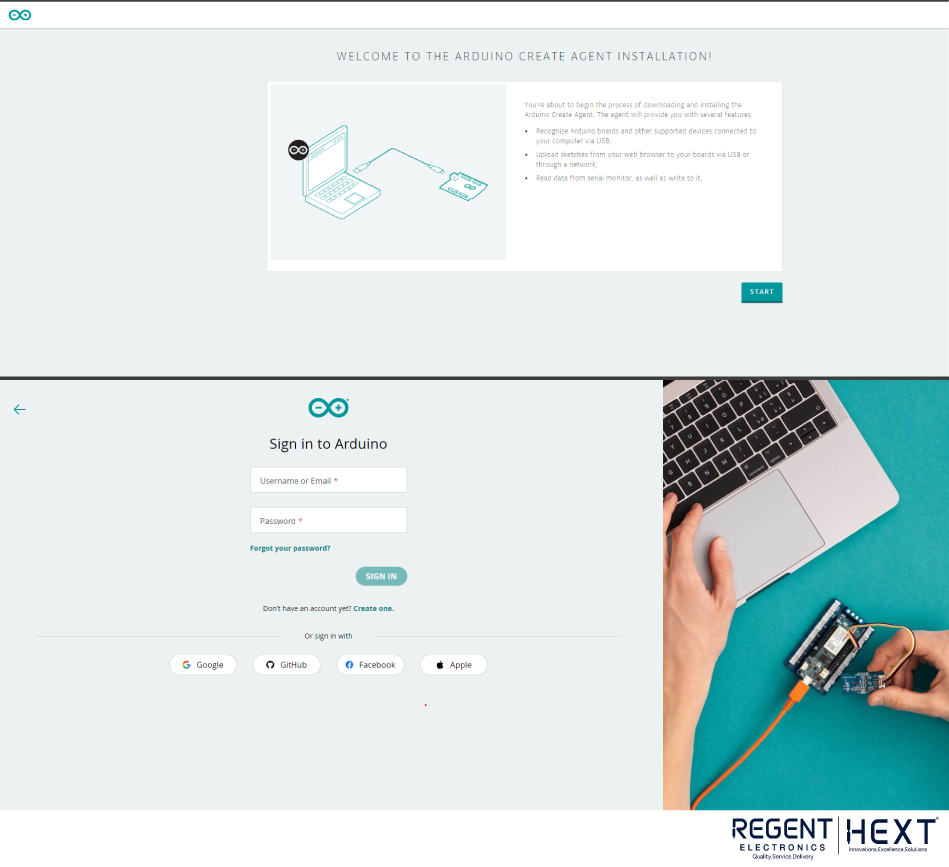
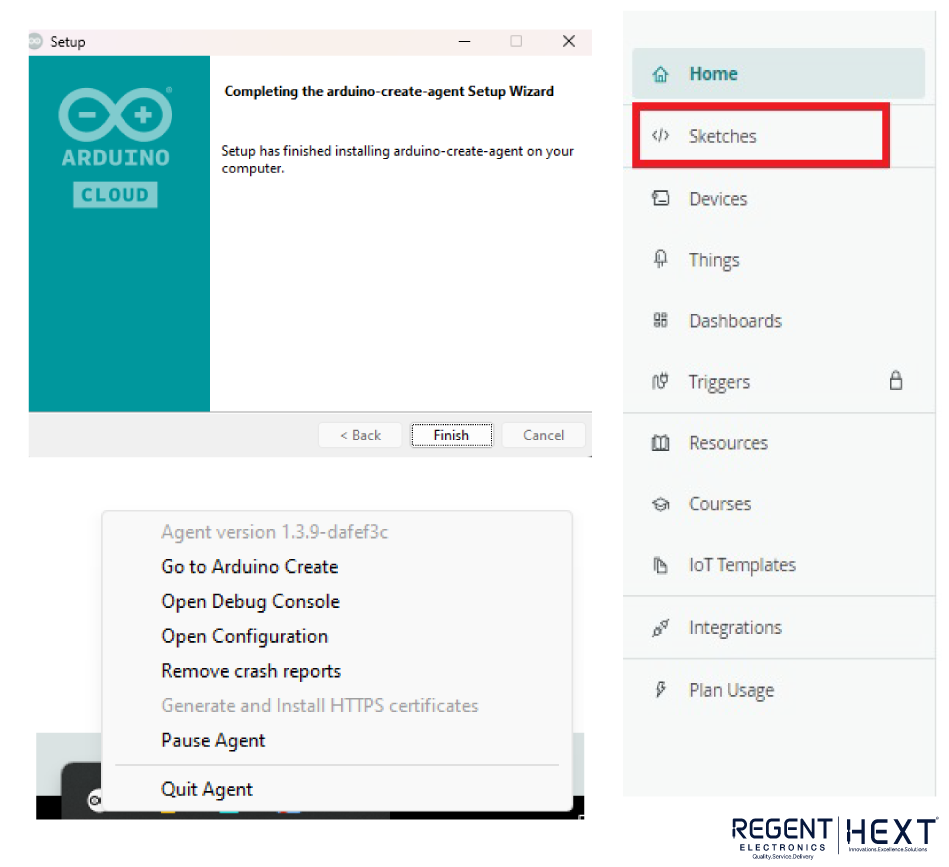
- Install the Arduino Create Agent.
- Log in to Arduino Web Editor or create a new account.
- The Online IDE will open.
- Connect your board to the PC.
- Activate the Create Agent and select the correct Board and Port.
- Open the Blink Example Code and upload it.
When the upload is successful, the LED on the board will start blinking!
For detailed instructions, visit Arduino Web Editor Guide.
Exciting IoT Projects with MKR 1010
Looking for a project idea? Check out this step-by-step guide on controlling devices remotely with Arduino MKR Wi-Fi 1010 Web Server: Project Guide
Watch the project in action here: YouTube Video.
Applications of Arduino MKR Wi-Fi 1010
The MKR Wi-Fi 1010 is widely used for:
- IoT Smart Home Automation
- Wireless Sensor Networks
- Remote Device Control
- BLE and Bluetooth Applications
- Environmental Monitoring Systems
- Smart Farming & Industrial IoT
Conclusion
The Arduino MKR Wi-Fi 1010 is an excellent choice for IoT projects, thanks to its Wi-Fi, Bluetooth, and BLE capabilities. With Arduino Cloud compatibility, programming is simple and efficient. Whether you’re a beginner or an experienced developer, this board provides an ideal platform for IoT prototyping, automation, and smart applications.
Start your next IoT project today with Regent Electronics and unleash the power of the Arduino MKR Wi-Fi 1010!