
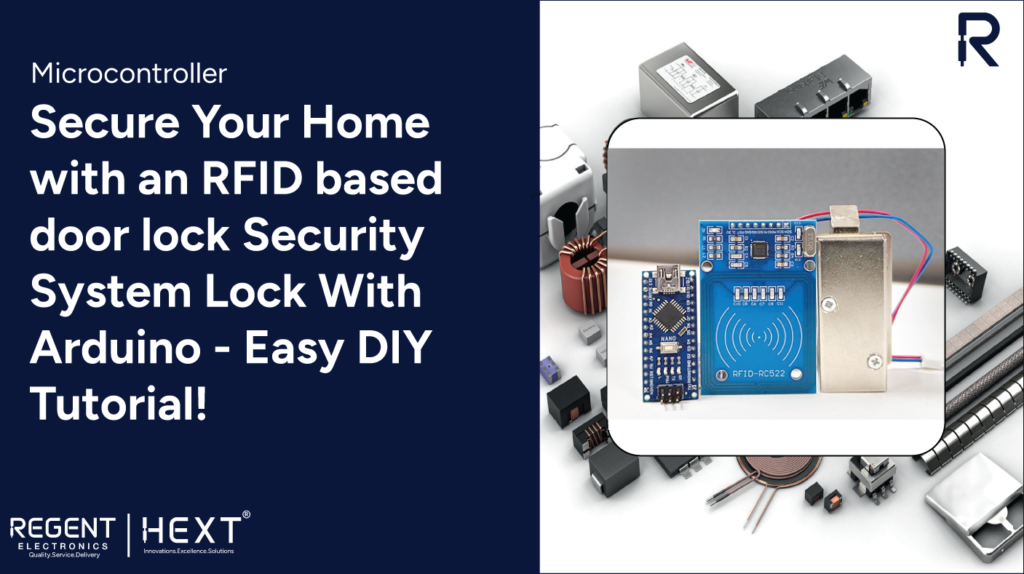
DIY RFID-Based Door Lock Security System with Arduino: A Step-by-Step Guide
Introduction
In today’s world, securing your home is more important than ever, and one of the most reliable ways to enhance security is by using an advanced door lock system. While traditional keys are still commonly used, RFID-based door lock security systems are gaining popularity for their convenience and reliability. In this guide, we’ll show you how to build your own RFID-based door lock system using Arduino. This project is perfect for anyone looking to add an extra layer of security to their home or workspace.
What is RFID and How Does It Work?
RFID stands for Radio Frequency Identification. It uses electromagnetic fields to automatically identify and track tags attached to objects. The RFID system consists of two main components:
- RFID Reader: This reads the unique ID of the RFID tags and sends the information to a microcontroller.
- RFID Tags: Each tag has a unique identifier (UID), which the reader detects when brought near.
In an RFID system, the reader emits radio waves to power the RFID tag. The tag then responds with its unique ID, which is read by the reader. RFID can be categorized into two types: active and passive. For this project, we’ll be using a passive RFID system, where the tags do not have a battery, making them ideal for short-range identification (typically 5 to 10 cm).
Components Required
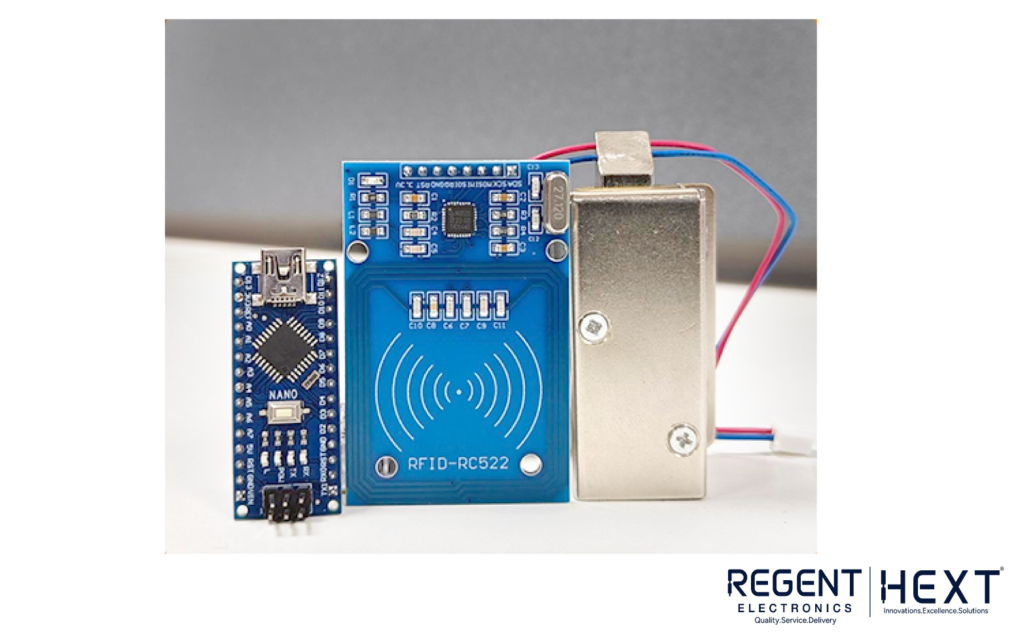
To build the RFID-based door lock system, you’ll need the following components:
- Arduino Nano (with USB cable)
- RC522 RFID Reader Module
- RFID Tags (two tags included with the module)
- 12V DC Solenoid Lock
- IRF540 N-channel MOSFET
- Resistors (10KΩ, 100KΩ, 1KΩ)
- 3mm Orange LED
- Mini Breadboard
- 12V 5A Adapter
- Jumper Wires (F to F, F to M, M to M)
Circuit Diagram and Connections
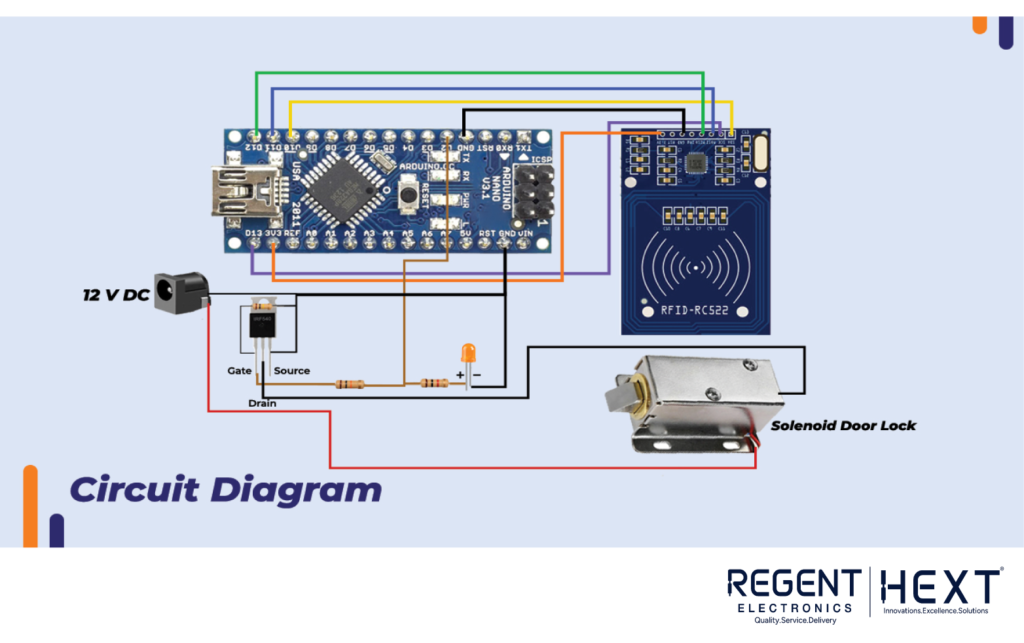
The RFID reader connects to the Arduino Nano using the SPI protocol. Here’s how to connect the pins:
- SCK (Serial Clock) of the reader to Pin 13 of Arduino Nano
- MISO (Master In Slave Out) of the reader to Pin 12 of Arduino Nano
- MOSI (Master Out Slave In) of the reader to Pin 11 of Arduino Nano
- SDA (Slave Select) to Pin 10 of Arduino Nano
The LED is connected to Pin 2 of the Arduino to indicate when the RFID tag is successfully read.
Why Use a MOSFET?
The Arduino Nano operates at 5V and can supply a maximum of 40mA of current from its pins. However, the 12V DC Solenoid Lock requires more current (0.8A) than the Arduino can safely handle. To solve this, we use the IRF540 N-channel MOSFET, which acts as a switch, allowing the Arduino to control the solenoid lock without overloading its pins. When the Arduino outputs 5V from Pin 2, the MOSFET turns on and allows current to flow, activating the solenoid and unlocking the door.
Installing the RFID Reader Library

To use the RC522 RFID reader with Arduino, we need to install the MFRC522 library. Here’s how:
- Download the library zip file: Download RFID Library
- Open Arduino IDE and go to Sketch > Include Library > Add .ZIP Library.
- Browse to the downloaded zip file and install it.
Arduino Code
Once the hardware connections are in place and the library is installed, upload the following code to your Arduino Nano:
#include <SPI.h> // Library for SPI communication
#include <MFRC522.h> // RFID Reader Library
#define SS_PIN 10 // SDA Pin connected to Pin 10
#define RST_PIN 9 // Reset Pin connected to Pin 9
#define LED 2 // LED Pin connected to Pin 2
#define NUM_ID 3 // Number of registered RFID tags
String reg_tag_IDs[NUM_ID] = {“4A6C7E12”, “D9DB1916”, “C153FB1D”}; // Registered tag IDs
String tagID = “”; // Variable to store the scanned tag ID
MFRC522 mfrc522(SS_PIN, RST_PIN); // Initialize MFRC522 instance
int c = 0;
void setup() {
pinMode(LED, OUTPUT); // Set LED pin as output
digitalWrite(LED, LOW); // Turn LED off
Serial.begin(9600); // Start serial communication
SPI.begin(); // Initialize SPI communication
mfrc522.PCD_Init(); // Initialize RFID reader
}
void loop() {
if (readID()) { // Check if a new tag is scanned
Serial.println(tagID); // Print the scanned tag ID
for (int i = 0; i < NUM_ID; i++) {
if (tagID == reg_tag_IDs[i]) { // If tag ID matches registered ID
digitalWrite(LED, HIGH); // Turn on LED
delay(3000);
digitalWrite(LED, LOW); // Turn off LED
} else {
c += 1; // Increment counter if ID doesn’t match
}
}
if (c == NUM_ID) {
Serial.println(“Access denied. ID not registered.”);
c = 0;
} else {
c = 0;
}
}
}
// Function to read the tag ID
boolean readID() {
if (!mfrc522.PICC_IsNewCardPresent()) {
return false; // No new card detected
}
if (!mfrc522.PICC_ReadCardSerial()) {
return false; // Card not readable
}
tagID = “”;
for (uint8_t i = 0; i < 4; i++) {
tagID.concat(String(mfrc522.uid.uidByte[i], HEX)); // Get tag UID
}
tagID.toUpperCase(); // Convert to uppercase for consistency
mfrc522.PICC_HaltA(); // Stop reading
return true;
}
How to Add More RFID Tags?
The Arduino Nano has limited memory, so you can add up to 3000 unique tag IDs to the system, depending on your tag size and memory usage. To add more tags, simply scan them and add the tag’s ID to the reg_tag_IDs array in the code.
Conclusion
With this simple, yet effective, RFID-based door lock system, you can enhance the security of your home or office. The door will only unlock when a registered RFID tag is scanned, ensuring that only authorized individuals can gain access.
If you have any questions or need further assistance with this project, feel free to leave a comment. We’re here to help!
For more exciting DIY electronics projects, make sure to check out Regent Electronics for the latest tutorials and tips!