

MQ2 Sensor Interfacing with Arduino – Gas and Smoke Detection
Introduction
A gas sensor is a device that detects the concentration of gases present in the atmosphere. This project demonstrates the interfacing of the MQ2 sensor with Arduino and provides the necessary code to implement it effectively.
Interfacing MQ2 Smoke Sensor with Arduino
In modern safety systems, sensors play a crucial role in detecting hazardous environmental conditions. Smoke sensors are widely used to detect fire and smoke, enabling timely safety measures. Various sensors are available to monitor environmental conditions such as light, noise, and smoke.
The MQ2 Gas Sensor is one such sensor used in safety systems to detect harmful gases. It is an ideal choice for applications such as indoor air quality monitoring, breath analysis, and early fire detection systems.
In this tutorial, we will discuss how to interface the MQ2 smoke detector sensor with an Arduino board and write the necessary code. The MQ2 sensor is a powerful tool for detecting various gases, including butane, methane, LPG, smoke, alcohol, propane, and hydrogen in the air.
How Does the Gas Sensor Work?
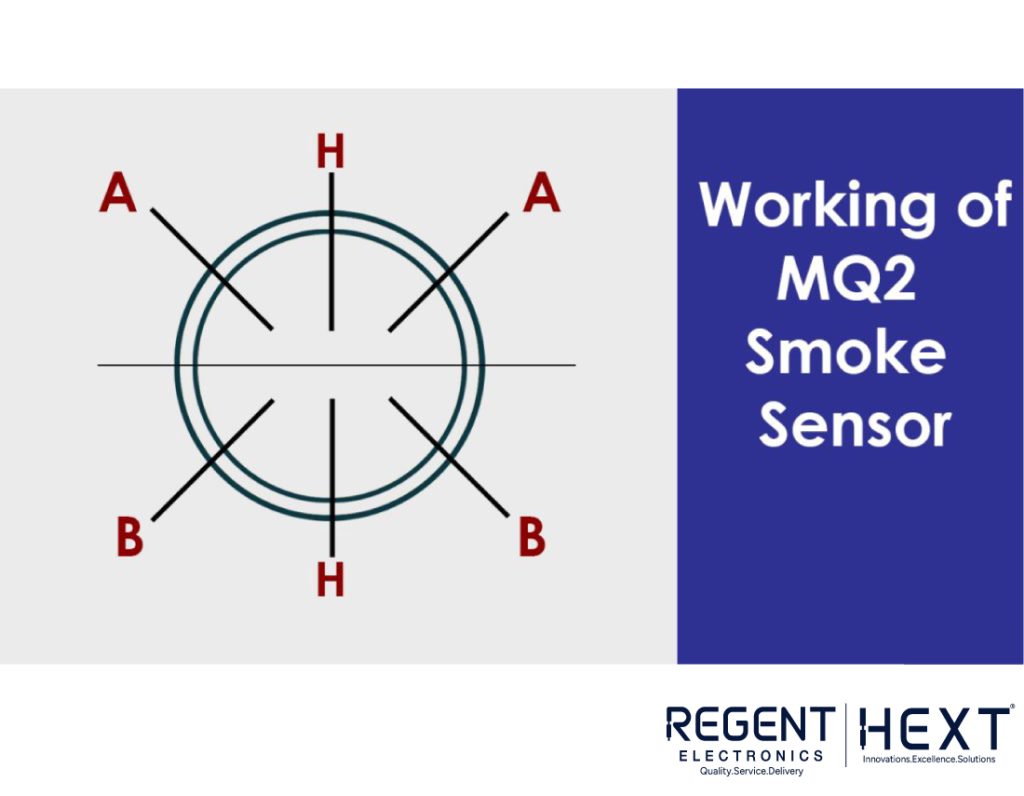
The MQ2 Gas Sensor contains a sensing element responsible for detecting smoke and gaseous materials. This sensing element consists of a stainless-steel mesh enclosing an aluminum-oxide-based ceramic coated with tin dioxide.
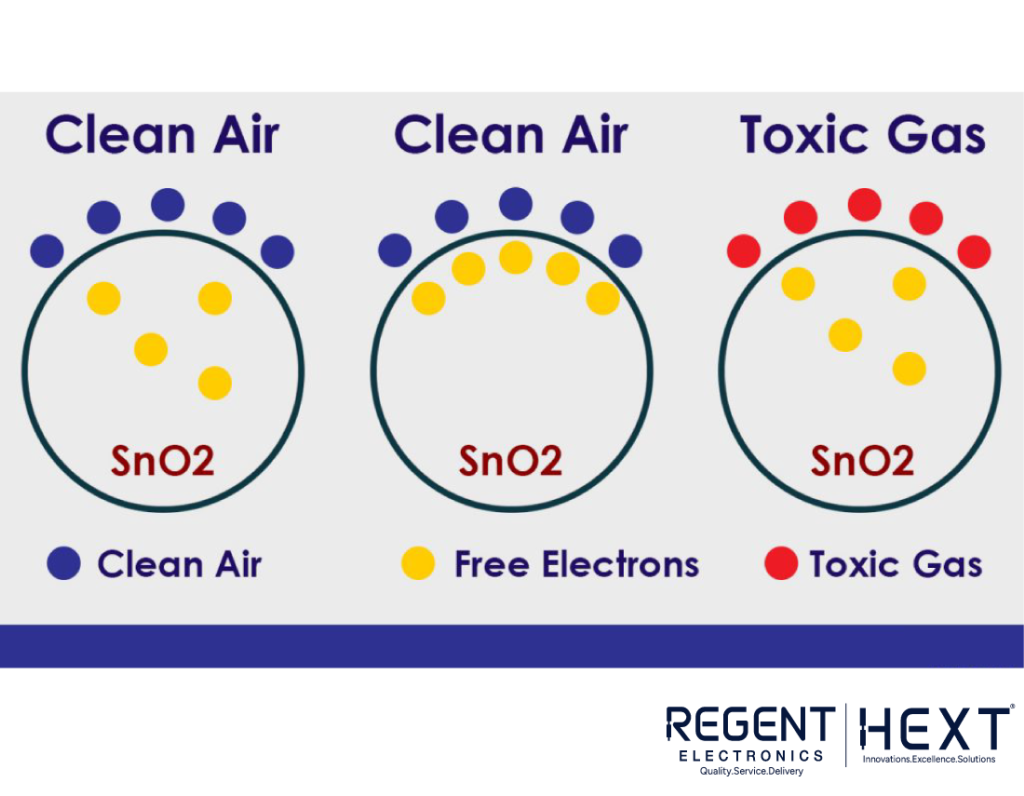
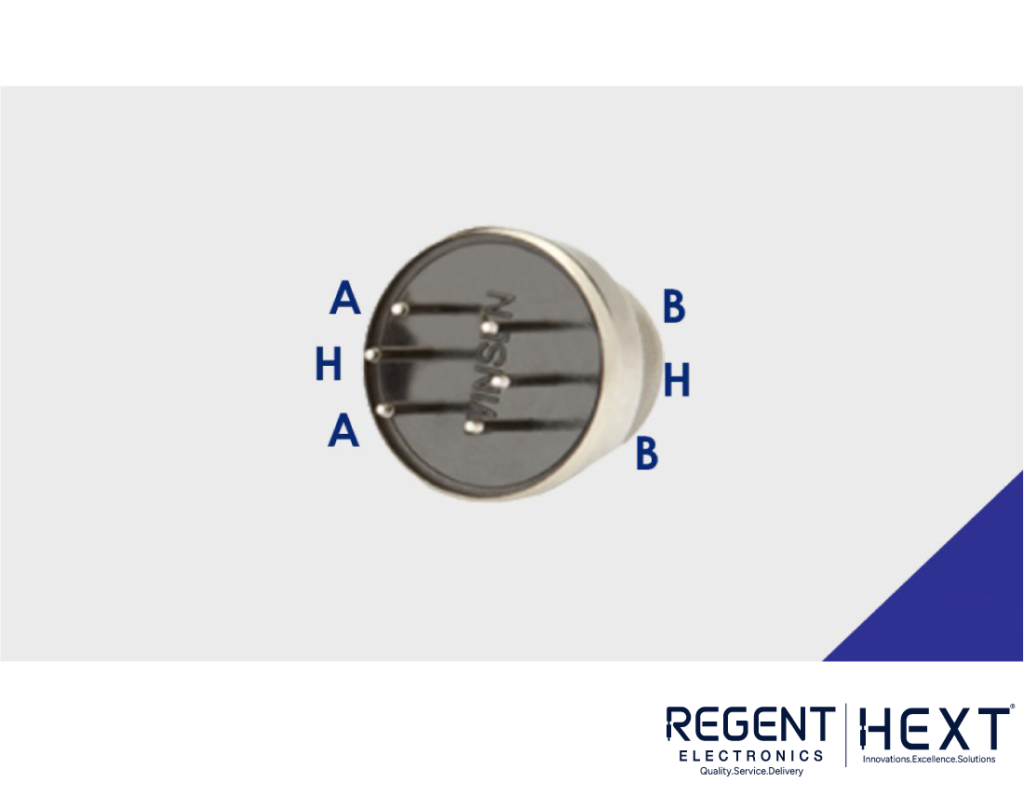
The sensor comprises six leads: two are used for heating the sensing element, while the remaining four are responsible for signal output. When gases come in contact with the heated sensor, oxygen atoms interact with the surface, affecting the electrical conductivity. This variation in conductivity is converted into an output signal, which provides the concentration level of the gas. A higher concentration results in a higher output voltage.
What is the MQ2 Gas Sensor?
The MQ2 gas sensor module is highly useful for detecting gas leaks in residential and industrial environments. It monitors the presence of gases in the atmosphere and operates at 5V with an 800mW power requirement.
Depending on the gas concentration, the sensor measures the potential difference, causing changes in resistance inside the sensor. The output voltage provides an indication of the gas type and concentration.
These sensors are typically available with a comparator that allows setting a threshold value for gas concentration. The digital output pin will activate only when the concentration exceeds the threshold value. The sensor can also operate in analog mode for precise gas concentration measurements.
Construction of the Gas Sensor

All gas sensors, including the MQ2, are typically constructed using metal oxide semiconductors. The main components of the MQ2 sensor include:
- Tubular ceramic structure
- Electrodes
- Heater coil
- Gas sensing layer
- Electrode lines
The sensing element processes various parameters to detect the type and concentration of gas.
Pin Configuration of the MQ2 Gas Sensor
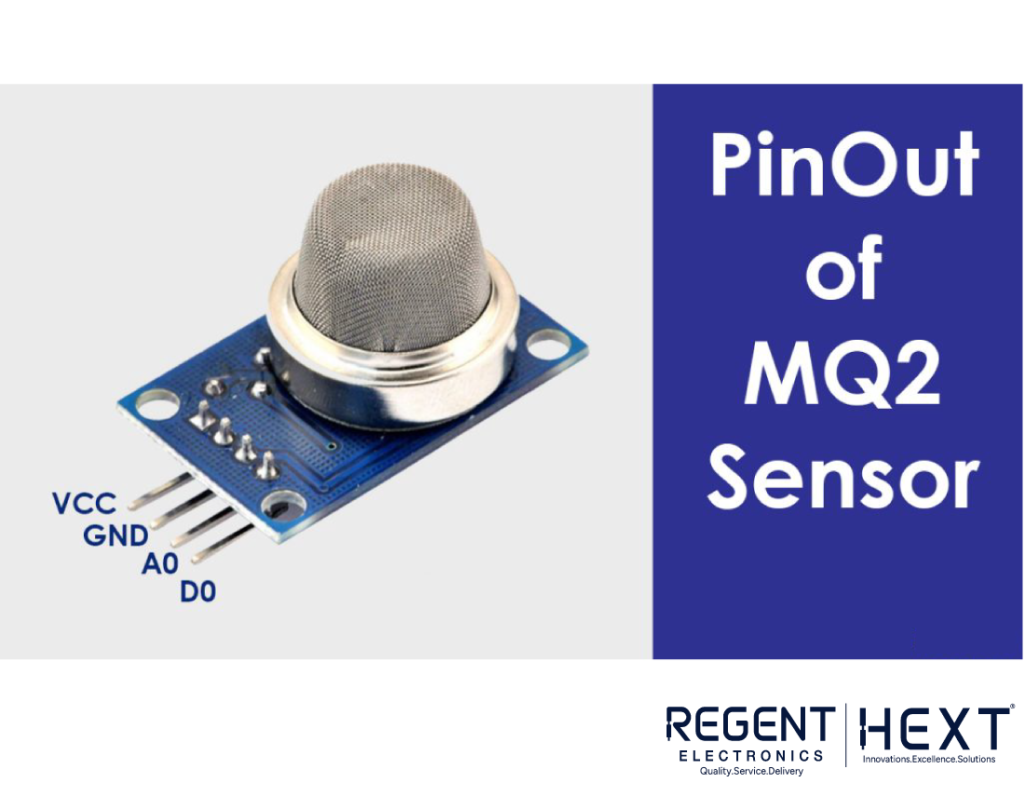
- VCC: Powers the sensor comparator board (Connect to 5V on the Arduino)
- GND: Ground pin (Connect to Arduino GND)
- D0: Digital output pin (Indicates gas detection)
- A0: Analog output pin (Provides gas concentration levels)
Adjusting the Sensitivity of the Gas Sensor
To adjust the sensor’s sensitivity to a specific gas:
- Expose the sensor to the desired gas type.
- Rotate the potentiometer on the sensor module.
- Turn the potentiometer clockwise to increase sensitivity or counterclockwise to decrease it.
- The red LED on the sensor will light up once the threshold value is reached.
- Calibration ensures accurate gas detection readings.
Components Required
- Arduino Uno
- Connecting cables
- Breadboard
- MQ2 Gas Sensor
- Dupont jumper cables
Interfacing MQ2 Sensor with Arduino
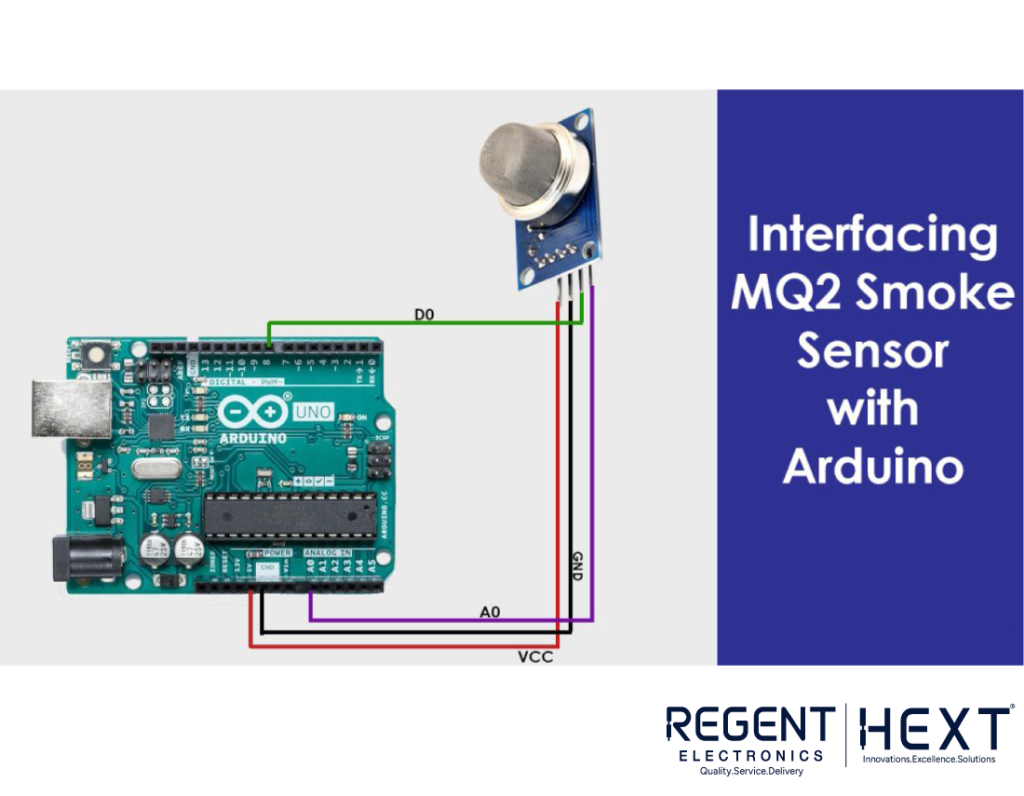
Follow the wiring diagram to connect the MQ2 sensor to the Arduino:
- Connect the VCC pin of the sensor to the 5V pin on the Arduino.
- Connect the GND pin of the sensor to the GND pin of the Arduino.
- Connect the D0 pin of the sensor to digital pin 8 on the Arduino.
- Connect the A0 pin of the sensor to analog pin A0 on the Arduino.
Code for MQ2 Gas Sensor with Arduino

To run the MQ2 sensor with Arduino, install the Arduino software and upload the following code:
#define MQ2pin (0)
float sensorValue; // Variable to store sensor value
void setup()
{
Serial.begin(9600); // Set serial communication baud rate
Serial.println(“Gas sensor warming up!”);
delay(20000); // Allow the MQ2 sensor to warm up
}
void loop()
{
sensorValue = analogRead(MQ2pin); // Read analog input from pin A0
Serial.print(“Sensor Value: “);
Serial.print(sensorValue);
if(sensorValue > 200)
{
Serial.print(” | Smoke detected!”);
}
Serial.println(“”);
delay(2000); // Wait for 2 seconds before the next reading
}

Conclusion
Thank you for reading! We hope this article has helped you understand how the MQ2 gas sensor works and how to interface it with an Arduino. Use this guide while working on your project, and feel free to share your feedback in the comments. Happy coding!