

DIY Arduino Radar System Using Ultrasonic Sensor: A Step-by-Step Guide
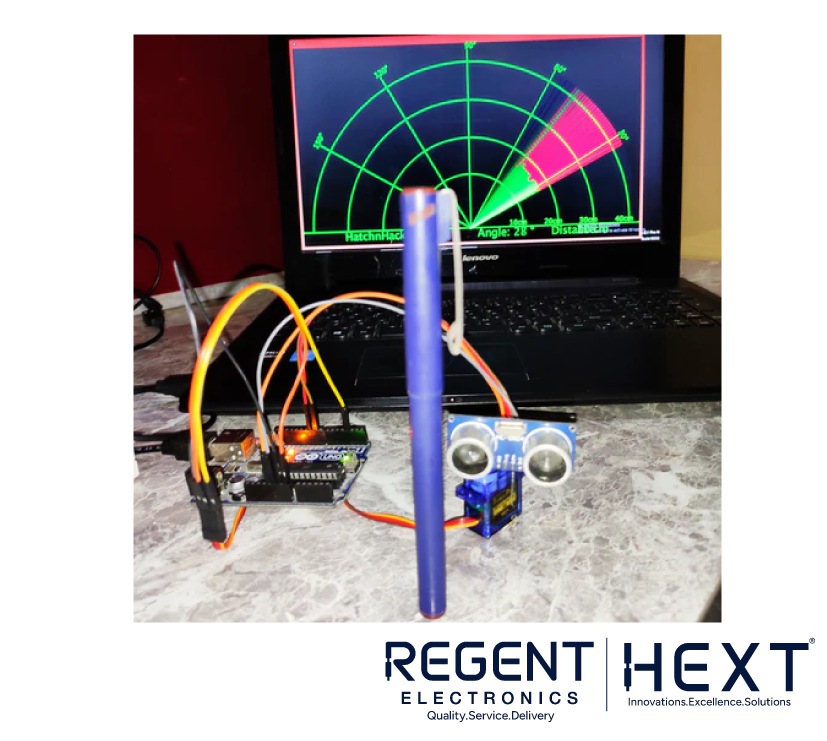
Create an impressive Arduino radar system with an ultrasonic sensor in this step-by-step tutorial by Regent Electronics. This exciting and educational project enables you to build a radar system to detect objects within a short range, making it perfect for robotics enthusiasts and obstacle-avoiding robots.
Components Needed
- Arduino Board
- HC-SR04 Ultrasonic Sensor
- SG90 Servo Motor
- Breadboard
- Connecting Wires
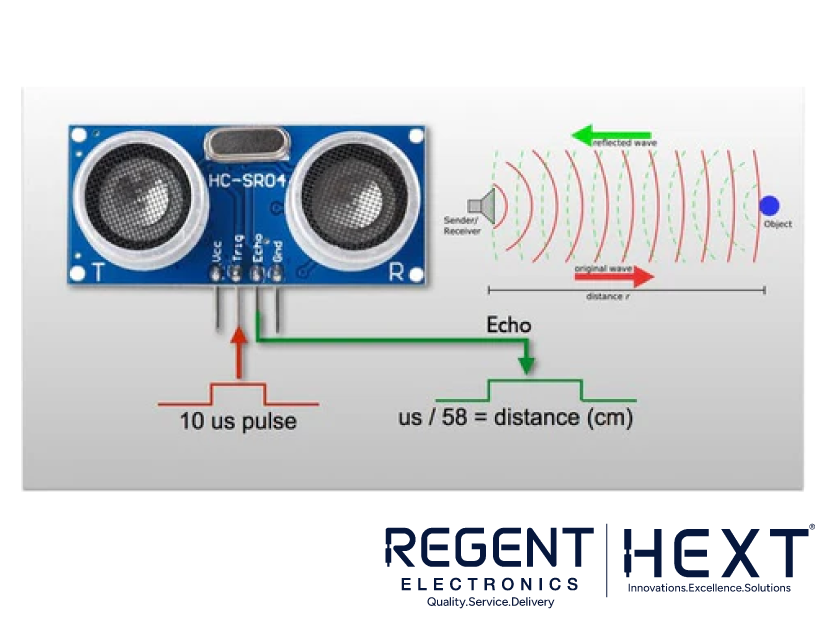
Understanding the HC-SR04 Ultrasonic Sensor
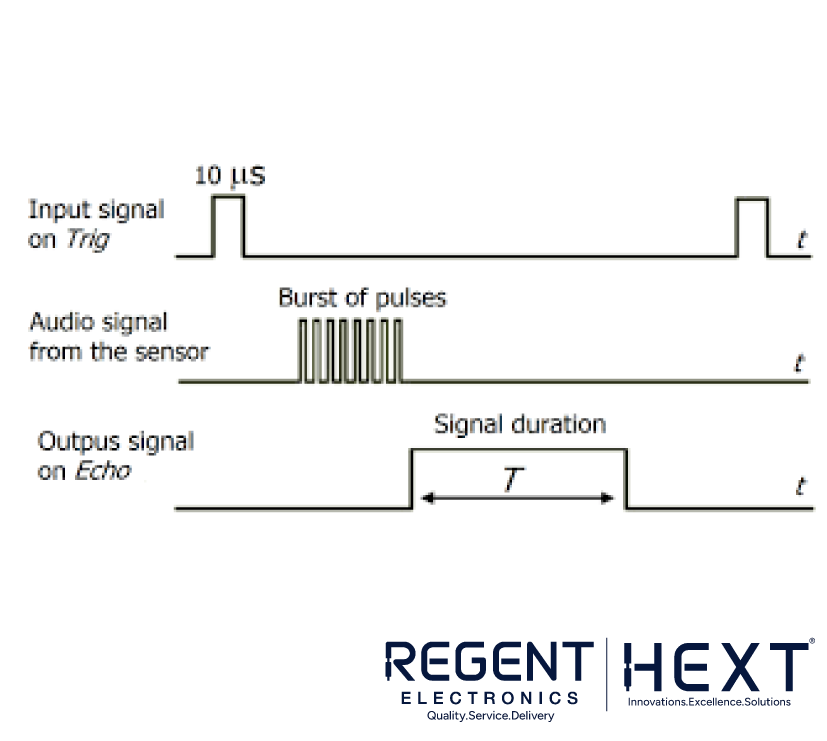
The HC-SR04 sensor is a reliable distance-measuring device. It features two cylindrical ultrasonic transducers: one transmits sound waves, and the other receives the reflected signal. Operating at 40 kHz, it measures the time taken for a sound wave to travel to an object and return, calculating distance using:
Distance=Time×Speed of Sound2\text{Distance} = \frac{\text{Time} \times \text{Speed of Sound}}{2}Distance=2Time×Speed of Sound
With an accuracy of 3 mm, the HC-SR04 is lightweight, easy to use, and compatible with 5V logic systems.
SG90 Servo Motor Overview
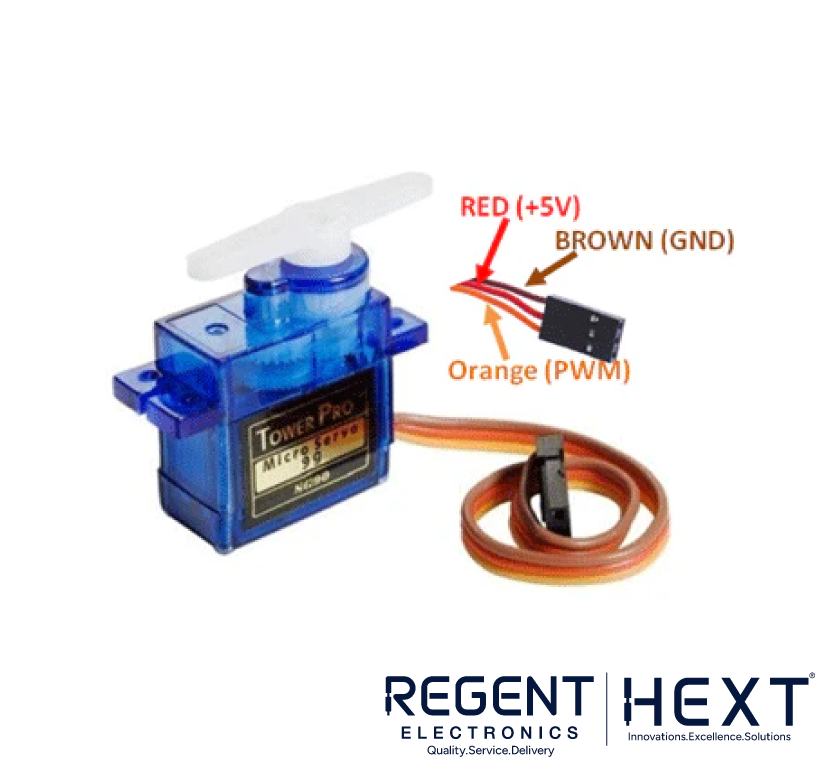
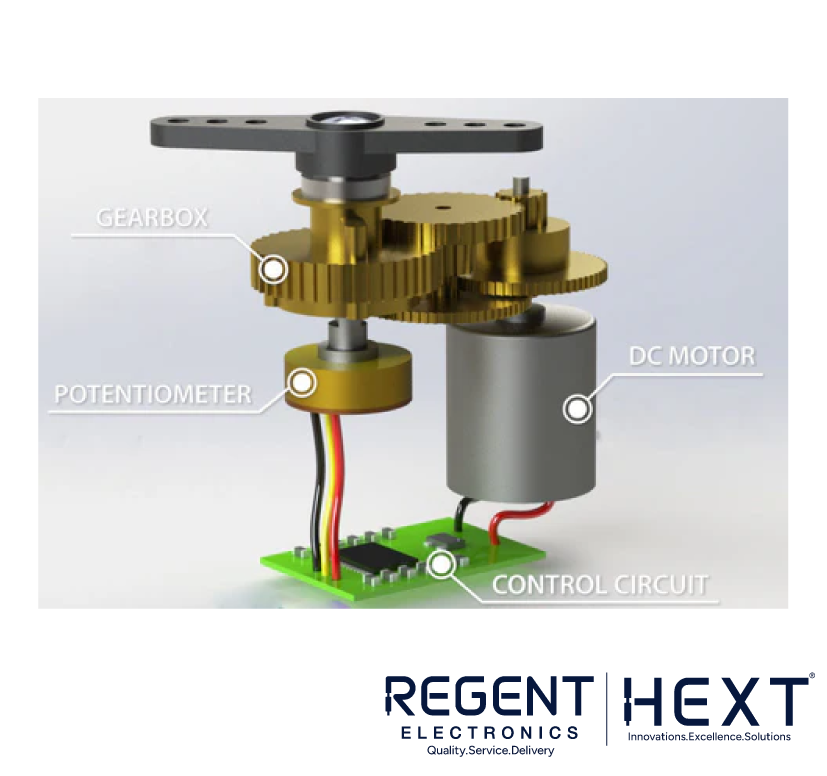
The SG90 servo motor is designed for precise control of angular movement. Equipped with a DC motor, potentiometer, gear assembly, and control circuit, it adjusts the motor’s position based on error signals generated from feedback. The motor rotates based on Pulse Width Modulation (PWM) signals:
- 1 ms Duty Cycle: 0°
- 1.5 ms Duty Cycle: 90°
- 2 ms Duty Cycle: 180°
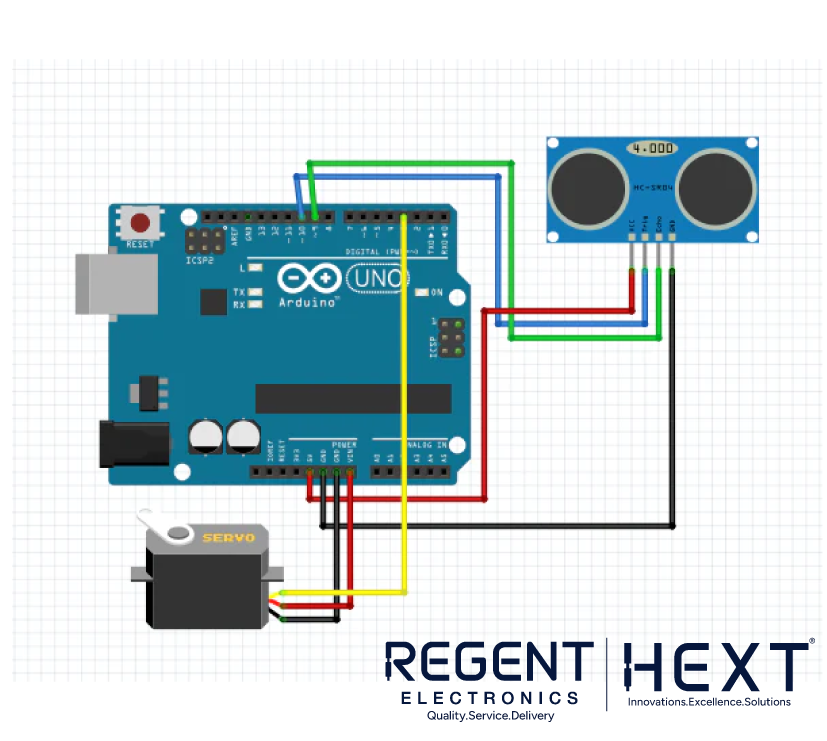
Interfacing the SG90 Servo Motor with Arduino
The servo motor operates at a PWM frequency of 50 Hz. By varying the duty cycle, you can control the motor’s position and speed. This functionality is essential for the radar system, which requires the motor to sweep a range of angles.
DIY Radar System: Features and Applications
This DIY radar mimics real radar systems by detecting objects and visualizing them. Applications include:
- Obstacle detection
- Motor coordination
- Distance measurement
- Data visualization
Note: Ensure the Arduino IDE has the Servo library installed.
Software Setup
- Processing Software: Download and install Processing Software.
- Serial Communication: Ensure compatibility between Arduino and Processing IDE.
Processing Code
java
CopyEdit
import processing.serial.*;
Serial myPort;
String angle = “”, distance = “”, data = “”;
int iAngle, iDistance;
void setup() {
size(1200, 700);
myPort = new Serial(this, “COM11”, 9600);
myPort.bufferUntil(‘.’);
}
void draw() {
background(0);
drawRadar();
drawObjects();
}
void serialEvent(Serial myPort) {
data = myPort.readStringUntil(‘.’);
String[] values = data.split(“,”);
if (values.length == 2) {
iAngle = int(values[0]);
iDistance = int(values[1]);
}
}
void drawRadar() {
translate(width / 2, height – 100);
stroke(0, 255, 0);
ellipse(0, 0, 400, 400);
line(0, 0, 200 * cos(radians(iAngle)), 200 * sin(radians(iAngle)));
}
void drawObjects() {
float distancePixels = map(iDistance, 0, 400, 0, 200);
ellipse(distancePixels * cos(radians(iAngle)), distancePixels * sin(radians(iAngle)), 10, 10);
}
Arduino Code
cpp
CopyEdit
#include <Servo.h>
const int trigPin = 10, echoPin = 9;
Servo servo;
long duration;
int distance;
void setup() {
pinMode(trigPin, OUTPUT);
pinMode(echoPin, INPUT);
servo.attach(3);
Serial.begin(9600);
}
void loop() {
for (int angle = 0; angle <= 180; angle++) {
servo.write(angle);
delay(30);
distance = getDistance();
sendData(angle, distance);
}
for (int angle = 180; angle >= 0; angle–) {
servo.write(angle);
delay(30);
distance = getDistance();
sendData(angle, distance);
}
}
int getDistance() {
digitalWrite(trigPin, LOW);
delayMicroseconds(2);
digitalWrite(trigPin, HIGH);
delayMicroseconds(10);
digitalWrite(trigPin, LOW);
duration = pulseIn(echoPin, HIGH);
return duration * 0.034 / 2;
}
void sendData(int angle, int distance) {
Serial.print(angle);
Serial.print(“,”);
Serial.print(distance);
Serial.println(“.”);
}
Final Thoughts
This radar system combines hardware and software to simulate real-world obstacle detection and object tracking. Whether you’re a beginner or an advanced maker, this project offers valuable insights into robotics and Arduino programming.