
DIY Smart Irrigation System using IoT: Build Your Own Efficient Garden Watering Solution
In today’s fast-paced world, time is valuable, and no one wants to waste it on mundane tasks like watering plants. However, plants and trees play a crucial role in our environment, offering benefits like air purification and reducing pollution. As water resources become increasingly scarce, efficient irrigation is more essential than ever. The good news is, with the help of IoT technology, we can automate this process and save both time and water.
This step-by-step guide will show you how to create a Smart Irrigation System for your garden using the power of the Internet of Things (IoT). By using sensors and NodeMCU, you can automate your irrigation system to water your plants based on soil moisture, temperature, humidity, and light levels.
Components Required for the DIY Smart Irrigation System:
- ESP8266 NodeMCU board: Acts as the central control unit.
- Breadboard: For connecting components.
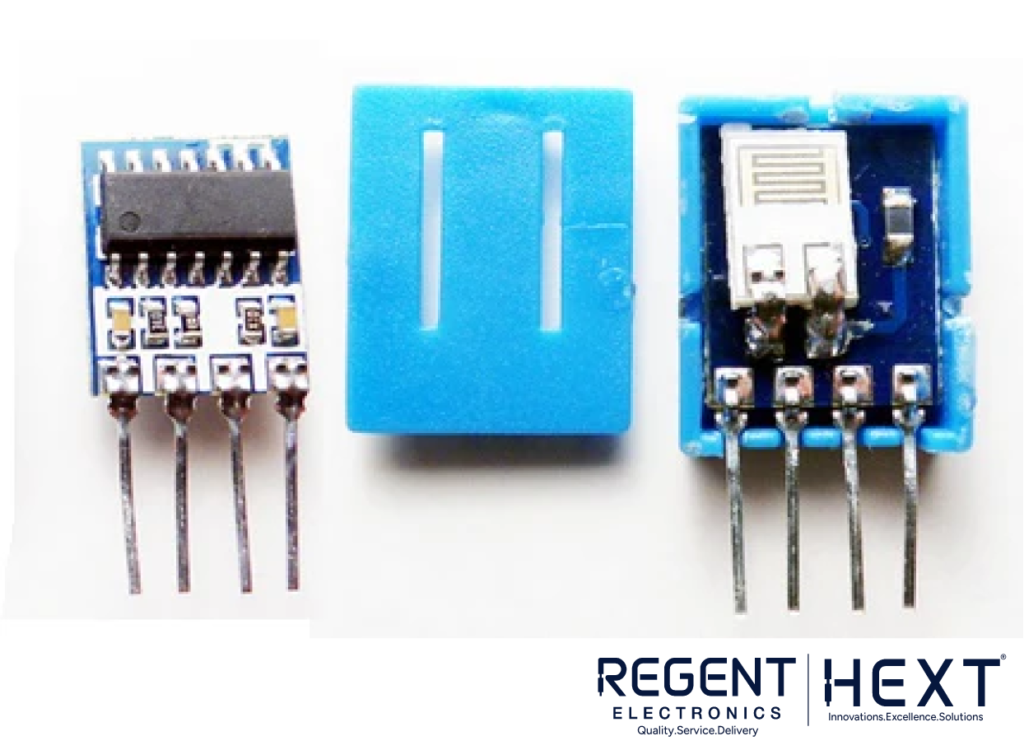
- Soil Moisture Sensor: Monitors the soil’s moisture level.
- DHT11 Temperature & Humidity Sensor: Measures temperature and humidity.
- Light Dependent Resistor (LDR): Detects light intensity.
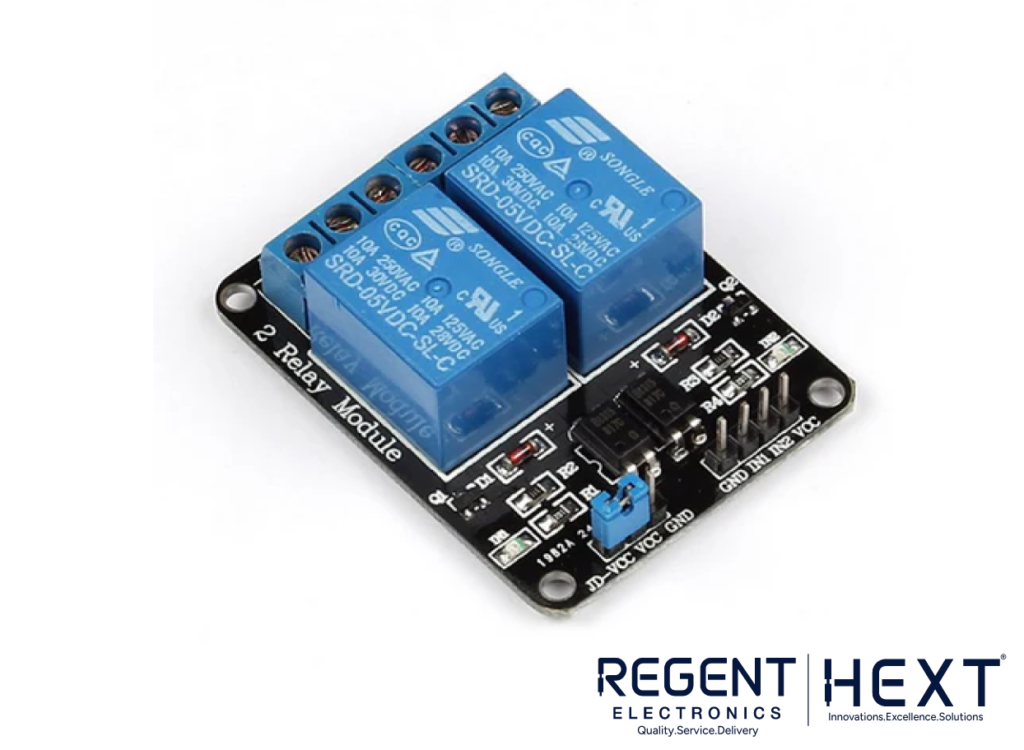
- Relay Module: Controls high voltage devices like pumps.
- Submersible Pump: For watering plants.
- Bulb & Holder: Provides lighting for the garden.
- Ultrasonic Sensor (HC-SR04): Measures the water level in the tank.
Understanding IoT (Internet of Things)

The Internet of Things (IoT) refers to the interconnection of everyday physical objects, devices, and systems that collect, exchange, and process data. IoT systems typically consist of sensors, actuators, and low-power microcontrollers. These interconnected devices exchange valuable data, enabling smarter decision-making and more efficient operations.
IoT offers numerous benefits, such as:
- Automation: IoT allows devices to perform tasks automatically without human intervention.
- Efficiency: Real-time data collection and analysis ensure optimal resource usage.
- Improved Convenience: IoT makes life easier by allowing remote control and monitoring of devices.
MQTT Protocol: Enabling Device Communication
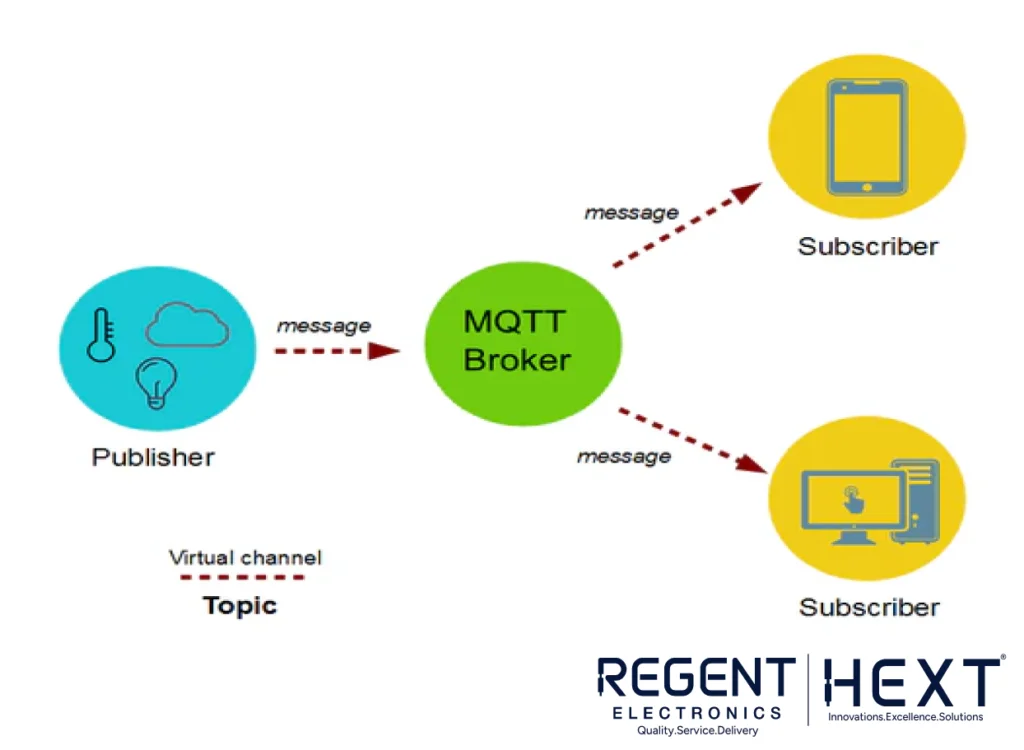
MQTT (Message Queue Telemetry Transport) is a lightweight messaging protocol designed for IoT applications. It enables communication between devices in a publish/subscribe manner. Devices can send data (publish) to a central server or MQTT broker, which then shares the information with subscribed clients. MQTT is perfect for IoT systems as it uses minimal bandwidth, ensuring reliable communication even in low bandwidth scenarios.
Introduction to ESP8266 NodeMCU


The ESP8266 NodeMCU is a microcontroller with built-in Wi-Fi capabilities. It enables you to connect your smart irrigation system to the internet, allowing you to monitor and control your garden remotely. It features 17 GPIO pins and supports both digital and analog inputs, making it ideal for IoT applications.
Step-by-Step Process: Building the Smart Irrigation System
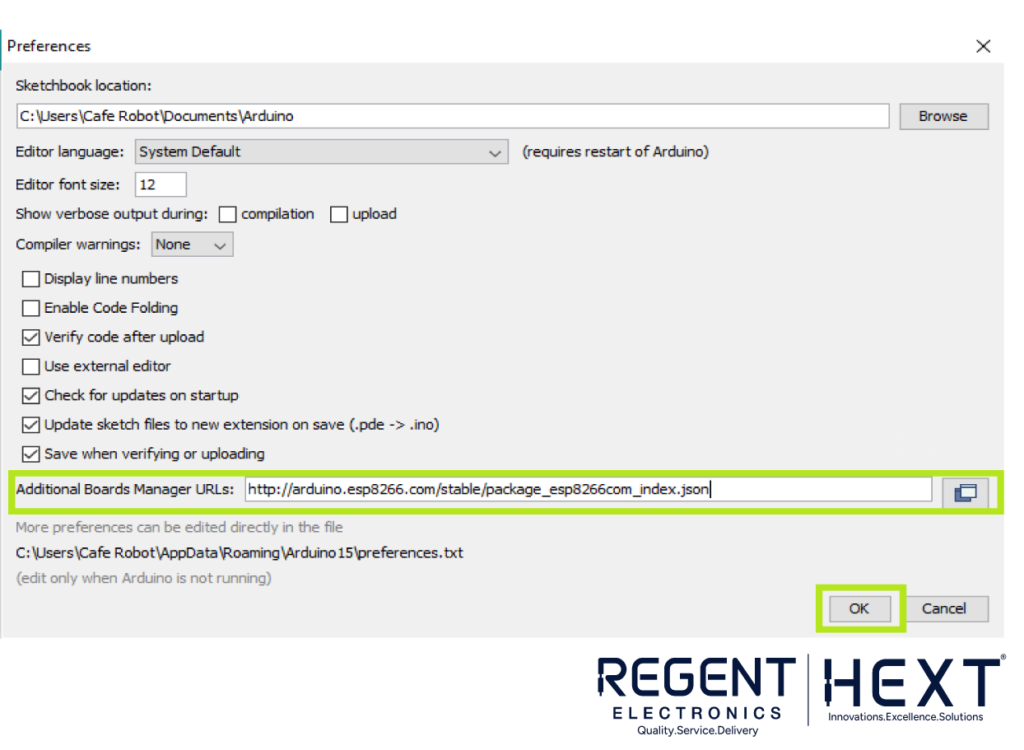
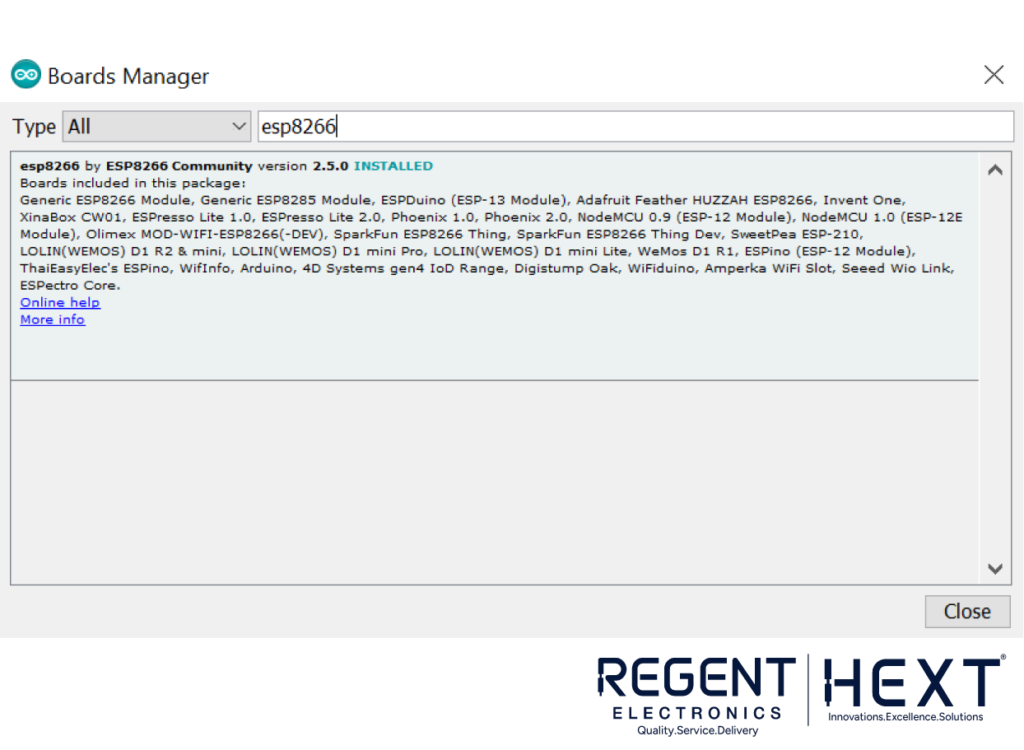
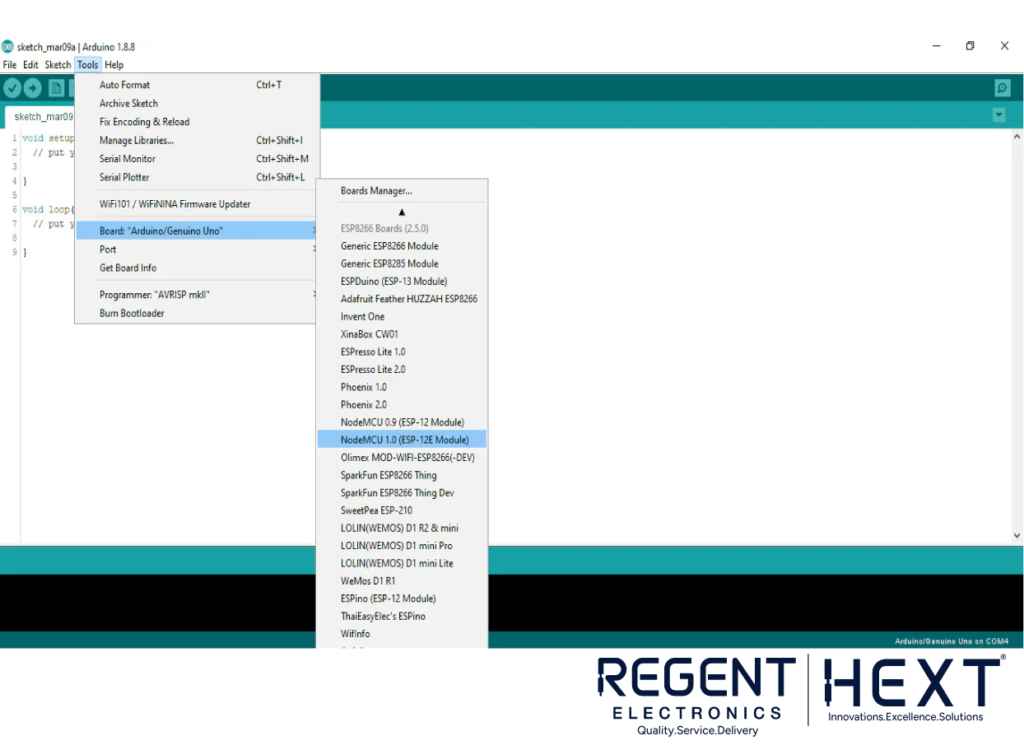
- Set Up the NodeMCU: Begin by installing the ESP8266 board in the Arduino IDE. This will allow you to program the NodeMCU to control your irrigation system.
- Sensor Configuration: Connect the soil moisture sensor, DHT11 sensor, ultrasonic sensor, and LDR to the NodeMCU. Each sensor will monitor different parameters such as moisture, temperature, humidity, and light.
- Relay Control: Use the relay module to control the submersible pump for irrigation and the bulb for garden lighting. These devices can be triggered based on the sensor readings.
- Cayenne IoT Dashboard: Create an account on Cayenne IoT platform to visualize the data from your sensors. You can also control the pump and light directly from the dashboard.
How the Sensors Work:
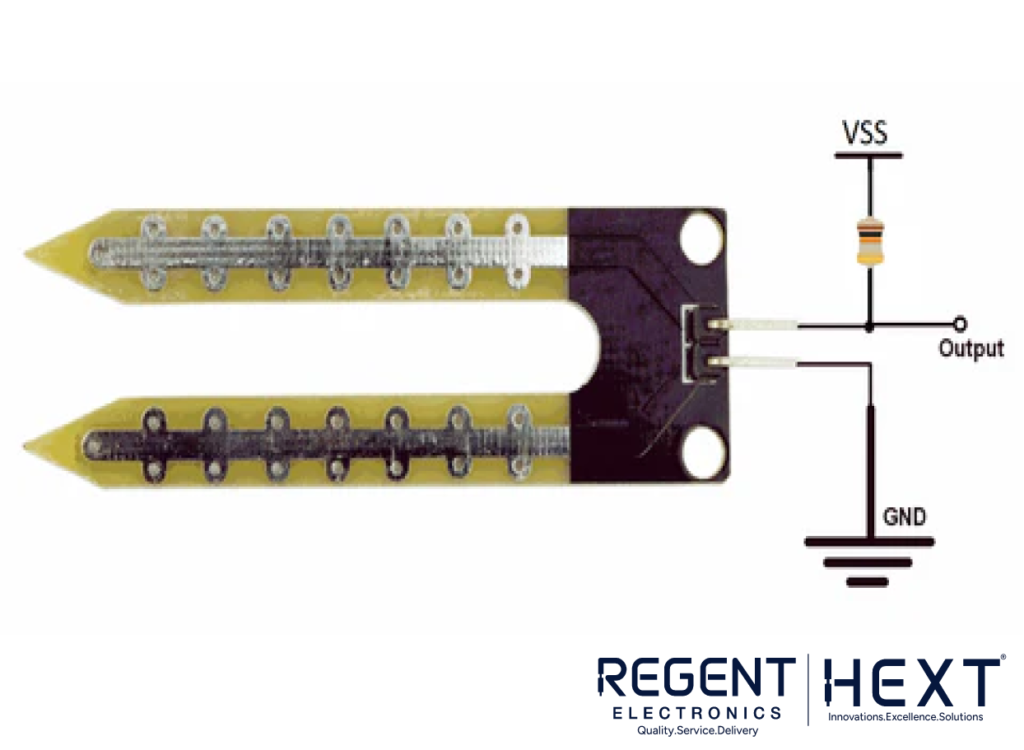

- Soil Moisture Sensor: Measures the amount of water in the soil. If the soil is dry, it will trigger the irrigation system to water the plants.
- DHT11 Sensor: Measures both temperature and humidity. It provides valuable data to optimize irrigation based on environmental conditions.
- LDR (Light Dependent Resistor): Measures the intensity of light. It helps in controlling the lighting system in the garden.
- HC-SR04 Ultrasonic Sensor: Measures the water level in the irrigation tank to ensure there’s enough water for the plants.


Programming the System
The system is programmed using the Arduino IDE. You will use Cayenne MQTT to send sensor data to the IoT dashboard, where you can view real-time information and control the irrigation pump and light remotely.


Advantages of the Smart Irrigation System
- Water Conservation: The system waters plants only when necessary, reducing water wastage.
- Remote Monitoring: You can monitor and control your garden from anywhere using a smartphone or computer.
- Energy Efficiency: The system uses solar-powered pumps and lighting, making it environmentally friendly.
Conclusion: Embrace Smart Gardening with IoT
By implementing a DIY Smart Irrigation System using IoT, you can optimize water usage, save time, and maintain a healthy garden effortlessly. The IoT-based system allows you to control your irrigation system remotely, ensuring your plants are always properly watered, regardless of your busy schedule.
For a sustainable and green environment, IoT provides a simple yet powerful solution that transforms everyday gardening tasks into automated processes. Start building your smart irrigation system today!