
Mastering DIY Soldering and Desoldering: Essential Skills for Electronics Enthusiasts
Soldering and desoldering are crucial skills for anyone working with electronics. Whether you’re repairing a broken gadget or building your own devices, understanding how to properly solder and desolder is essential. In this tutorial, we’ll walk you through the basics of soldering, desoldering, and the tools you’ll need to get started. By the end of this guide, you’ll be equipped to handle all your DIY electronics projects with confidence.
Essential Components for Soldering and Desoldering
To get started with soldering and desoldering, you’ll need the right tools and materials. Here’s a list of the items you’ll require for successful soldering:
- Soldering Iron
- Soldering Iron Stand
- Solder Wire
- Flux Paste
- Wire Cutter/Nippers
- Copper Mesh/Sponge
- Desoldering Pump
- Desoldering Wick
- Fume Absorber
- Helping Hands Tool
- Magnifier
- Complete Soldering Kit
These tools can be easily found at Regent Electronics, your go-to source for quality soldering supplies.
What is Soldering?
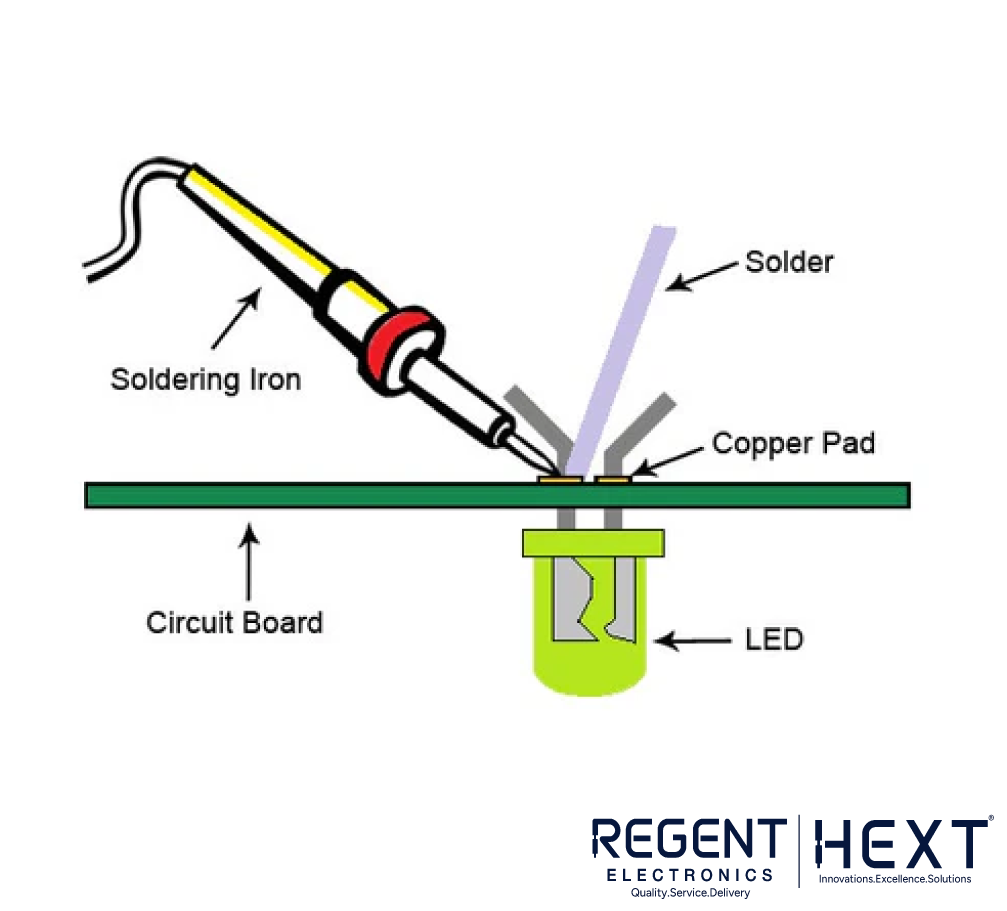
Soldering is the process of joining two electronic components together by melting solder around a connector. Solder is a metal alloy, typically composed of tin and lead or lead-free variants like tin-copper. It’s used to form a conductive link between electronic parts as it cools and solidifies. Unlike welding, which involves melting the components themselves, soldering only melts the solder material to create the joint.
For most basic electronic soldering, you’ll want to use rosin-core solder (60/40 tin-lead or lead-free alternatives). The rosin core prevents oxidation and helps the solder flow smoothly during the process.
Understanding Flux Paste
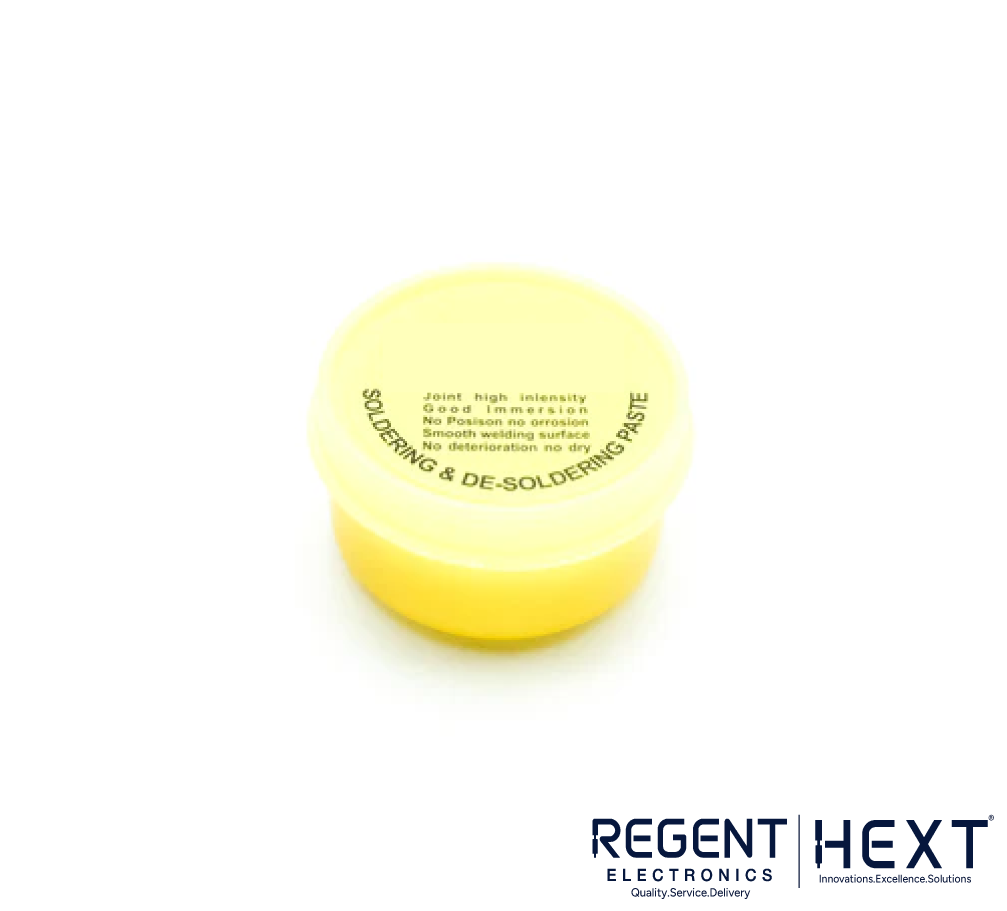
Flux is a vital component in soldering. It helps reduce oxidation and enhances the flow of solder onto the metal surfaces. Flux is applied to the components and PCB (Printed Circuit Board) before soldering, ensuring a clean and efficient connection. It also aids in wetting, reducing surface tension, and allowing the solder to adhere better.
Tip: While rosin-core solder already contains flux, you can also use additional liquid flux for improved results, especially when working with surface-mount components.
Choosing the Right Soldering Iron
The soldering iron is the primary tool for melting solder. It consists of a metal tip that heats up to the desired temperature. For beginners, a 25-50W soldering iron with adjustable power is ideal. You’ll also need a soldering iron stand to keep the tool safe when not in use.


Types of Soldering Iron Tips:
- Conical Tip: Best for precision work and small components.
- Chisel Tip: Ideal for larger components or wires.
Make sure your iron’s tip is clean and shiny before use. Regularly tin the tip with solder to ensure smooth heat transfer.
Preparing for Soldering

Before you begin, make sure your workspace is clean and well-ventilated. Proper airflow helps dissipate any fumes generated by the flux and solder. Consider using a fume absorber to eliminate harmful vapors.
Ensure that all components and the PCB are clean. Use a brass sponge or isopropyl alcohol (IPA) to remove any wax or oils from the surface.
Important Safety Tip: Soldering irons are extremely hot and should be handled with caution. Always keep the iron’s power cord out of the way to avoid accidents.
Common Soldering Mistakes to Avoid
One of the most common issues in soldering is the cold solder joint, which occurs when the solder does not properly flow onto the components. A cold solder joint will be weak and may not create a reliable electrical connection. To prevent this, ensure the soldering iron is heating both the pad and the pin evenly before applying solder.
Step-by-Step Soldering Process
- Heat the Connection: Hold the soldering iron tip against the pin and PCB for a few seconds to heat them.
- Apply Solder: Feed a small amount of solder onto the joint. The solder should flow smoothly around the pin and the PCB pad.
- Remove the Iron: Carefully remove the soldering iron while keeping the joint still to avoid disrupting the solder.
- Inspect the Joint: The solder should form a small, shiny “volcano” shape. If it looks dry or cracked, apply more solder.
If you make a mistake, don’t worry! You can always desolder and try again.
Cleaning the Soldering Iron Tip
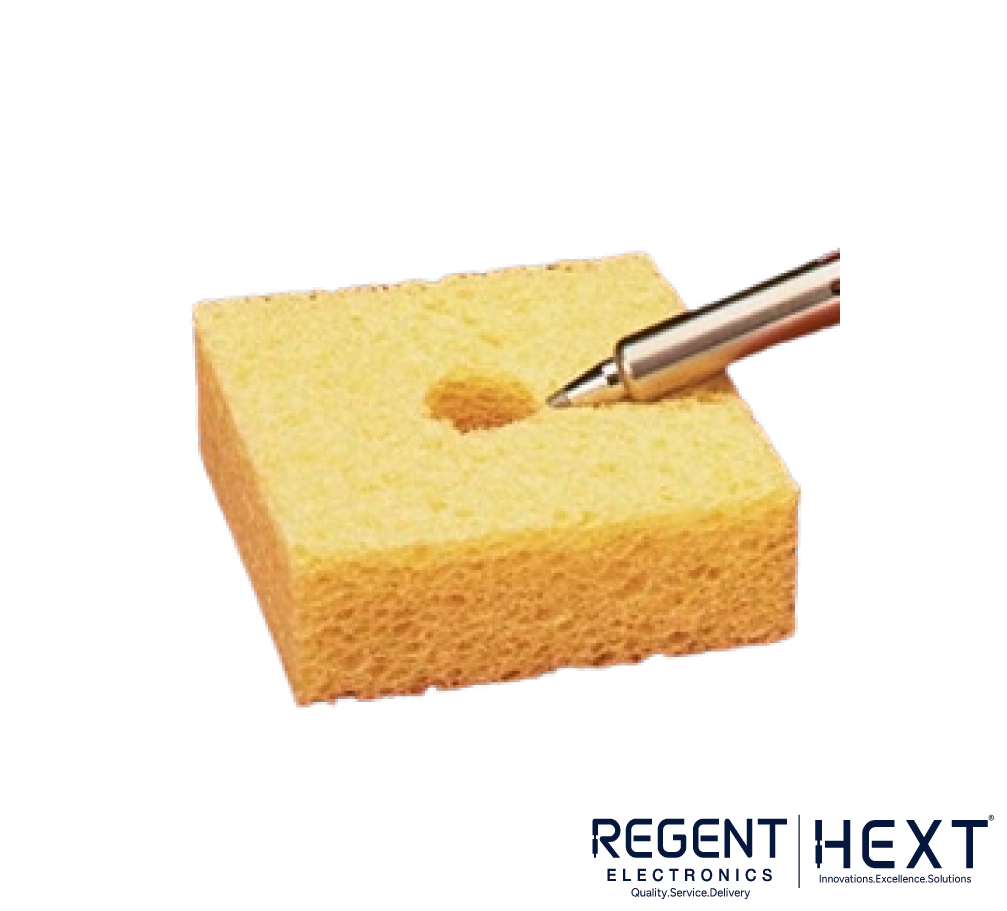
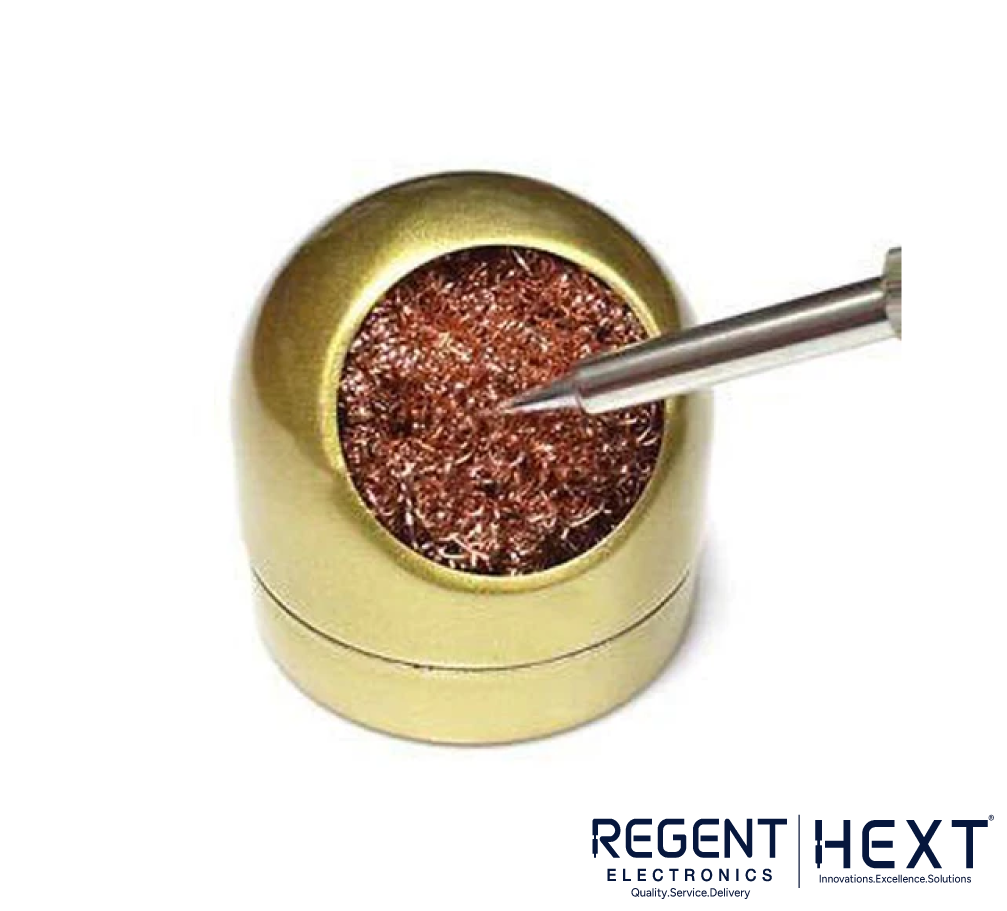
To maintain your soldering iron’s performance, regularly clean the tip. A wet sponge or copper mesh is ideal for cleaning. Avoid using soap on the sponge, as it can leave residues that affect soldering quality.
Desoldering: How to Remove Solder


Desoldering is the process of removing solder from a joint, typically when you need to fix a mistake or replace a component. The tools you’ll need for desoldering include a desoldering pump and desoldering wick.
Steps for Desoldering:
- Heat the Joint: Use your soldering iron to melt the solder.
- Use the Solder Sucker: Quickly depress the plunger of the desoldering pump to remove the melted solder.
- Use Desoldering Wick: If there’s still some solder left, place the wick on the joint and reheat it. The solder will be absorbed into the wick.
- Clean the Area: Use steel wool to remove any leftover solder or rosin.
Conclusion
Mastering soldering and desoldering is an essential skill for anyone interested in electronics. Whether you’re repairing gadgets or building custom circuits, knowing how to properly solder and desolder will ensure that your projects are both functional and reliable.
At Regent Electronics, we offer all the tools you need to get started, from beginner soldering kits to advanced desoldering tools. Ready to dive into your next DIY project? Explore our collection and start creating today!