

GSM-Based Agricultural Motor Control Using Arduino – Connections, Interfacing & Code
Let’s explore how to design a Smart Irrigation System using a GSM Module and control DC Motors remotely by sending an SMS through a smartphone.
Control Your Motor Using GSM Module – Complete Guide – Regent Electronics
In this article, we will learn how to operate a motor from remote locations using Arduino and a GSM Module.
The concept behind this project arises from the challenges faced by farmers. In many cases, farmlands are located far from farmers’ homes, requiring them to travel significant distances to irrigate crops.
Irrigation is a crucial aspect of farming. Since it needs to be done regularly, farmers must visit their fields daily to turn the irrigation system on and off. This results in time and fuel wastage.
With GSM-based agricultural motor control, farmers can remotely control irrigation systems using just a mobile phone.
Advantages of GSM-Based Agriculture Motor Control
- Saves farmers time and money.
- Enables remote moisture control of farmland.
- Increases agricultural productivity.
- Allows farmers to focus on other critical tasks.
- Easy to design and implement.
Working of Smart Irrigation System
We have simplified this project for both beginners and experts.
Overview of the Smart Irrigation System
The GSM module is connected to Arduino. When a farmer sends an SMS to turn ON the motor, the GSM module receives it and forwards it as a signal to the Arduino board.
The Arduino then triggers the relay to turn ON the water pump, initiating the irrigation process.
Similarly, when the farmer sends an OFF command, the Arduino deactivates the relay, shutting down the motor pump.
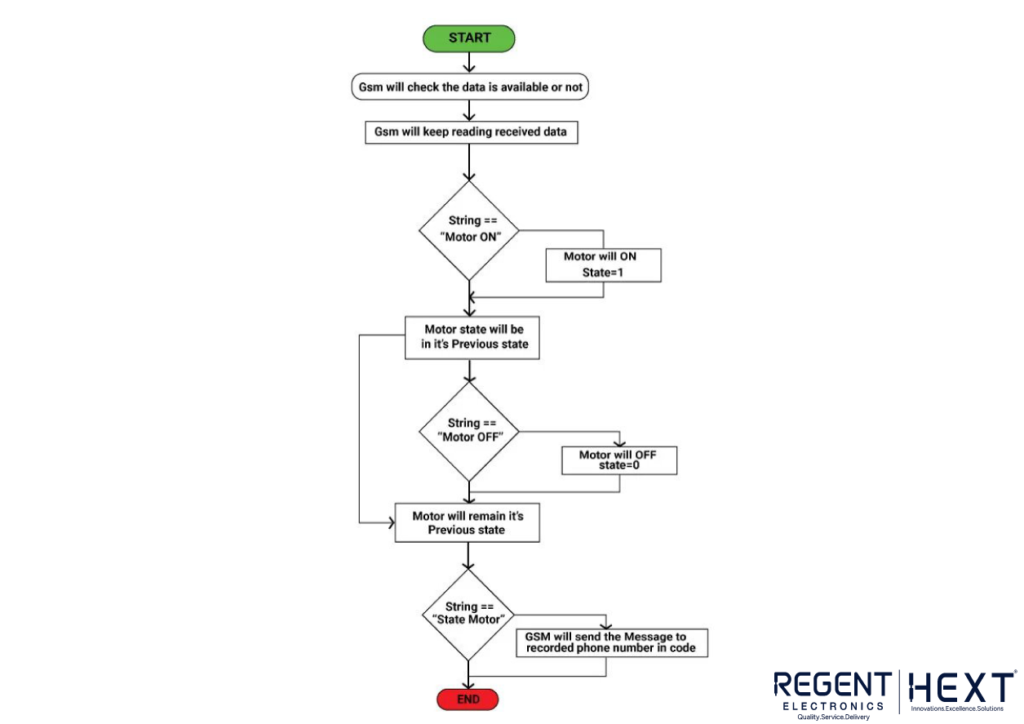
Flowchart of the Smart Irrigation System
- Farmer sends SMS (Motor ON/OFF command).
- GSM Module receives the SMS and transmits the data to Arduino.
- Arduino processes the command and switches the relay accordingly.
- Relay turns the water pump ON/OFF.
- Farmer receives confirmation SMS about motor status.
What is a GSM Module?

A GSM module is a type of modem that accepts a SIM card and allows a device to send and receive calls and messages over a mobile network.
The GSM module communicates with the Arduino using AT commands, which control various functions like SMS sending and receiving.
Components Required for This Project
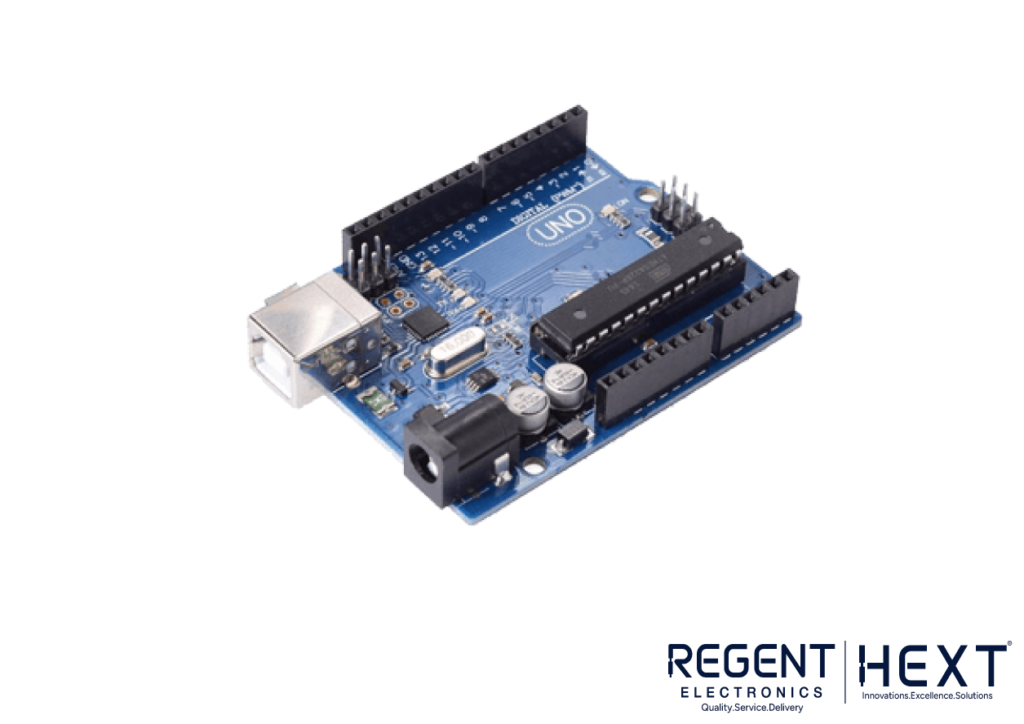


- Arduino UNO
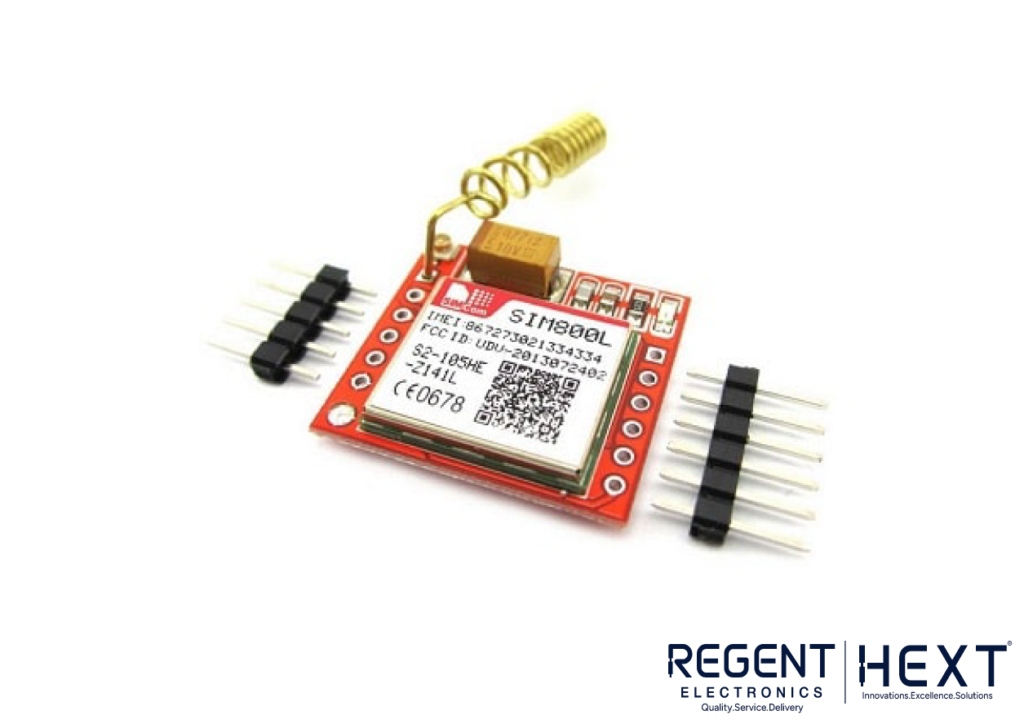
- SIM800L GSM Module
- 16×2 LCD Display
- Jumper Wires
- 5V DC Relay
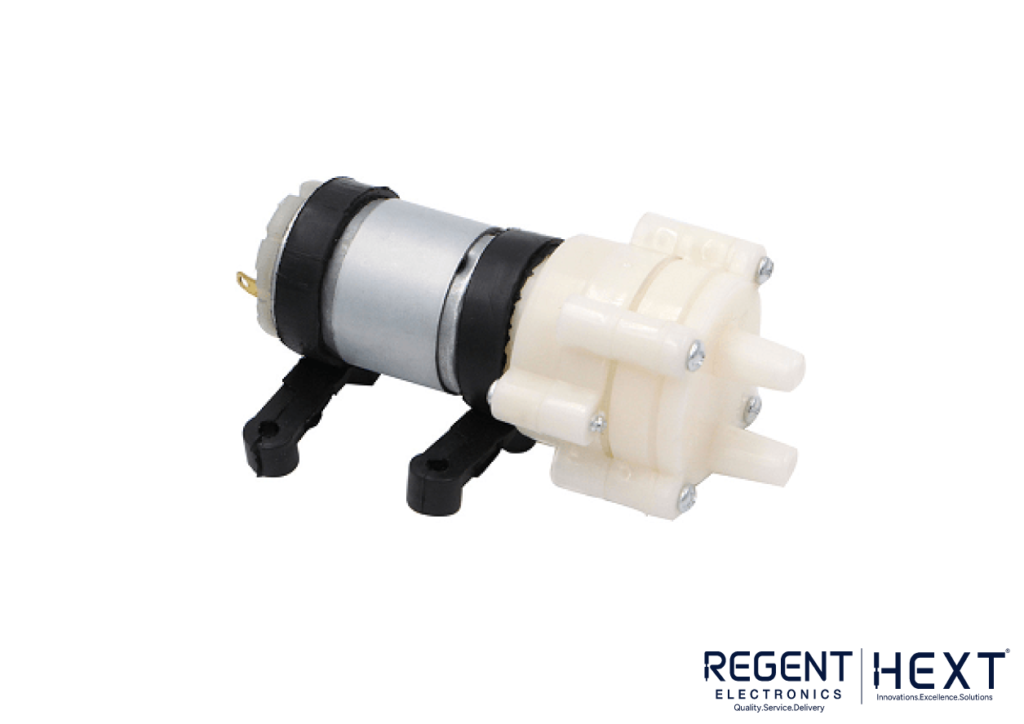
- Water Pump (DC Motor)
- Power Supply (12V Adapter)
Circuit Connections

Connecting the LCD Module to Arduino
| Arduino Pin | LCD Pin |
| 7 | RS |
| 6 | EN |
| 5 | D4 |
| 4 | D5 |
| 3 | D6 |
| 2 | D7 |
Connecting GSM Module to Arduino
- Vcc of GSM → 5V (Arduino)
- GND of GSM → GND (Arduino)
- Rx of GSM → Tx (Pin 8 Arduino)
- Tx of GSM → Rx (Pin 9 Arduino)
Connecting Water Pump to Arduino
The relay module acts as a switch between Arduino and the water pump.
- Relay IN → Pin 10 (Arduino)
- Relay NO (Normally Open) Pin → One terminal of Water Pump
- Water Pump second terminal → +12V Power Supply
- Relay Common (COM) Pin → -12V Power Supply
Arduino Code for GSM-Based Motor Control
const int motor = 10;
#include <LiquidCrystal.h>
const int rs = 7, en = 6, d4 = 5, d5 = 4, d6 = 3, d7 = 2;
LiquidCrystal lcd(rs, en, d4, d5, d6, d7);
#include <SoftwareSerial.h>
SoftwareSerial SIM900(9,8);
String textMessage;
String message, motorState;
void setup() {
pinMode(motor ,OUTPUT);
Serial.begin(19200);
lcd.begin(16, 2);
lcd.setCursor(0, 0);
lcd.print(“System is On”);
delay(1500);
SIM900.begin(19200);
delay(3000);
SIM900.print(“AT+CMGF=1\r”);
delay(100);
SIM900.print(“AT+CNMI=2,2,0,0,0\r”);
delay(100);
}
void loop() {
if(SIM900.available()>0){
textMessage = SIM900.readString();
Serial.print(textMessage);
delay(10);
}
if(textMessage.indexOf(“motor on”)>=0){
digitalWrite(motor, HIGH);
motorState = “on”;
Serial.println(“Motor set to ON”);
textMessage = “ON”;
lcd.setCursor(0, 1);
lcd.print(“Motor ON”);
delay(1000);
}
if(textMessage.indexOf(“motor off”)>=0){
digitalWrite(motor, LOW);
motorState = “off”;
Serial.println(“Motor set to OFF”);
textMessage = “OFF”;
}
if(textMessage.indexOf(“state motor”)>=0){
message = “Motor is ” + motorState;
Serial.println(“Motor status requested”);
textMessage = “”;
}
}
Using the Smart Irrigation System
Precautions
- Replace ********** with your mobile number in the code.
- Ensure the SIM card has valid outgoing & incoming SMS services enabled.
- Keep the setup in a dry environment.
Steps to Use
- Turn on the system. You will receive a confirmation SMS.
- Send “Motor On” SMS to the registered number.
- The GSM module receives the SMS and forwards it to the Arduino.
- Arduino activates the relay to turn ON the motor.
- After watering, send “Motor Off” SMS.
- The relay deactivates, turning OFF the motor.
- To check motor status, send “State Motor” SMS.
Final Thoughts
This project is simple yet highly beneficial for farmers. It reduces manual effort, saves resources, and increases efficiency. By using GSM-based remote control, farmers can focus on other vital agricultural tasks while ensuring proper irrigation.
If you have any queries, feel free to comment below. Happy Farming!