
How to Control Devices Remotely Using the Arduino MKR WiFi 1010 Web Server
When you have a variety of electrical devices in your home, office, or industrial setting, it’s important to have an efficient way to control them. A centralized control system allows you to turn devices on or off from a single point. In this project, we’ll show you how to build a simple web server using the Arduino MKR WiFi 1010 to control electrical devices remotely. This setup will include a web page with buttons to turn two relays on and off, which will control electrical devices connected to the relays.
Required Components
- Arduino MKR WiFi 1010
- USB micro cable
- 2-channel relay module
- 5V 2A power adapter
- Jumper wires
- MOSFET IRF540
- 1kΩ resistors
- 10kΩ resistor
- Breadboard
Circuit Design and Explanation
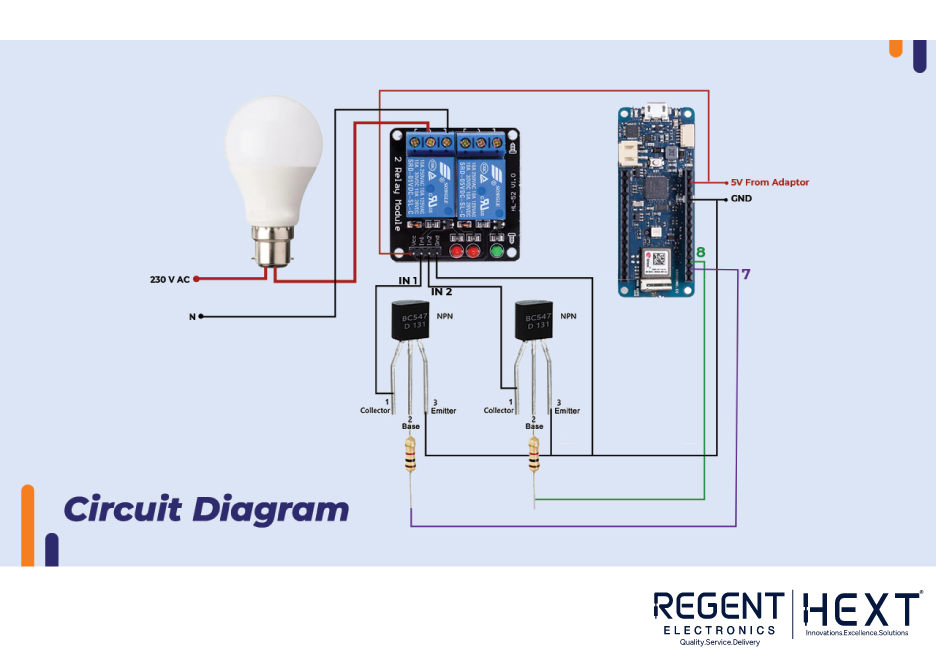
The relay module is interfaced with the Arduino MKR using a BC547 transistor. Since the MKR WiFi 1010 outputs only 3.3V on its digital pins, this voltage is insufficient to activate the relays. Relays require 5V to work properly, and that’s where the transistor comes in. The transistor acts as a switch, allowing the relay to be activated when the base of the transistor is supplied with 3.3V from the Arduino.
The electrical device is connected in series with the relay’s normally open (NO) switch. When the relay is activated, 230V will be supplied to the connected device.
Making the Arduino MKR WiFi 1010 Compatible with the Arduino IDE
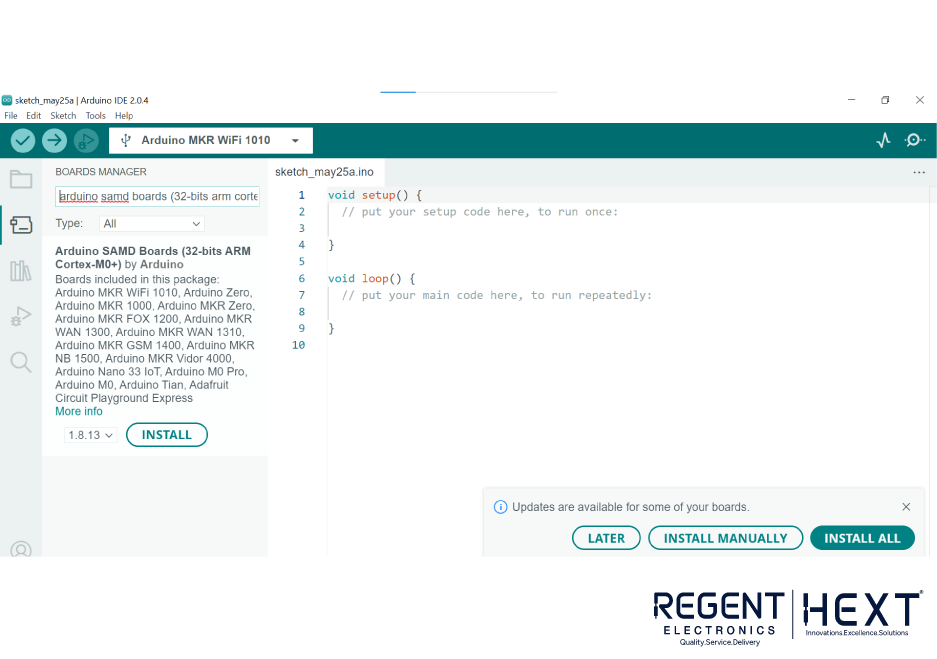
Before starting the project, you need to make sure your Arduino MKR WiFi 1010 is compatible with the Arduino IDE.
- Open the Arduino IDE and go to Board Manager.
- Search for “Arduino MKR” and install the necessary board package.
Once this is done, upload a simple LED-blinking test code to verify that the board is working. The on-board LED is connected to Pin 6.
To create the web server, you’ll need the WiFiNINA library. Follow these steps to install the library:
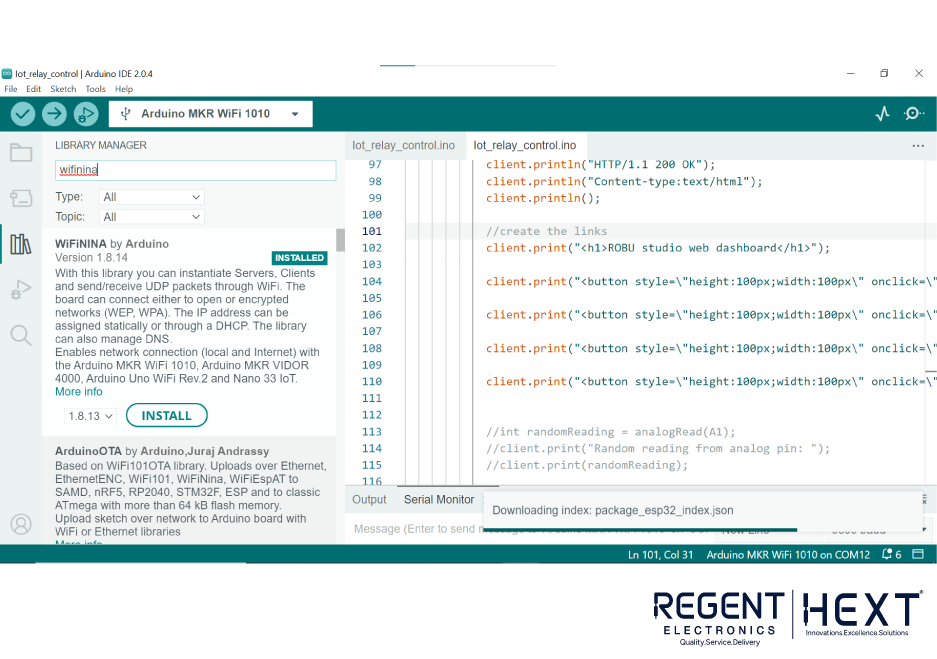
- Open the Library Manager in the Arduino IDE.
- Search for “WiFiNINA” and install it.
Arduino Code for Web Server
Below is the code for setting up the web server:
#include <WiFiNINA.h>
char ssid[] = “your_network_SSID”; // Enter your WiFi network SSID
char pass[] = “your_network_password”; // Enter your WiFi network password
int status = WL_IDLE_STATUS;
WiFiServer server(80); // Define server socket
WiFiClient client = server.available();
int bulbPin = 7;
int fanPin = 8;
void setup() {
Serial.begin(9600);
pinMode(bulbPin, OUTPUT);
pinMode(fanPin, OUTPUT);
while (!Serial);
connectWiFi();
server.begin();
printWifiStatus();
}
void loop() {
client = server.available();
if (client) {
printWebPage();
}
}
void connectWiFi() {
while (status != WL_CONNECTED) {
Serial.print(“Attempting to connect to SSID: “);
Serial.println(ssid);
status = WiFi.begin(ssid, pass);
delay(10000); // Wait for 10 seconds before retrying
}
}
void printWifiStatus() {
Serial.print(“Connected to: “);
Serial.println(WiFi.SSID());
IPAddress ip = WiFi.localIP();
Serial.print(“IP Address: “);
Serial.println(ip);
}
void printWebPage() {
if (client) {
String currentLine = “”;
while (client.connected()) {
if (client.available()) {
char c = client.read();
Serial.write(c);
if (c == ‘\n’) {
if (currentLine.length() == 0) {
client.println(“HTTP/1.1 200 OK”);
client.println(“Content-type:text/html”);
client.println();
client.print(“<h1>Arduino Web Control</h1>”);
client.print(“<button onclick=\”window.location.href = ‘http://192.168.1.1/H’;\”>Turn on Bulb</button>”);
client.print(“<button onclick=\”window.location.href = ‘http://192.168.1.1/L’;\”>Turn off Bulb</button><br><br>”);
client.print(“<button onclick=\”window.location.href = ‘http://192.168.1.1/Y’;\”>Turn on Fan</button>”);
client.print(“<button onclick=\”window.location.href = ‘http://192.168.1.1/N’;\”>Turn off Fan</button>”);
break;
} else {
currentLine = “”;
}
} else if (c != ‘\r’) {
currentLine += c;
}
if (currentLine.endsWith(“GET /H”)) {
digitalWrite(bulbPin, HIGH);
}
if (currentLine.endsWith(“GET /L”)) {
digitalWrite(bulbPin, LOW);
}
if (currentLine.endsWith(“GET /Y”)) {
digitalWrite(fanPin, HIGH);
}
if (currentLine.endsWith(“GET /N”)) {
digitalWrite(fanPin, LOW);
}
}
}
client.stop();
Serial.println(“Client disconnected”);
}
}
Testing the Web Server
- Once the code is uploaded, open the Serial Monitor. You should see a message that says, “Attempting to connect to SSID”.
- Wait for the board to connect to the Wi-Fi network. When connected, the IP address of the board will be displayed.
- On the same Wi-Fi network, open a web browser and enter the IP address. The web page will appear, displaying buttons to control the electrical devices.
Conclusion
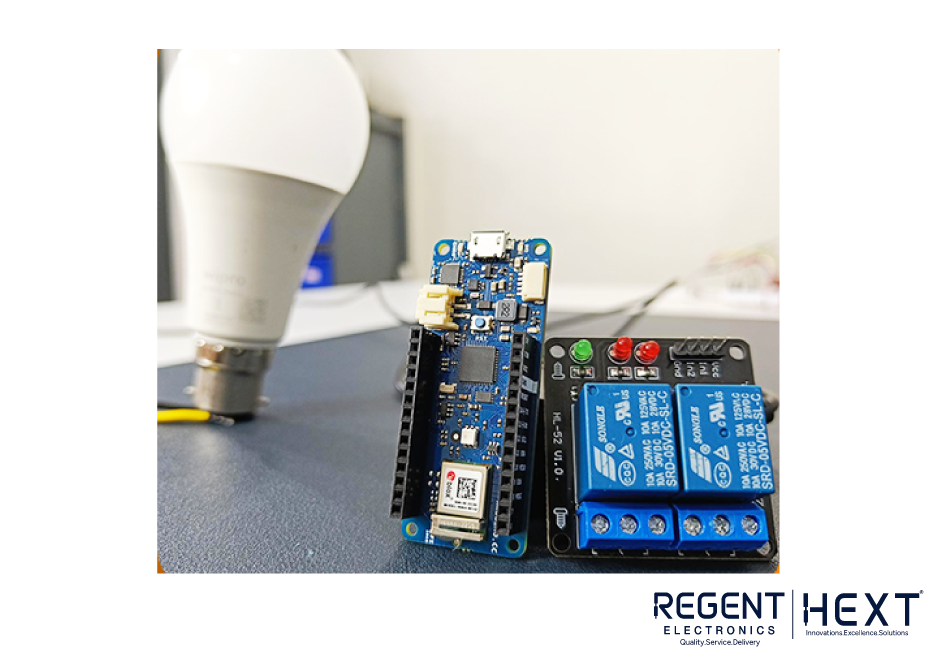
With the above setup, you’ve successfully created a web server using the Arduino MKR WiFi 1010 to remotely control devices through a simple HTML dashboard. You can control relays to switch on and off electrical devices like lights and fans.
This project demonstrates the power of Arduino in IoT applications and can be customized to add more devices or features. For more electronics projects, visit our website or YouTube channel for tutorials and guides.