
Easy Step-by-Step Guide for Setting Up a Raspberry Pi 5 for Beginners
Introduction
The Raspberry Pi 5 is an exciting upgrade for tech enthusiasts, makers, and programmers. Whether you’re new to Raspberry Pi or upgrading from an older version, setting up the Raspberry Pi 5 can be an easy and rewarding experience. This guide will walk you through the step-by-step process of installing the operating system (OS), configuring your hardware, and getting started with your Raspberry Pi 5.
Features of Raspberry Pi 5
- Processor: Quad-core 64-bit Arm Cortex-A76 CPU
- RAM: Available in 4GB and 8GB variants
- Ethernet: Gigabit Ethernet for high-speed networking
- GPIO Pins: 40-pin General-Purpose Input/Output (GPIO) header
- USB Ports: 2 USB 3.0 ports (supports 5Gbps operation) and 2 USB 2.0 ports
- Wi-Fi: Dual-band 802.11ac Wi-Fi
- Bluetooth: Bluetooth 5.0 with Low Energy (BLE)
- GPU: VideoCore VII GPU
- Power: 5V/5A DC power supply
Prerequisites
Before starting the setup, ensure you have the following components:
- Raspberry Pi 5
- MicroSD card (16GB or higher recommended)
- MicroSD card reader
- 5V/5A power supply
- Keyboard and mouse
- Monitor or desktop setup
- HDMI cable and micro-HDMI adapter
- Active cooler or Raspberry Pi 5 case (for heat management)
Step 1: Flashing the SD Card

To install the Raspberry Pi OS, you must first prepare the microSD card.
- Insert the microSD card into a card reader and connect it to your PC or laptop.
- Open Disk Management (Windows Key + X > Disk Management).
- Locate the microSD card under removable drives.
- Right-click and select Delete Volume to make it unallocated space.
- The microSD card is now formatted and ready for OS installation.
Step 2: Installing the Raspberry Pi OS Imager

- Download the Raspberry Pi Imager from the official Raspberry Pi website.
- Install the Imager software on your PC.

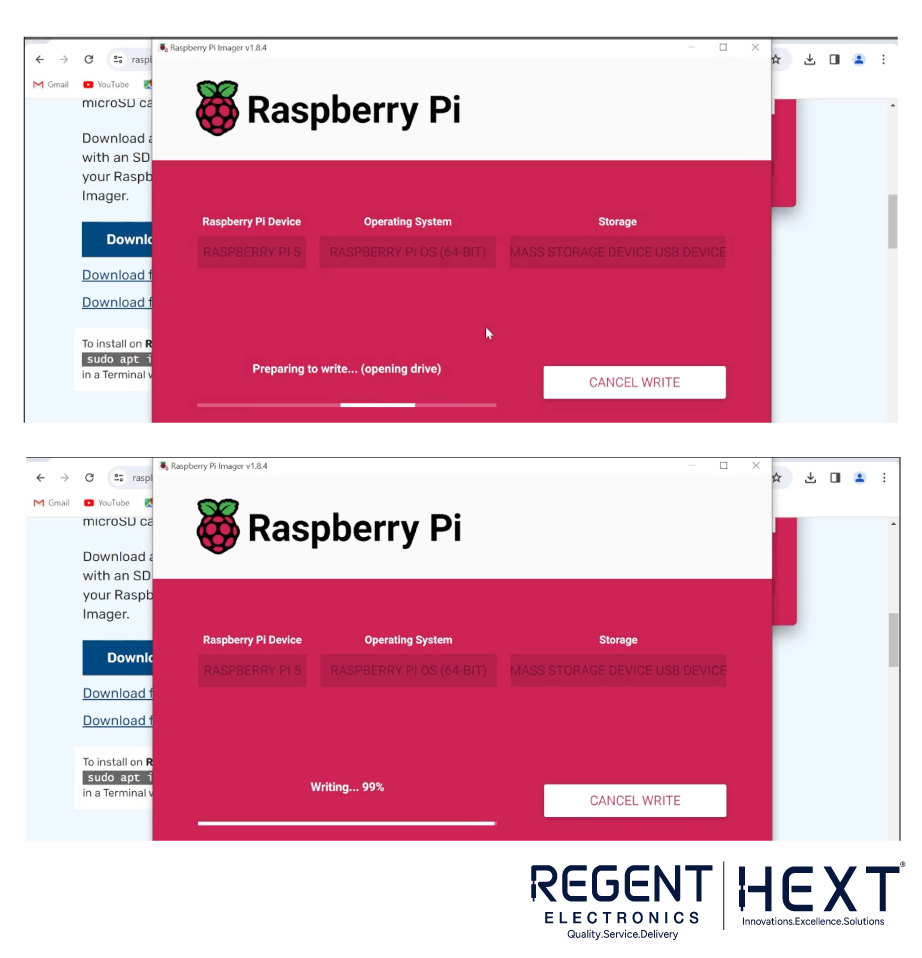
Step 3: Setting Up the OS in the SD Card
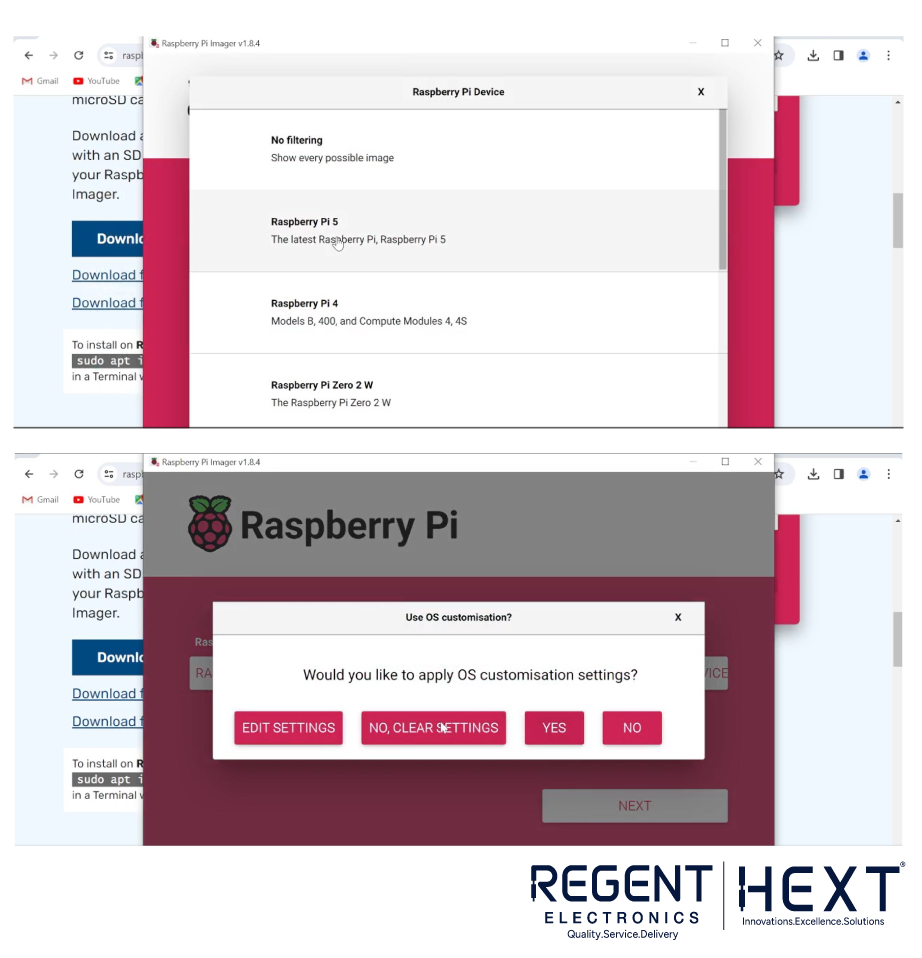
- Open the Raspberry Pi Imager and follow these steps:
- Select Raspberry Pi 5 as your device.
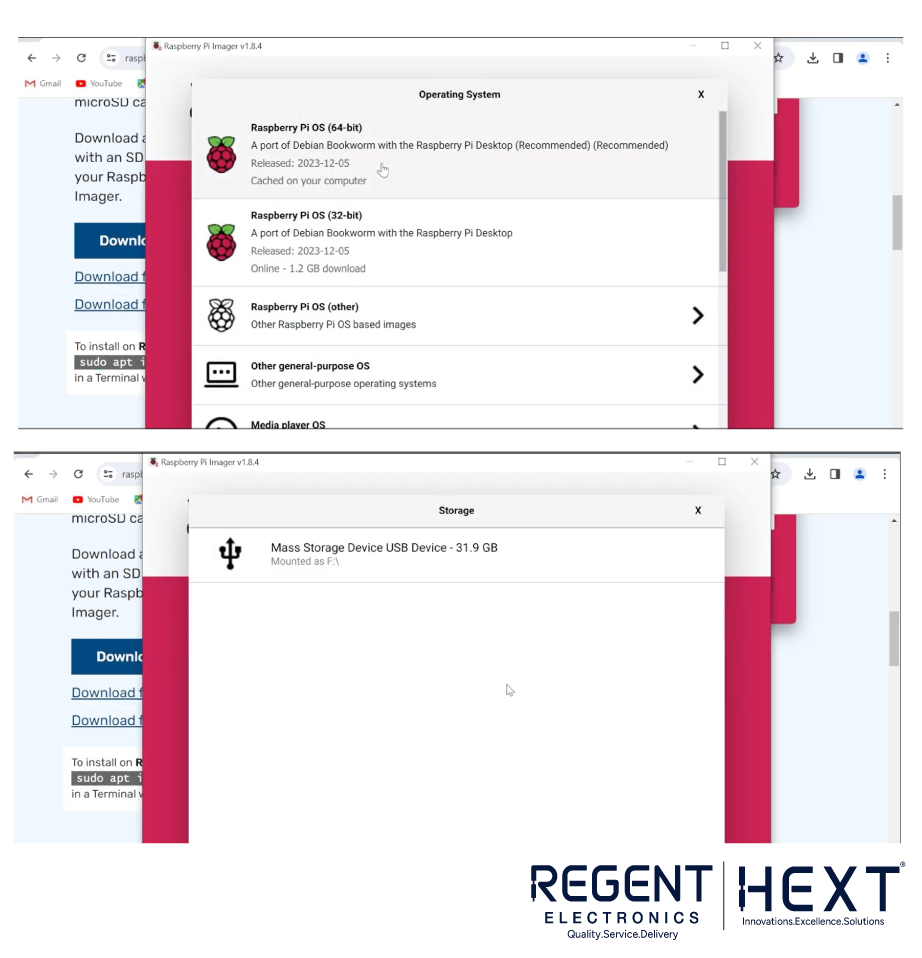
- Choose Raspberry Pi OS as your operating system.
- Select your microSD card as the storage.
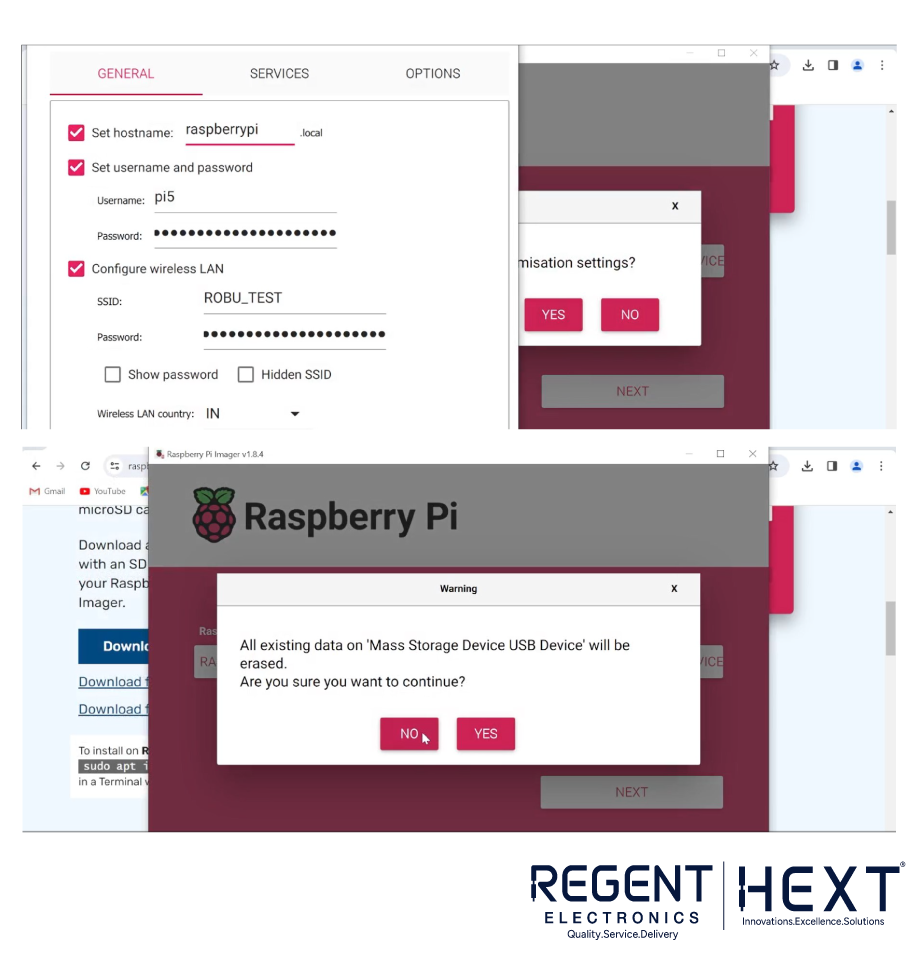
- Set up your username and password for secure access.
- Provide your Wi-Fi credentials (if connecting wirelessly).
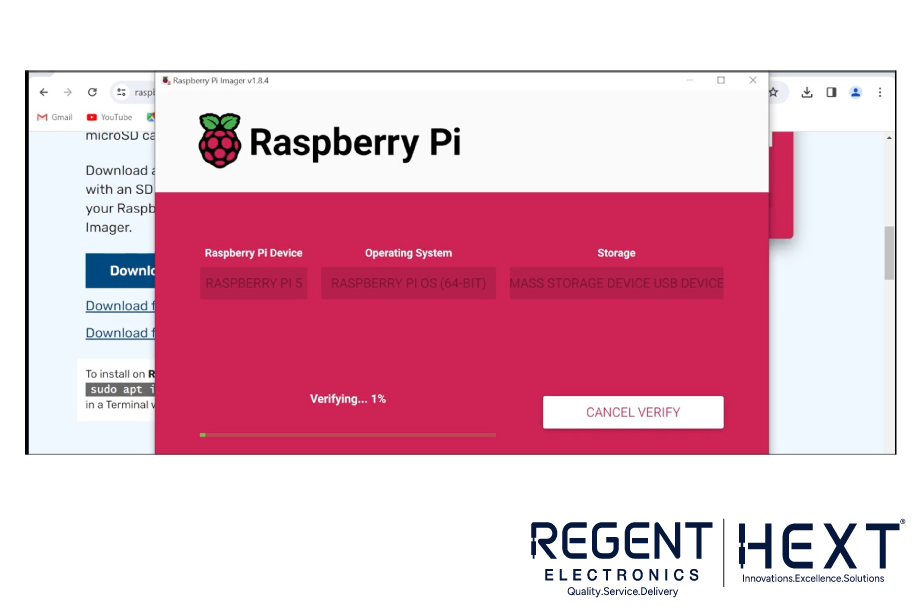
- Confirm the settings and start downloading the OS.
- Once the installation is complete, safely remove the microSD card from the card reader.
Step 4: Setting Up the Hardware

- Insert the microSD card into the Raspberry Pi 5.
- Connect the following peripherals:
- HDMI cable (via micro-HDMI adapter) to a monitor or desktop.
- Keyboard and mouse to the USB ports.
- Power supply to the Raspberry Pi 5.
- Place the Raspberry Pi in its case for protection and cooling.
- If using an Active Cooler, connect it to the designated pins on the Pi board.
- Ensure all connections are secure before powering on the device.
Step 5: Initial Setup and Updates

- Power on the Raspberry Pi 5.
- Follow the on-screen instructions to complete the initial setup.
- Connect the Raspberry Pi to a Wi-Fi network or an Ethernet connection.
- Open the terminal and run the following commands to update the system:
- sudo apt update
- sudo apt upgrade
Getting Started with Raspberry Pi 5
Congratulations! Your Raspberry Pi 5 is now set up and ready for use. You can explore:
- Installing and running various software applications.
- Writing and executing Python scripts.
- Using it for IoT and embedded projects.
- Experimenting with AI and machine learning applications.