
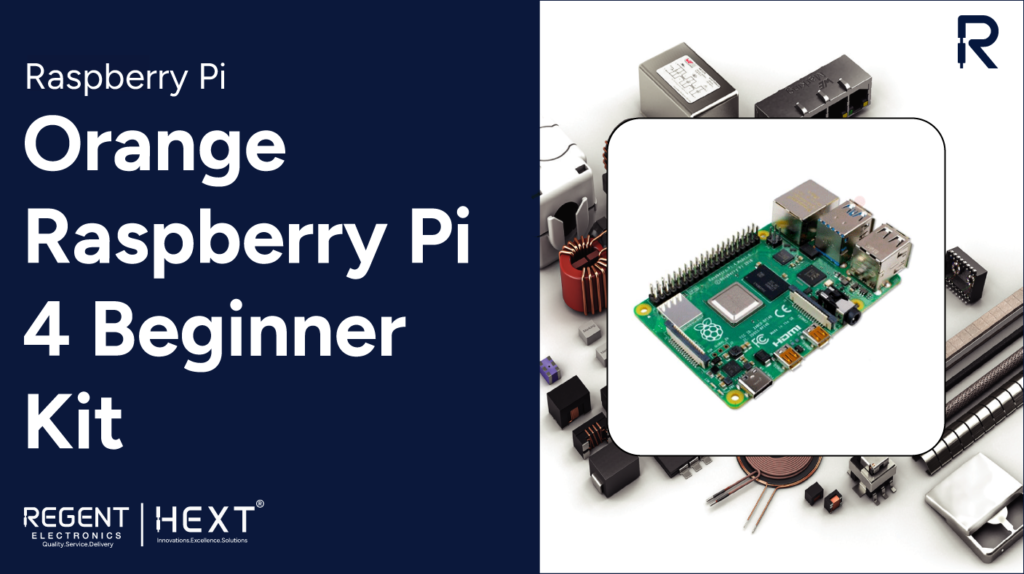
Orange Raspberry Pi 4/Zero Beginner Kit
Introduction
Welcome to this blog, where we will explore the Orange Raspberry Pi Beginner Kit. This kit includes a variety of essential components, making it an excellent starting point for anyone interested in Raspberry Pi programming and Python.
Raspberry Pi 4 Beginner Kit
Many people want to start working with the Raspberry Pi board but often struggle to find the right direction due to a lack of knowledge and guidance.
Understanding this challenge, Regent Electronics has introduced Raspberry Pi board kits designed to simplify the learning process. Take a look at the available Raspberry Pi kits:
- Raspberry Pi Zero Beginner Kit
- Raspberry Pi 4 Beginner Kit
IDE and Programming Language for Raspberry Pi Board
Since we are working with the Raspberry Pi board, we need a programming language and an IDE to write and execute programs that interact with peripherals.
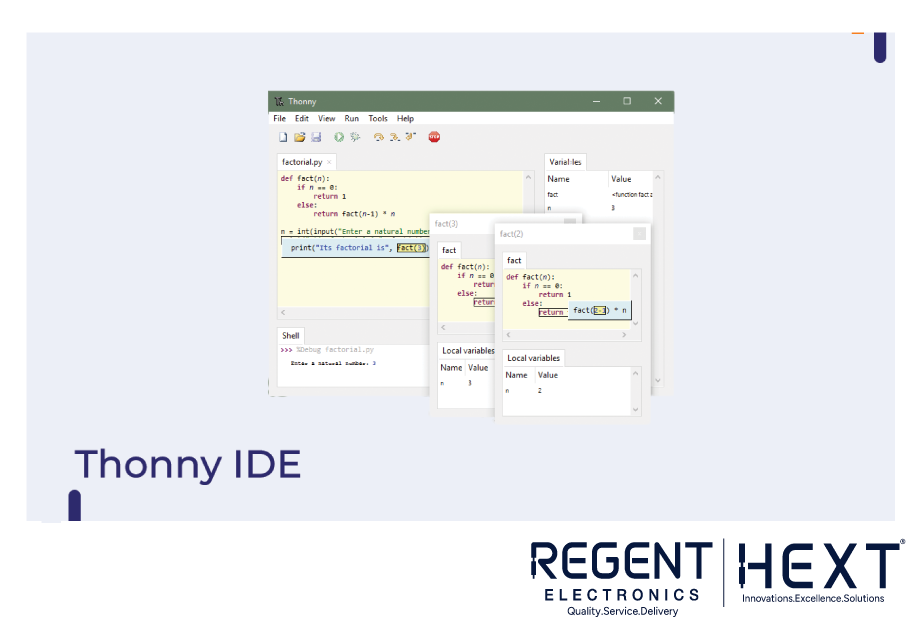
Python is widely used due to its simplicity and effectiveness, and the Thonny IDE is pre-installed on Raspberry Pi, making it an ideal choice for programming.
Thonny IDE
Thonny IDE is an easy-to-use Python development environment that simplifies coding for beginners.
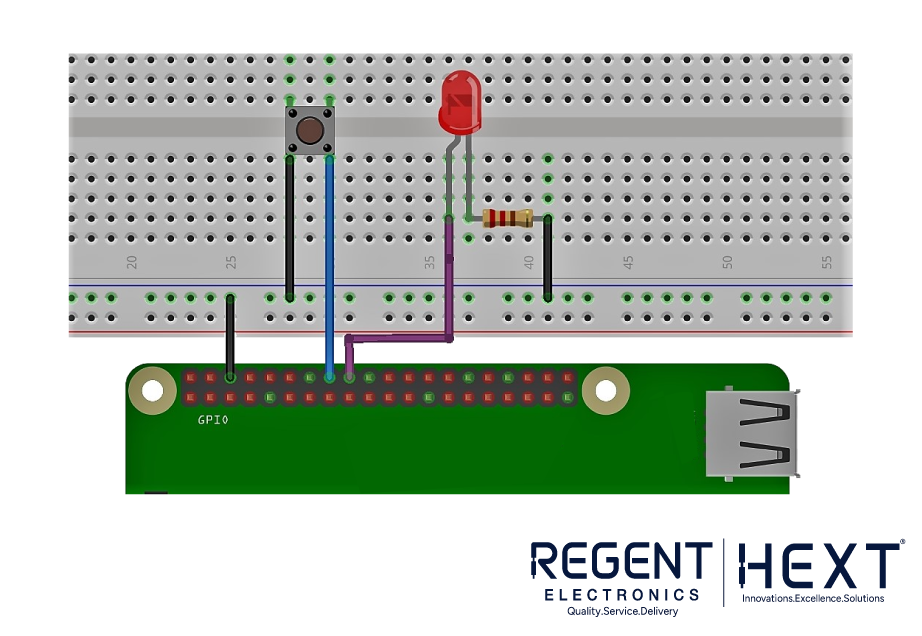
LED (Light Emitting Diode)
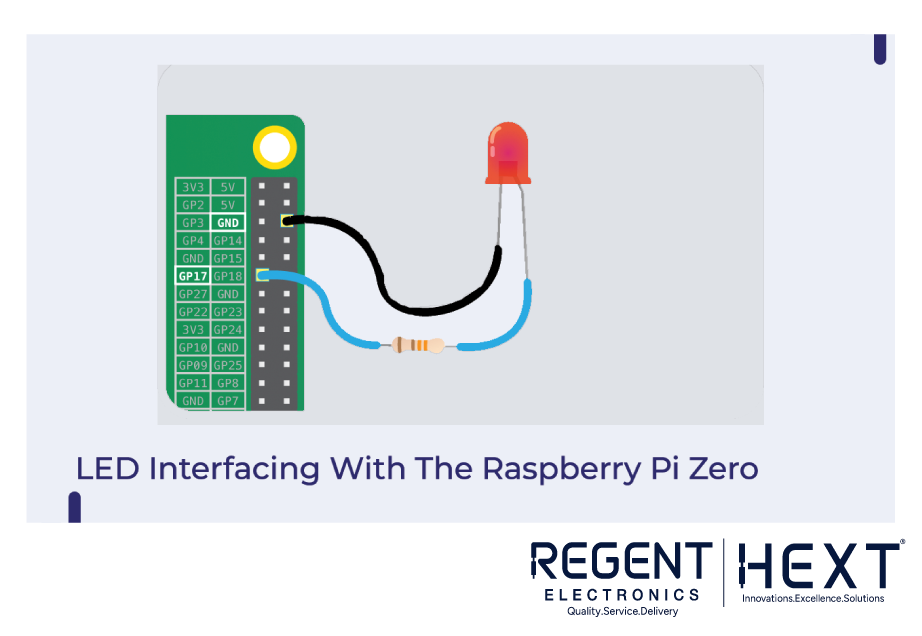
LEDs emit light when a required voltage is applied. They have two terminals: an anode (positive) and a cathode (negative). To turn on an LED, connect these terminals to the VCC and GND pins of the power supply.
LED Interfacing with Raspberry Pi 4
Understanding the fundamentals of LEDs allows us to interface them with the Raspberry Pi. A 320-ohm resistor is used to connect the LED to the Raspberry Pi to regulate voltage and prevent damage.
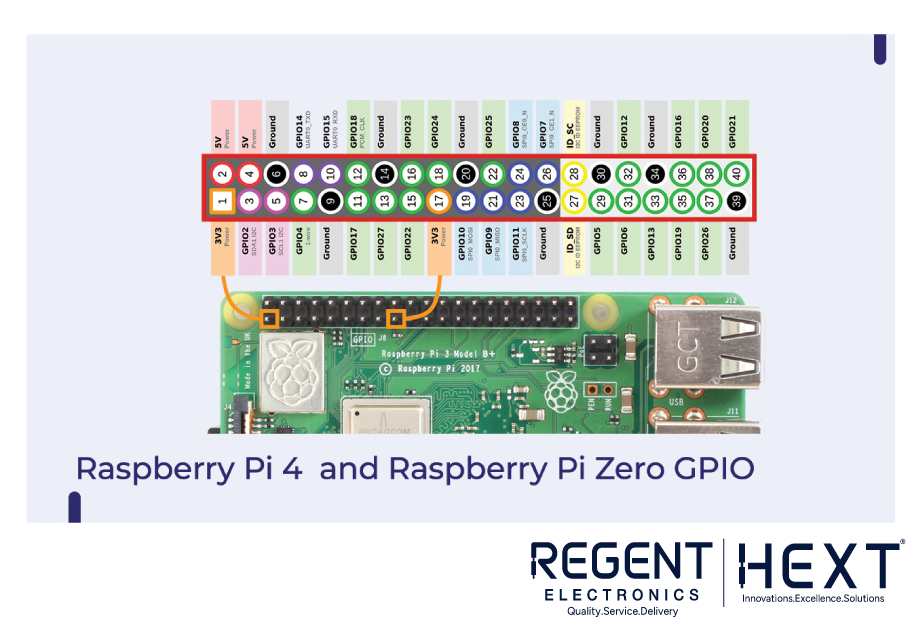
GPIO Pins of Raspberry Pi 4 and Zero
GPIO (General Purpose Input/Output) pins allow the Raspberry Pi to interact with other hardware components, including LEDs.
Python Code for LED
import RPi.GPIO as GPIO
import time
LED_PIN = 17
GPIO.setmode(GPIO.BCM)
GPIO.setup(LED_PIN, GPIO.OUT)
GPIO.output(LED_PIN, GPIO.HIGH)
time.sleep(1)
GPIO.output(LED_PIN, GPIO.LOW)
GPIO.cleanup()
Understanding Python Libraries and Functions
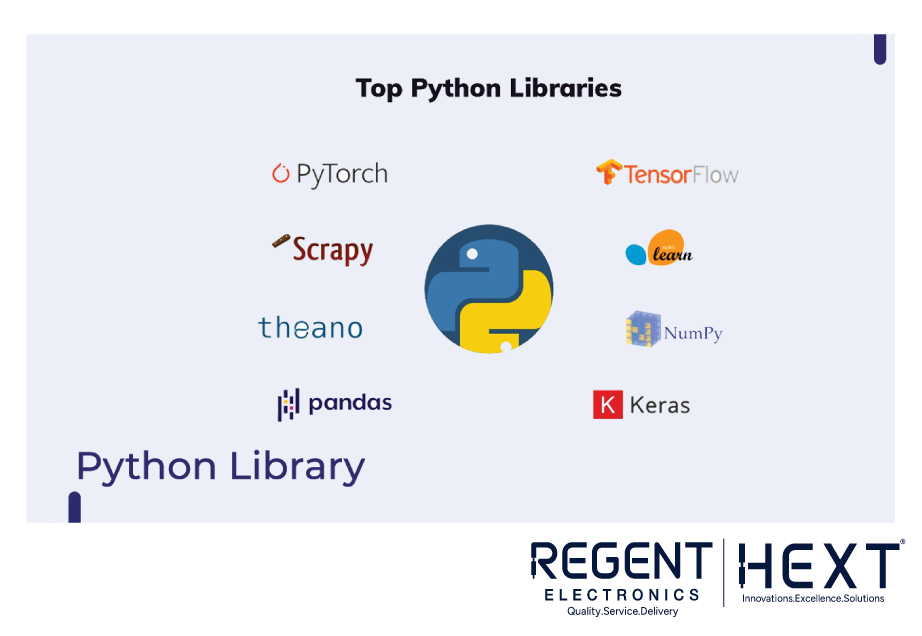
Python libraries are collections of functions and classes that simplify coding. Python also supports functions and classes, making programming more structured and efficient.
Interfacing a Button with Raspberry Pi
A push-pull button is included in the kit. While connecting the button, ensure that the Raspberry Pi receives no more than 3.3V, as exceeding this can damage the GPIO pins.
Python Code for Button
import RPi.GPIO as GPIO
import time
GPIO.setmode(GPIO.BCM)
GPIO.setup(23, GPIO.IN, pull_up_down=GPIO.PUD_UP)
GPIO.setup(24, GPIO.OUT)
try:
while True:
button_state = GPIO.input(23)
if button_state == False:
GPIO.output(24, True)
print(‘Button Pressed!!!’)
time.sleep(0.2)
else:
GPIO.output(24, False)
except:
GPIO.cleanup()
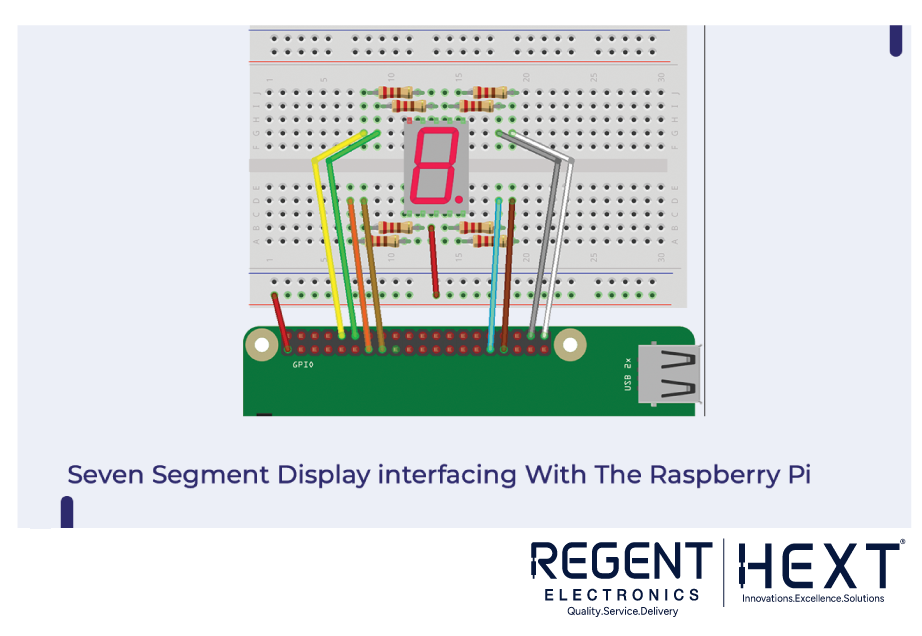
Seven-Segment Display with Raspberry Pi
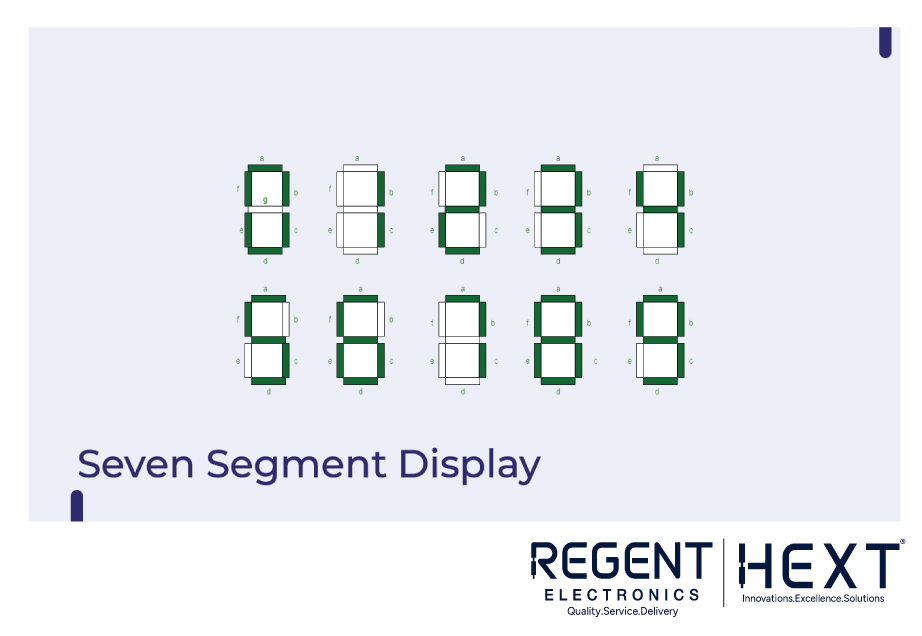
A seven-segment display consists of seven LEDs used to display numeric values. The kit includes a 7-segment display module that can be connected to the Raspberry Pi.
Interfacing a Buzzer with Raspberry Pi
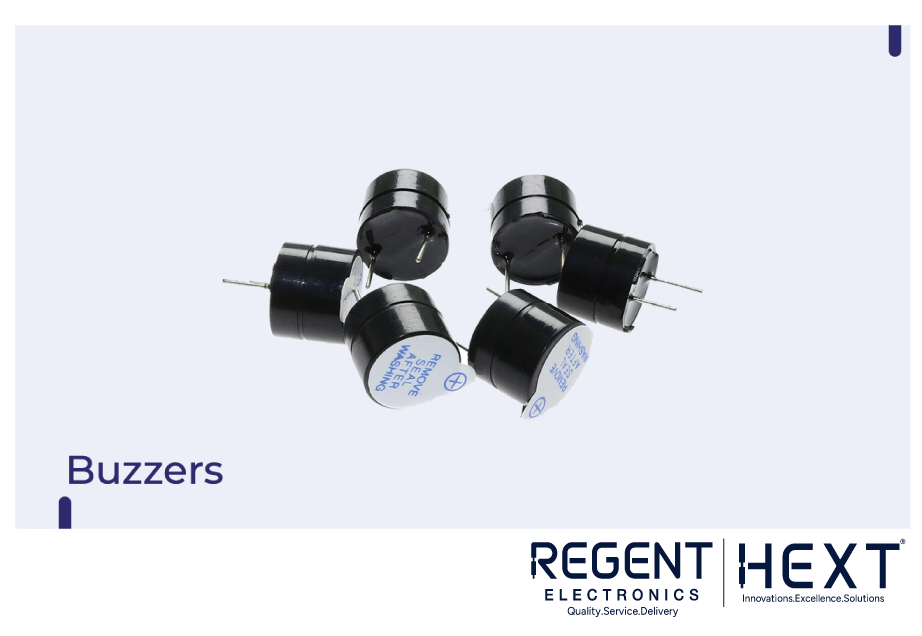
Buzzers convert electrical energy into sound energy and are commonly used in alarm systems. Active buzzers have a built-in oscillator, making them easy to use with the Raspberry Pi.

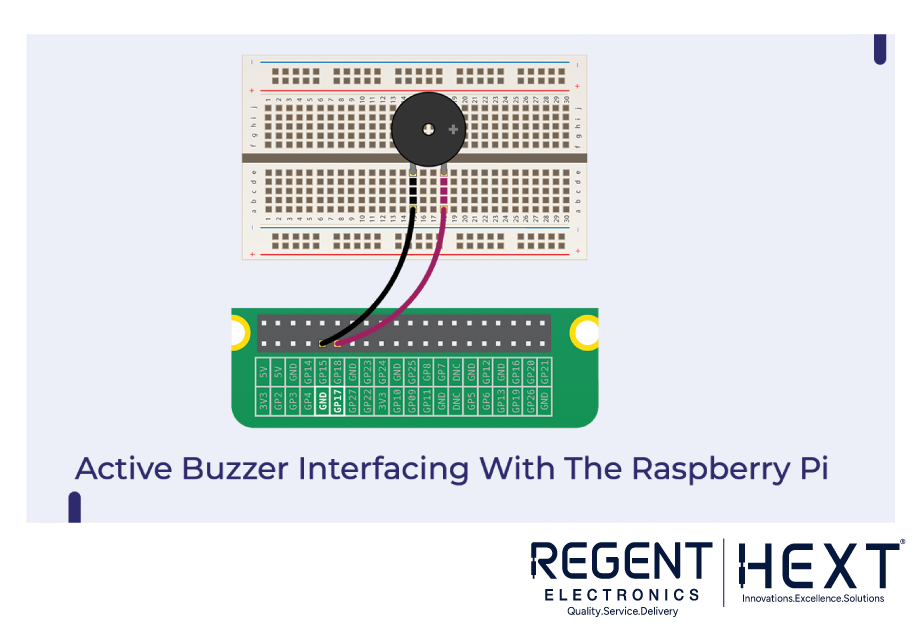
Python Code for Buzzer
import RPi.GPIO as GPIO
import time
Buzzer = 17
GPIO.setmode(GPIO.BCM)
GPIO.setup(Buzzer, GPIO.OUT)
GPIO.output(Buzzer, GPIO.HIGH)
time.sleep(1)
GPIO.output(Buzzer, GPIO.LOW)
GPIO.cleanup()
Using an IR Sensor with Raspberry Pi
IR sensors detect infrared radiation emitted by objects. The kit includes an IR sensor module that consists of:
- IR Transmitter (LED) – Emits infrared radiation.
- IR Receiver (Photodiode) – Detects infrared radiation.
- Gain Amplifier – Enhances weak signals.
Interfacing an IR Sensor with Raspberry Pi
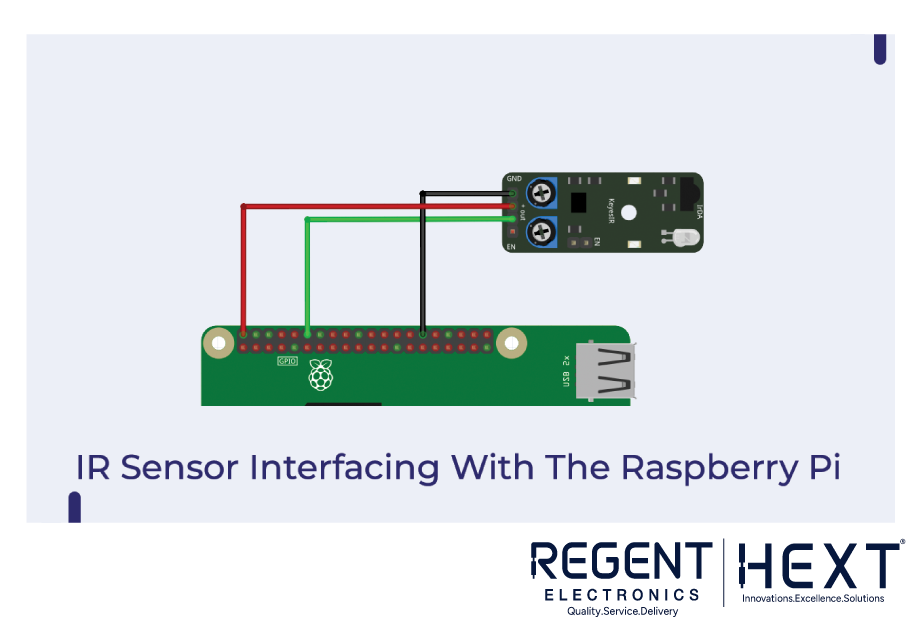
The IR sensor has three pins: VCC, GND, and Output. Since Raspberry Pi operates at 3.3V, a level shifter is required to prevent damage.
Python Code for IR Sensor
import RPi.GPIO as GPIO
import time
sensor = 18
GPIO.setmode(GPIO.BCM)
GPIO.setup(sensor, GPIO.IN)
Conclusion
This blog covered the basics of interfacing various components, including LEDs, buttons, buzzers, seven-segment displays, and IR sensors, with the Raspberry Pi. By experimenting with these components, you can develop a strong foundation in Raspberry Pi programming and embedded systems.
If you have any questions, feel free to leave a comment. Happy coding with Regent Electronics!