

Orange Raspberry Pi Advanced Kit – A Comprehensive Guide
Introduction
Welcome to Regent Electronics! In this blog, we’ll explore the Orange Raspberry Pi Advanced Kit, an ideal choice for those interested in Raspberry Pi and Python programming.
If you’re eager to delve into advanced Raspberry Pi projects while building a strong foundation in Python, this kit is perfect for you. The package includes various components that help enhance your learning experience and practical understanding of Raspberry Pi applications.
Let’s dive into the features, interfacing, and programming of key components in this kit.
Exploring Raspberry Pi Kits
At Regent Electronics, we offer a range of Raspberry Pi kits tailored for different learning levels. If you’re a beginner, we recommend starting with our basic Raspberry Pi kits before moving on to the advanced version.
Now, let’s explore how to interface and program some key components included in the Orange Raspberry Pi Advanced Kit.
Ultrasonic Sensor with Raspberry Pi

Understanding Ultrasonic Sensors
Ultrasonic sensors measure distance by emitting high-frequency sound waves and analyzing their reflection from objects. These sensors are widely used in robotics, automation, and DIY radar systems.
Other similar sensors, such as infrared, LIDAR, and sonar sensors, are available, but we’ll focus on ultrasonic sensors in this guide.
How Ultrasonic Sensors Work
The working principle of ultrasonic sensors is similar to radar. A transmitter emits sound waves, which bounce back upon encountering an object. The time taken for the waves to return is used to calculate the distance.
Formula:
Distance = Time × Speed of Sound
- Time: The duration for sound waves to travel and return.
- Speed: The speed of sound in air.
Interfacing Ultrasonic Sensor with Raspberry Pi
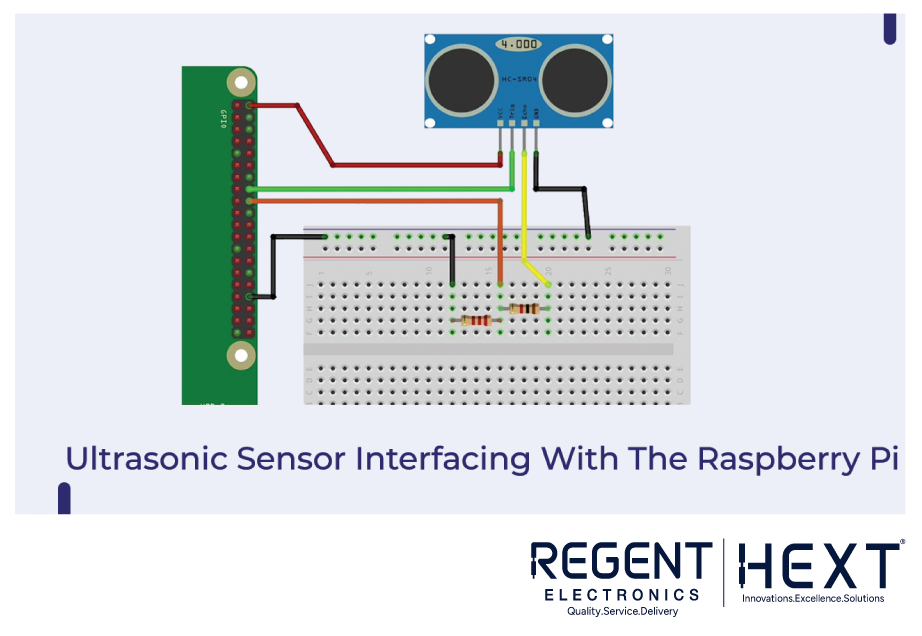
The ultrasonic sensor has:
- Trigger (TRIG) – Transmits sound waves
- Echo (ECHO) – Receives reflected waves
- VCC & GND – Power supply connections
Below is the pin configuration for interfacing with Raspberry Pi:
| Ultrasonic Sensor | Raspberry Pi GPIO |
| VCC | 5V |
| GND | GND |
| TRIG | GPIO 11 |
| ECHO | GPIO 18 |
Python Code for Distance Measurement
import RPi.GPIO as GPIO
import time
GPIO.setmode(GPIO.BCM)
GPIO_TRIG = 11
GPIO_ECHO = 18
GPIO.setup(GPIO_TRIG, GPIO.OUT)
GPIO.setup(GPIO_ECHO, GPIO.IN)
GPIO.output(GPIO_TRIG, GPIO.LOW)
time.sleep(2)
GPIO.output(GPIO_TRIG, GPIO.HIGH)
time.sleep(0.00001)
GPIO.output(GPIO_TRIG, GPIO.LOW)
while GPIO.input(GPIO_ECHO) == 0:
start_time = time.time()
while GPIO.input(GPIO_ECHO) == 1:
bounce_back_time = time.time()
pulse_duration = bounce_back_time – start_time
distance = round(pulse_duration * 17150, 2)
print(f”Distance: {distance} cm”)
GPIO.cleanup()
Capacitive Touch Sensor and Buzzer with Raspberry Pi
A capacitive touch sensor detects touch by measuring changes in capacitance. When you touch the sensor, it triggers a change in capacitance, which can be used to control devices like buzzers.
Interfacing Capacitive Touch Sensor with Raspberry Pi
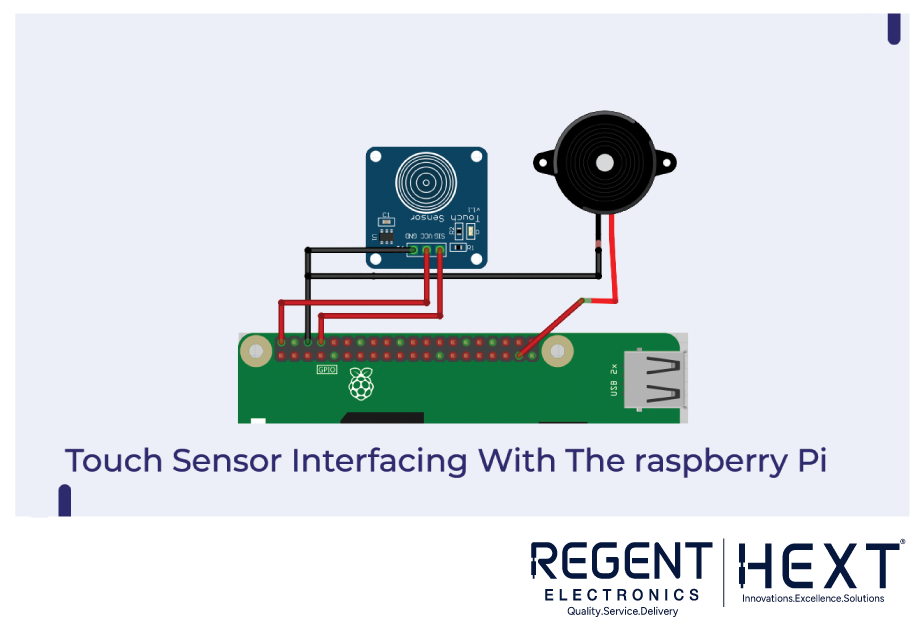
| Capacitive Sensor | Raspberry Pi GPIO |
| VCC | 3.3V |
| GND | GND |
| OUT | GPIO 26 |
Python Code for Capacitive Touch Sensor
import RPi.GPIO as GPIO
import time
buzzer = 14
touch = 26
def init():
GPIO.setwarnings(False)
GPIO.setmode(GPIO.BCM)
GPIO.setup(buzzer, GPIO.OUT)
GPIO.setup(touch, GPIO.IN, pull_up_down=GPIO.PUD_UP)
def buzzer_on():
GPIO.output(buzzer, GPIO.LOW)
time.sleep(0.2)
GPIO.output(buzzer, GPIO.HIGH)
def buzzer_off():
GPIO.output(buzzer, GPIO.HIGH)
def read_touchsensor():
if GPIO.input(touch) == True:
print(“Touch detected! Buzzer On.”)
buzzer_on()
else:
print(“No touch detected. Buzzer Off.”)
buzzer_off()
init()
while True:
read_touchsensor()
time.sleep(1)
RFID Card Reader with Raspberry Pi
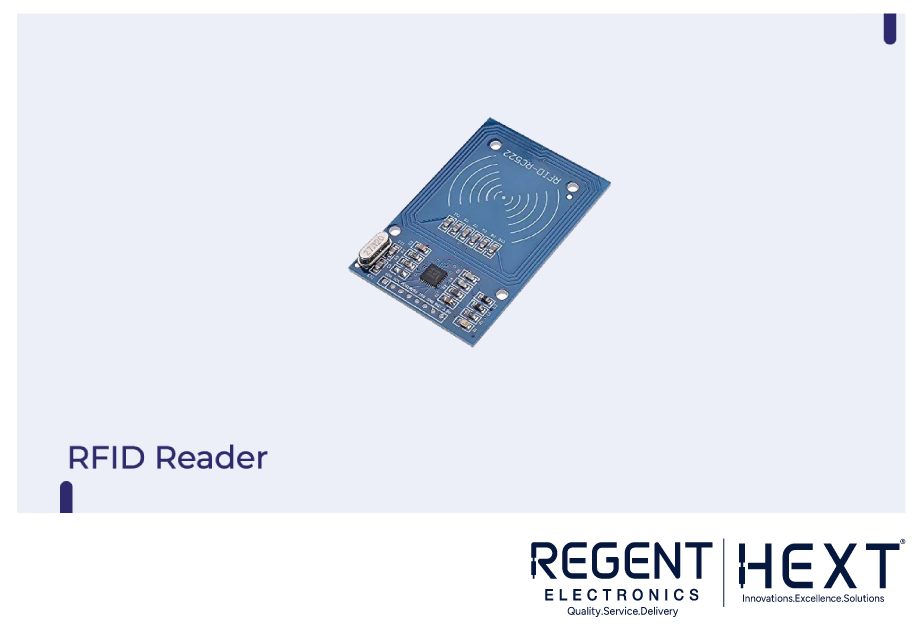
Understanding RFID Technology
RFID (Radio Frequency Identification) is used in automation, access control, and inventory tracking. An RFID system consists of:
- RFID Reader – Reads the information stored on RFID tags
- RFID Tag – Contains a microchip that stores information
Types of RFID Tags
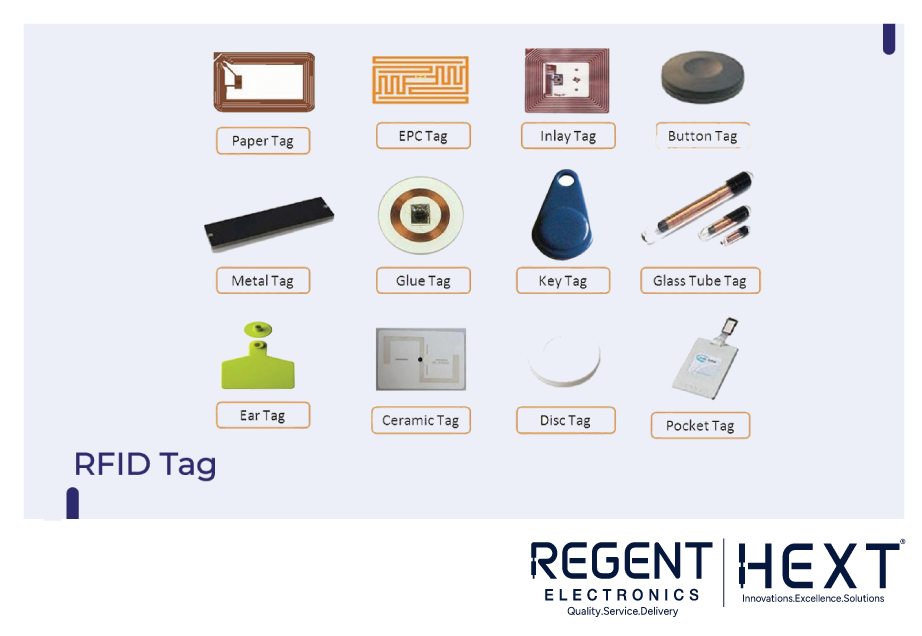
- Active RFID Tags – Have an internal battery.
- Passive RFID Tags – Derive power from the RFID reader.
Interfacing RFID Reader with Raspberry Pi
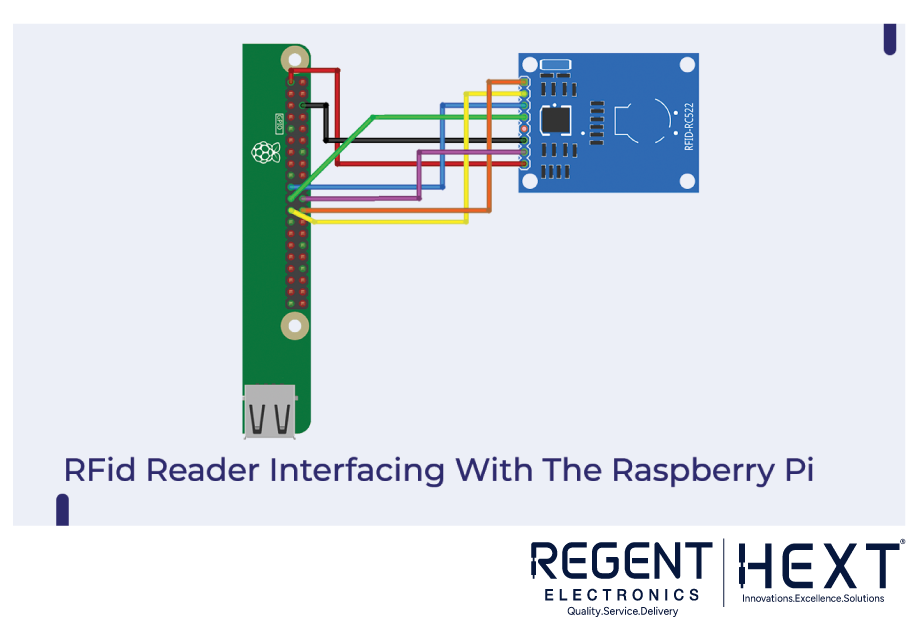
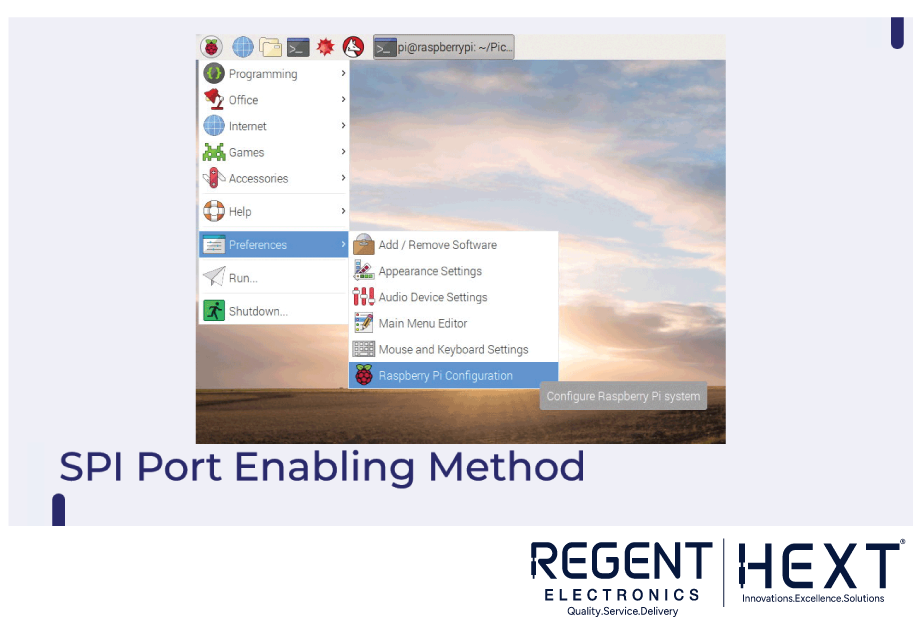
The RFID module communicates via SPI (Serial Peripheral Interface) using these pins:
| RFID Module | Raspberry Pi GPIO |
| VCC | 3.3V |
| GND | GND |
| MOSI | GPIO 10 |
| MISO | GPIO 9 |
| SCK | GPIO 11 |
| RST | GPIO 25 |
| SDA | GPIO 8 |
Conclusion
In this guide, we explored the Orange Raspberry Pi Advanced Kit and learned how to interface essential components like ultrasonic sensors, capacitive touch sensors, buzzers, and RFID readers with the Raspberry Pi.
If you have any questions, feel free to reach out to Regent Electronics. Stay tuned for more tutorials on advanced Raspberry Pi projects!