
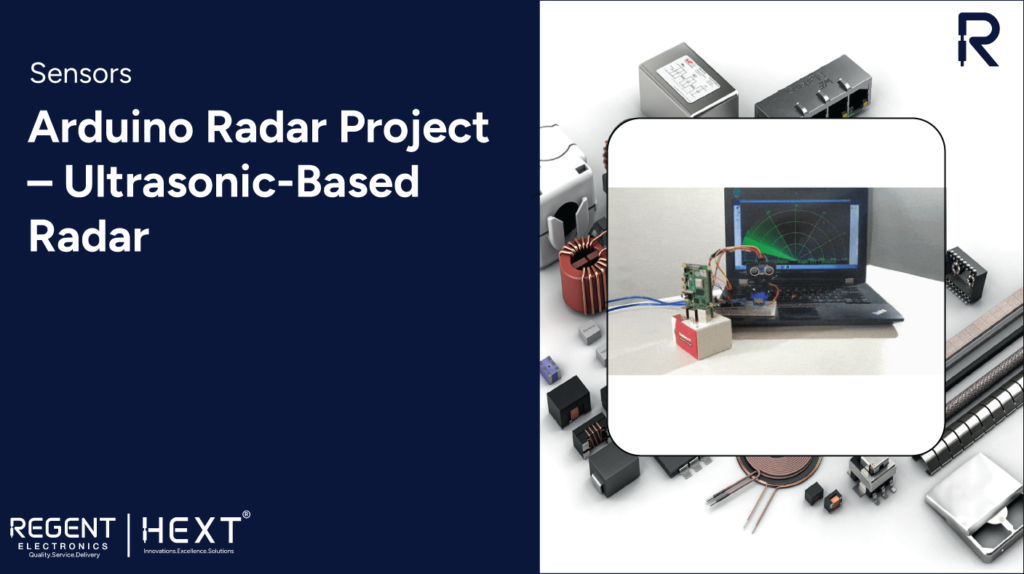
Arduino Radar Project – Ultrasonic-Based Radar
Introduction
The Arduino Radar Project is an innovative prototype that utilizes an ultrasonic sensor to detect objects, both stationary and moving. Radar technology has evolved significantly since its early military applications and is now used in numerous fields, including traffic control, defense systems, and automation.
This project demonstrates how an Arduino microcontroller can be integrated with an ultrasonic sensor to develop a functional radar system for detecting objects within a specified range.
How Radar Works
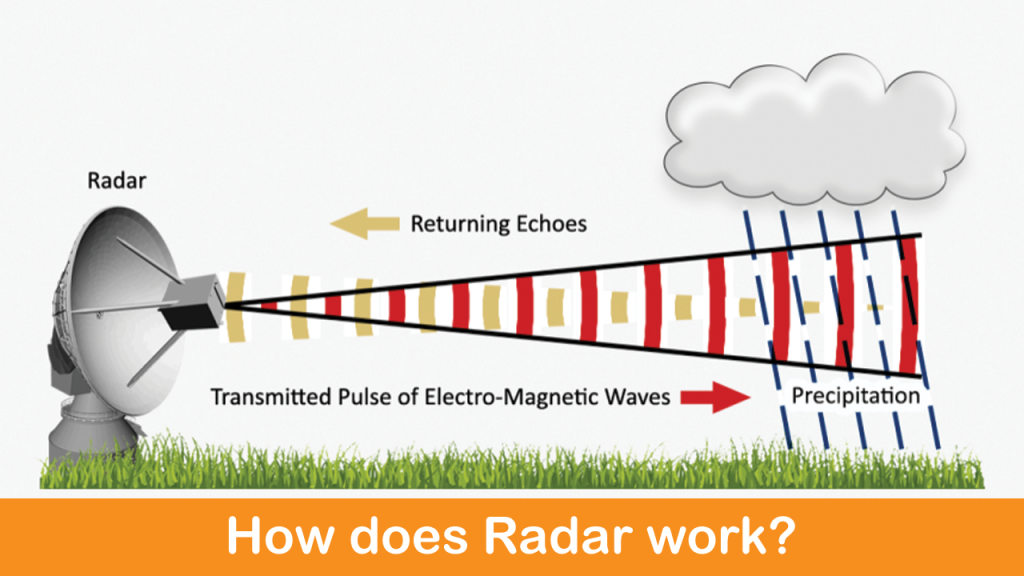
Radar (Radio Detection and Ranging) operates by emitting radio waves that reflect off objects. The reflected signals are then analyzed to determine the object’s position and distance.
Basic Radar Functionality:
- The radar emits radio or ultrasonic waves.
- These waves encounter objects and bounce back.
- The returning waves are analyzed to calculate distance and location.
Modern radar systems are extensively used in air traffic control, weather monitoring, and autonomous vehicle navigation.
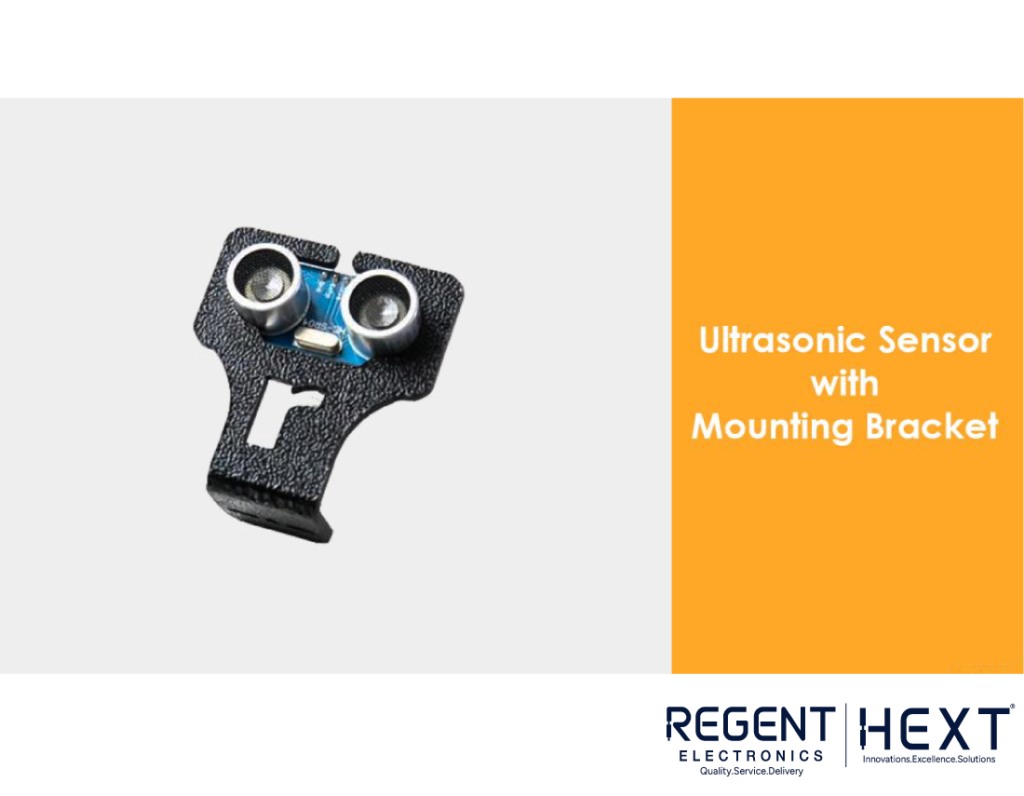
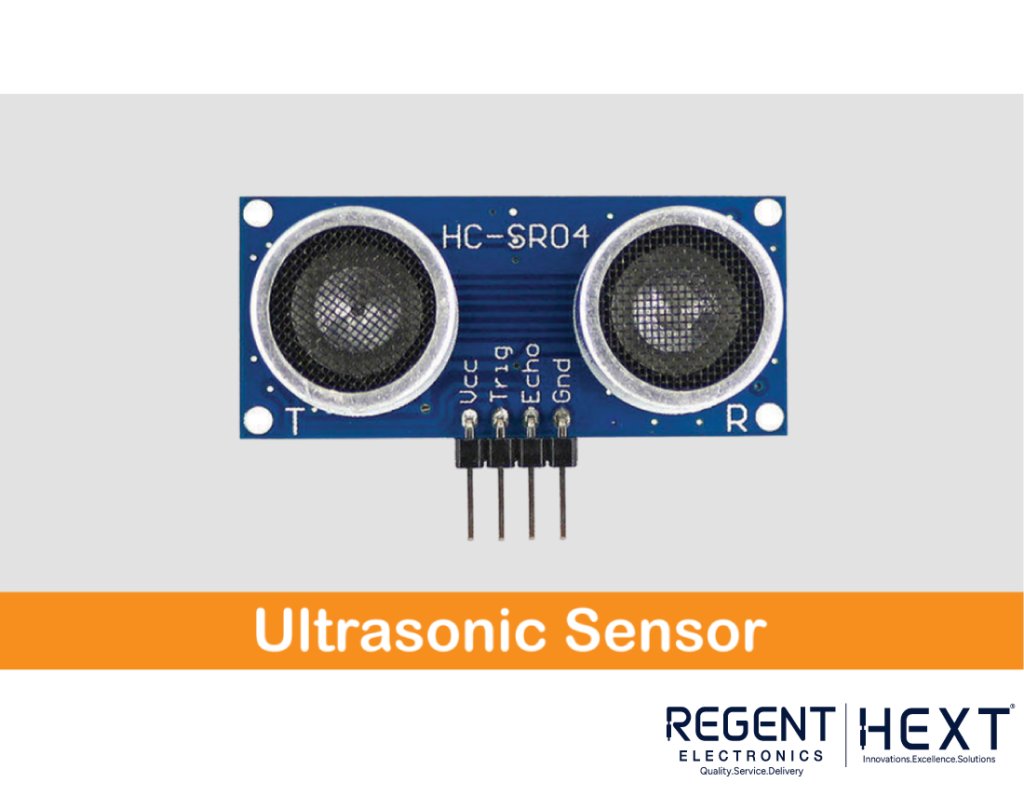
Understanding the Ultrasonic Sensor

An ultrasonic sensor measures the distance to an object by emitting high-frequency sound waves and detecting the reflected signal.
Key Components:
- Transmitter: Emits ultrasonic waves.
- Receiver: Captures the reflected waves and converts them into electrical signals.
Distance Calculation:
Using the formula:
D=12×T×CD = \frac{1}{2} \times T \times C
Where:
- D = Distance to the object
- T = Time taken for the ultrasonic waves to return
- C = Speed of sound (343 m/s)
Ultrasonic sensors are widely used in automation, robotics, and security systems.
Introduction to Servo Motors
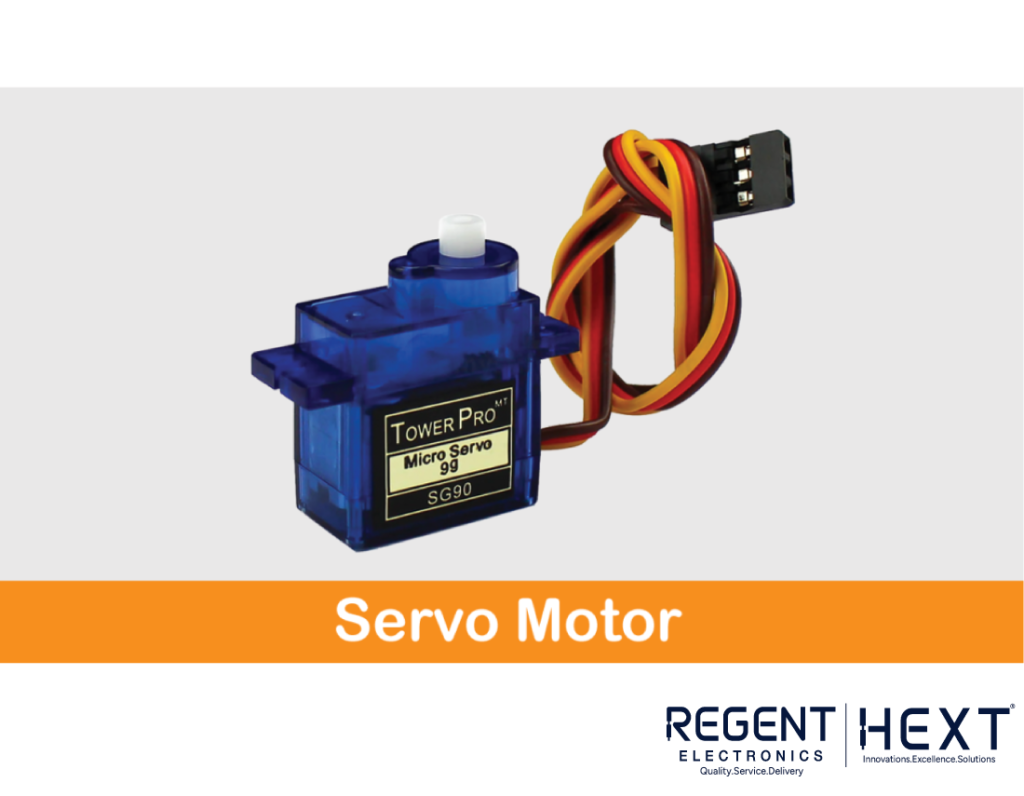
A servo motor is a precise motor used for angular movement and controlled positioning.
Components:
- Control Circuit: Regulates motor movement.
- Motor Shaft: Moves in the specified direction.
- Potentiometer: Provides position feedback.
- Gears & Amplifier: Aid in motion control.
Servo motors are used in robotics, aerospace, and industrial automation.
Building the Arduino Radar System
Required Components:
- Arduino Uno
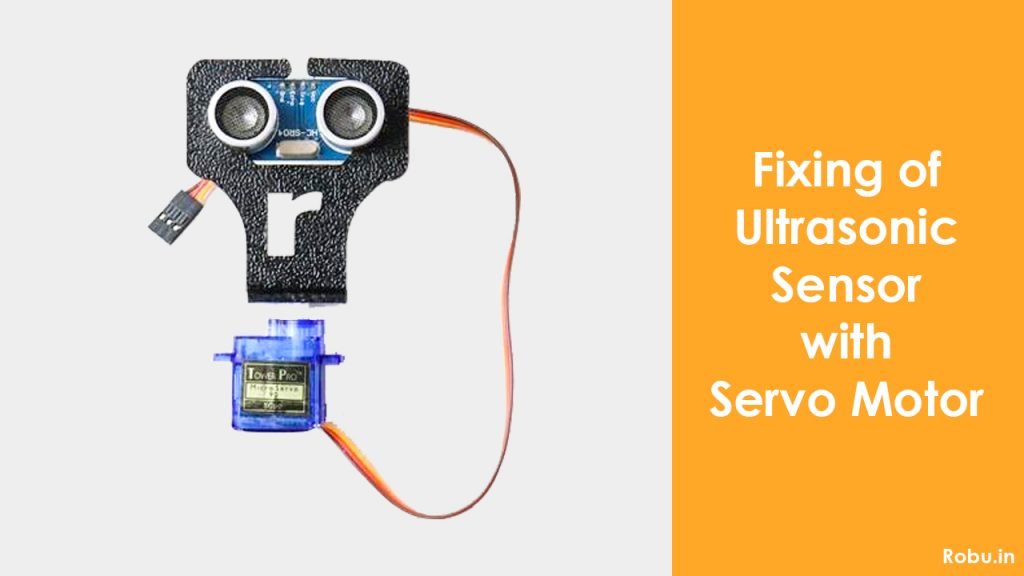
- Ultrasonic Sensor (HC-SR04)
- Servo Motor (SG90 or equivalent)
- Jumper Wires
- Mounting Bracket
- Double-Sided Tape
Assembly Steps:
- Mount the ultrasonic sensor onto a bracket.
- Attach the bracket to the servo motor.
- Secure the servo motor on a stable base.
- Connect the components to the Arduino board.
Wiring Diagram:
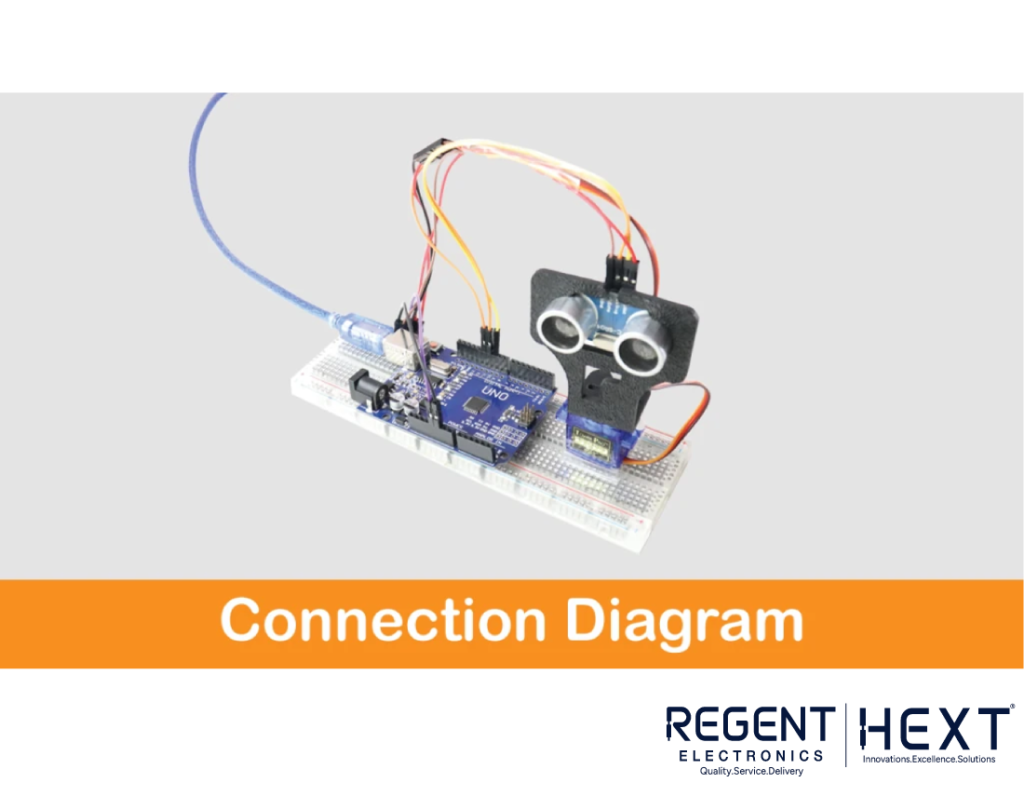
| Arduino Uno | Ultrasonic Sensor | Servo Motor |
| Vcc | Vcc | Vcc |
| Gnd | Gnd | Gnd |
| D10 | Trig | – |
| D11 | Echo | – |
| D12 | – | Signal |
Programming the Arduino Radar
Required Software:
- Arduino IDE – For coding and uploading to Arduino.
- Processing IDE – For visual representation of radar data.
Arduino Code:
#include <Servo.h>
const int trigPin = 10;
const int echoPin = 11;
long duration;
int distance;
Servo myServo;
void setup() {
pinMode(trigPin, OUTPUT);
pinMode(echoPin, INPUT);
Serial.begin(9600);
myServo.attach(12);
}
void loop() {
for(int i=15; i<=165; i++) {
myServo.write(i);
delay(30);
distance = calculateDistance();
Serial.print(i);
Serial.print(“,”);
Serial.print(distance);
Serial.print(“.”);
}
for(int i=165; i>15; i–) {
myServo.write(i);
delay(30);
distance = calculateDistance();
Serial.print(i);
Serial.print(“,”);
Serial.print(distance);
Serial.print(“.”);
}
}
int calculateDistance(){
digitalWrite(trigPin, LOW);
delayMicroseconds(2);
digitalWrite(trigPin, HIGH);
delayMicroseconds(10);
digitalWrite(trigPin, LOW);
duration = pulseIn(echoPin, HIGH);
distance = duration * 0.034 / 2;
return distance;
}
Processing Code:
import processing.serial.*;
Serial myPort;
String angle=””, distance=””, data=””;
int iAngle, iDistance, index1=0;
void setup() {
size (1200, 700);
myPort = new Serial(this, “COM5”, 9600);
myPort.bufferUntil(‘.’);
}
void draw() {
background(0);
fill(98,245,31);
drawRadar();
drawLine();
drawObject();
}
void serialEvent (Serial myPort) {
data = myPort.readStringUntil(‘.’);
data = data.substring(0, data.length()-1);
index1 = data.indexOf(“,”);
angle = data.substring(0, index1);
distance = data.substring(index1+1, data.length());
iAngle = int(angle);
iDistance = int(distance);
}
Running the Arduino Radar System
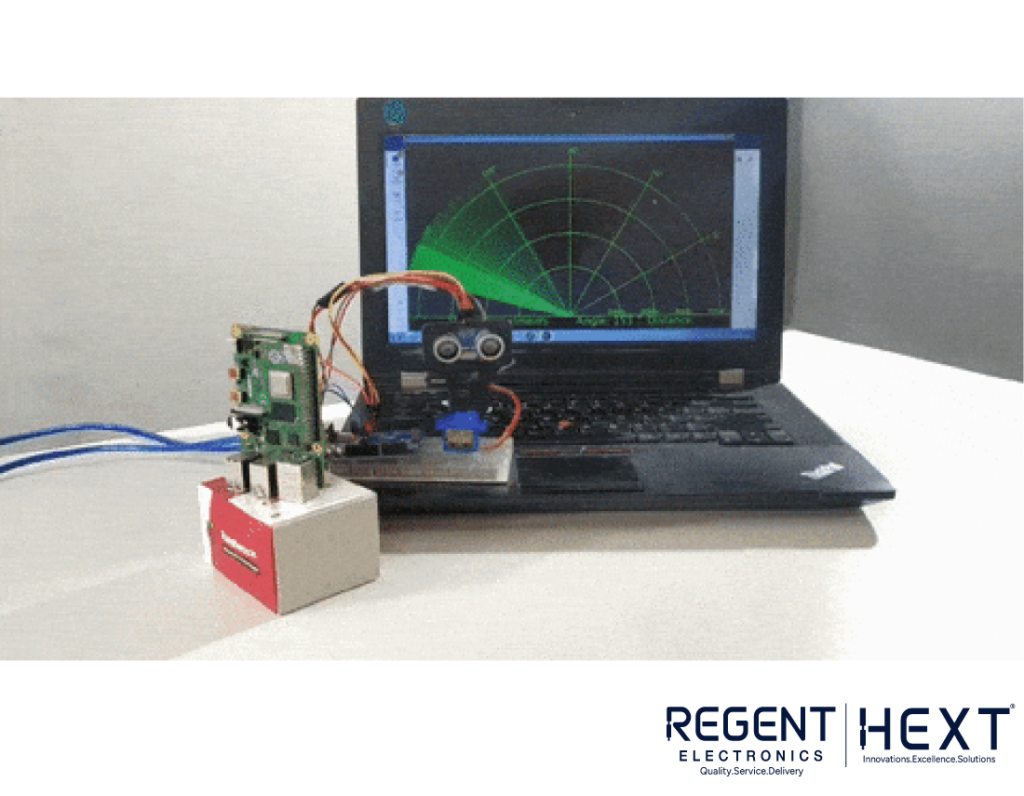
- Upload the Arduino code using the Arduino IDE.
- Run the Processing code and set the correct COM port.
- View the graphical radar display representing detected objects.
Conclusion
This Arduino-based radar project showcases how ultrasonic sensors and servo motors can be integrated with an Arduino to create a basic radar system. It has potential applications in security surveillance, obstacle detection, and automation.
Future enhancements, such as adding Bluetooth or Wi-Fi, can transform this into a wireless radar system. Regent Electronics continues to support innovation in electronic projects like these, enabling advancements in embedded systems and automation.