
Interfacing Fingerprint Sensor with Arduino – Complete Guide
Introduction
In this tutorial, we will learn how to interface the R307 fingerprint sensor with Arduino, program it, and correctly identify fingerprints using the Adafruit library.
Importance of Fingerprint Sensors
Fingerprint sensors play a crucial role in modern security systems and access control. Since every individual has a unique fingerprint, these sensors provide an efficient and secure way to identify authorized users. Fingerprint recognition systems offer high-speed performance, affordability, and greater reliability compared to traditional security methods.
Working Principle of a Fingerprint Sensor
Fingerprint sensors generally function using optical or capacitive technology.
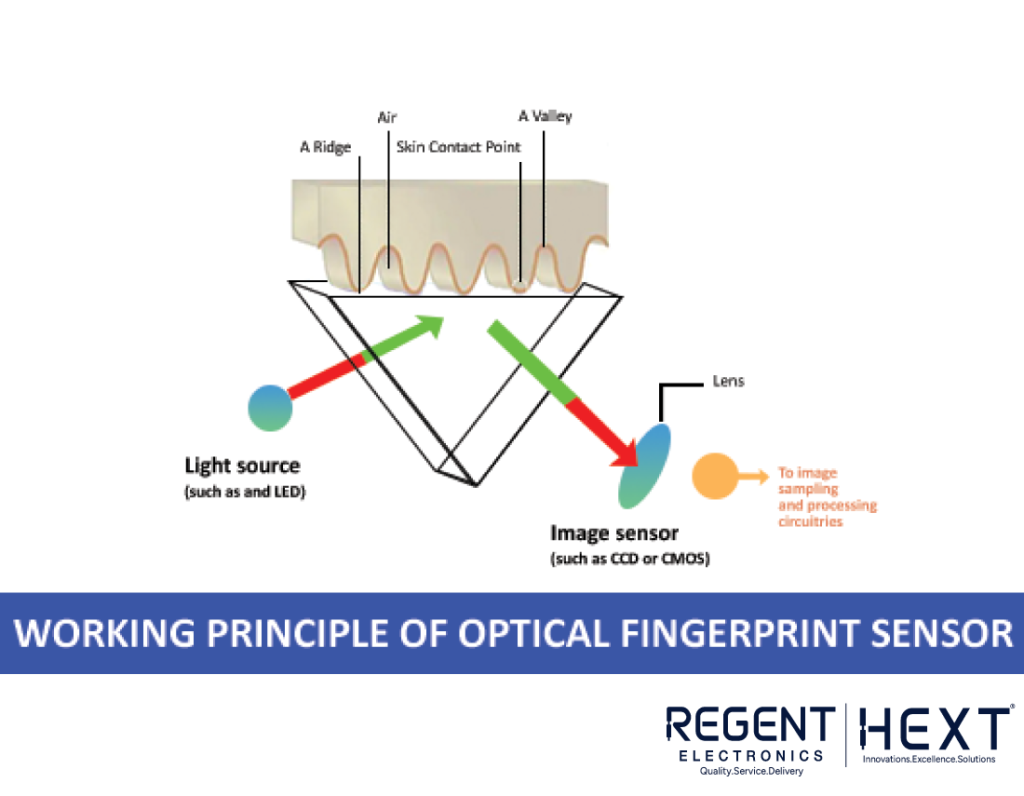
Optical Fingerprint Sensor
Optical fingerprint sensors capture an image of the fingerprint by flashing a bright light onto the finger. The sensor then analyzes the fingerprint pattern, converting it into digital data (binary format 0s and 1s), which acts as the unique identification key. If the scanned fingerprint matches a stored fingerprint, access is granted.
Capacitive Fingerprint Sensor
Capacitive fingerprint sensors use an array of tiny capacitor circuits to map the ridges and valleys of a fingerprint. When a finger is placed on the sensor, the ridges alter the charge stored in the capacitors, whereas the valleys do not. The system records this data and converts it into a digital format using an analog-to-digital converter (ADC), which is then used for fingerprint identification.
R307 Optical Fingerprint Scanner
The R307 fingerprint sensor operates through two main processes:
- Fingerprint Enrollment: Storing a fingerprint for future verification.
- Fingerprint Matching: Comparing a scanned fingerprint with stored fingerprints.
Each R307 module has a unique address for communication with the system. When a command is sent, the module responds only if the data package matches its address. The R307 sensor supports both USB and UART communication protocols, with USB recommended for faster data exchange.
Features of the R307 Fingerprint Sensor
- Built-in image collection and processing algorithm.
- Low power consumption and user-friendly operation.
- High-resolution image processing capability.
- Compact and cost-effective.
Pinout Configuration of R307 Fingerprint Sensor
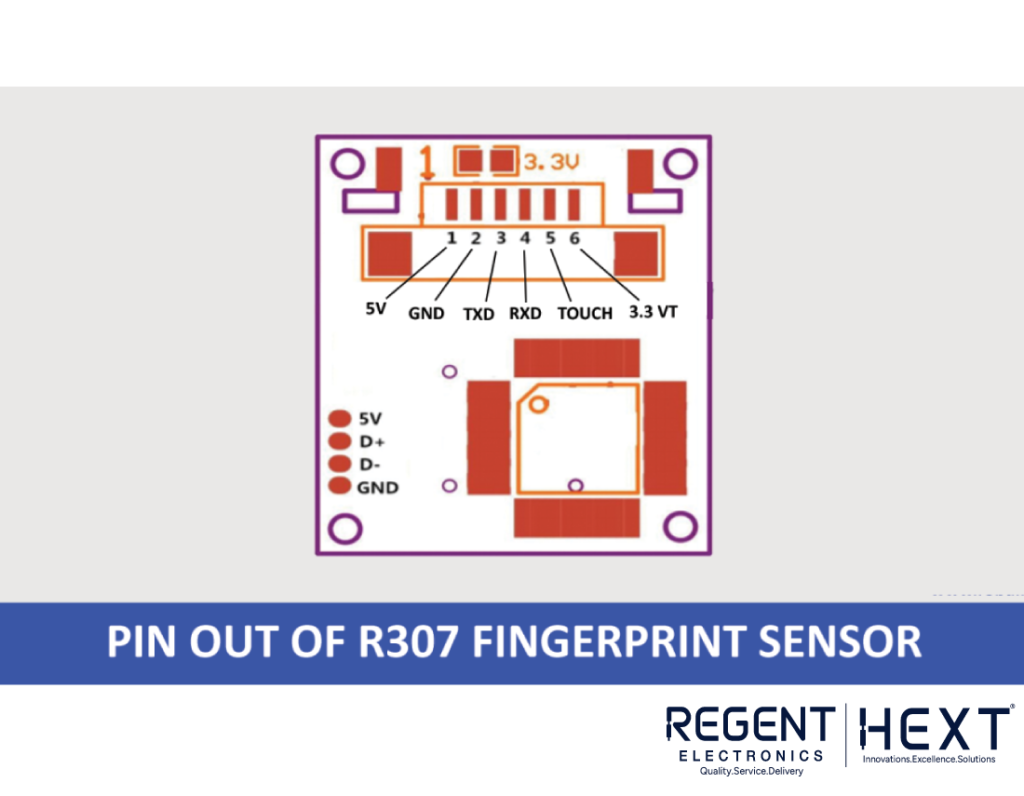
| Pin Number | Name | Type | Function |
| 1 | 5V | Input | Power input |
| 2 | GND | – | Ground connection |
| 3 | TXD | Output | Data output (TTL logic level) |
| 4 | RXD | Input | Data input (TTL logic level) |
| 5 | Touch | Output | Finger detection signal |
| 6 | 3.3V | Input | Finger detection power |
Components Required
- Arduino Uno
- R307 Fingerprint Sensor Module
- TFT Display
- Breadboard
- Jumper Wires
Interfacing R307 with Arduino
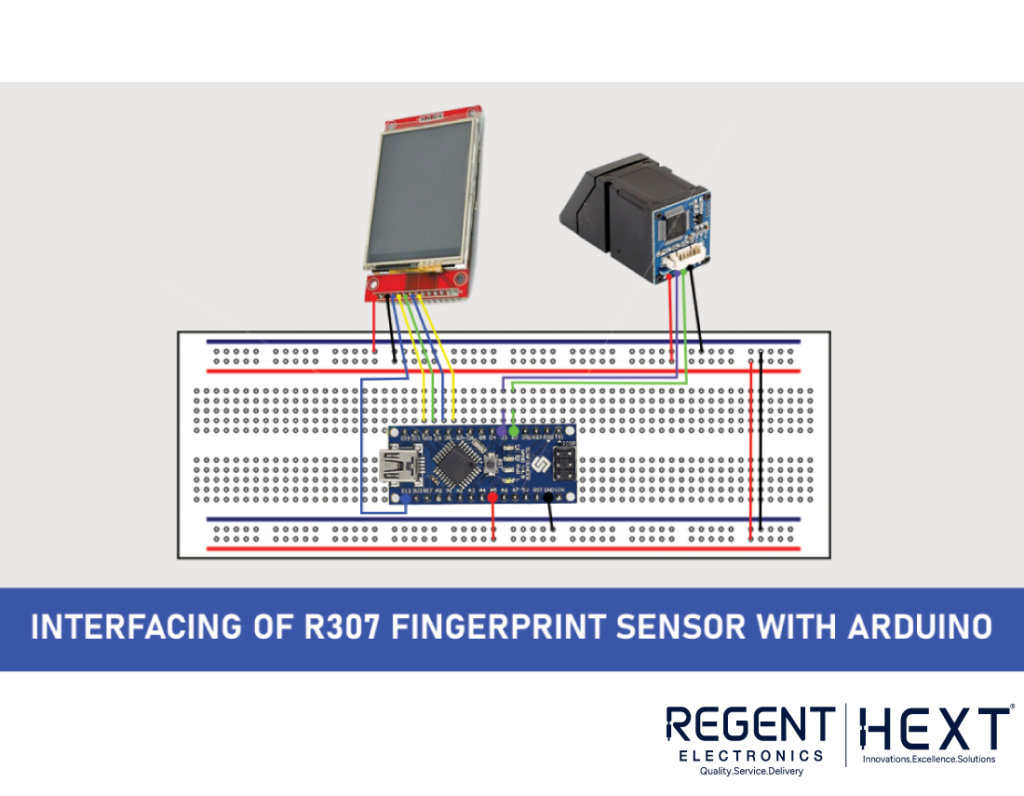
Connect the fingerprint sensor and display to the Arduino as per the table below.
Fingerprint Sensor Connections
- Black Wire → Arduino GND
- Red Wire → Arduino 5V
- Green Wire → Digital Pin 2
- White Wire → Digital Pin 3
Display Connections
- VCC → Arduino 5V
- GND → Arduino GND
- CS → Digital Pin 10
- RST → Digital Pin 9
- A0 → Digital Pin 8
- SDA → Digital Pin 11
- SCK → Digital Pin 13
- LED → Arduino 3.3V
Installing Required Libraries
Before uploading the code, install the necessary libraries:
After installing the libraries, open the Arduino IDE and navigate to File > Examples > Adafruit Fingerprint Sensor Library > Enrol. This example code will prompt you to enroll fingerprints into the system, assigning each fingerprint a unique ID.
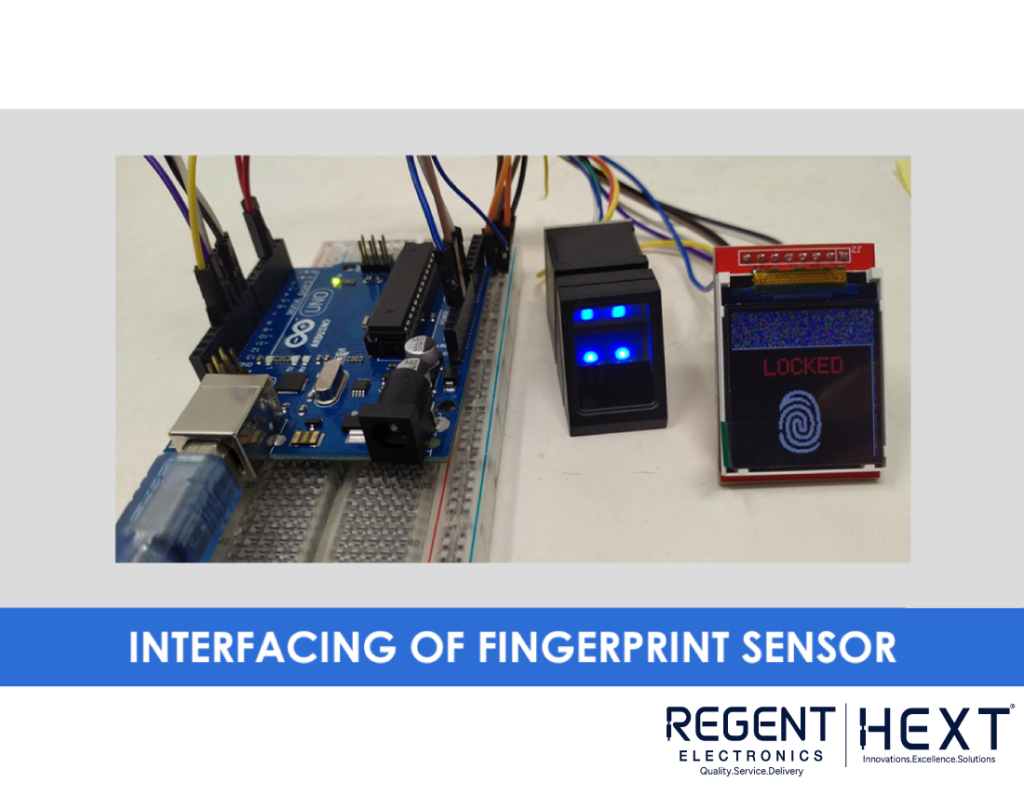
Code Implementation
Once the fingerprints are registered, upload the following code to display fingerprint authentication results on the TFT display.
#include <SPI.h>
#include <Adafruit_GFX.h>
#include <TFT_ILI9163C.h>
#include <Adafruit_Fingerprint.h>
#include <SoftwareSerial.h>
#define CS 10
#define DC 9
TFT_ILI9163C display = TFT_ILI9163C(CS, 8, DC);
SoftwareSerial mySerial(2, 3);
Adafruit_Fingerprint finger = Adafruit_Fingerprint(&mySerial);
void setup() {
Serial.begin(9600);
finger.begin(57600);
if (finger.verifyPassword()) {
Serial.println(“Fingerprint sensor detected!”);
} else {
Serial.println(“Fingerprint sensor not found!”);
}
display.begin();
}
void loop() {
int fingerprintID = getFingerprintID();
if (fingerprintID > 0) {
Serial.print(“Access Granted: ID “);
Serial.println(fingerprintID);
} else {
Serial.println(“Access Denied”);
}
delay(1000);
}
int getFingerprintID() {
uint8_t p = finger.getImage();
if (p != FINGERPRINT_OK) return -1;
p = finger.image2Tz();
if (p != FINGERPRINT_OK) return -1;
p = finger.fingerFastSearch();
if (p != FINGERPRINT_OK) return -1;
return finger.fingerID;
}
Conclusion
By following this guide, you can successfully interface the R307 fingerprint sensor with Arduino to create a biometric access control system. This project enhances security and provides a practical real-world application of fingerprint technology. If you have any questions or suggestions, feel free to leave a comment below.