
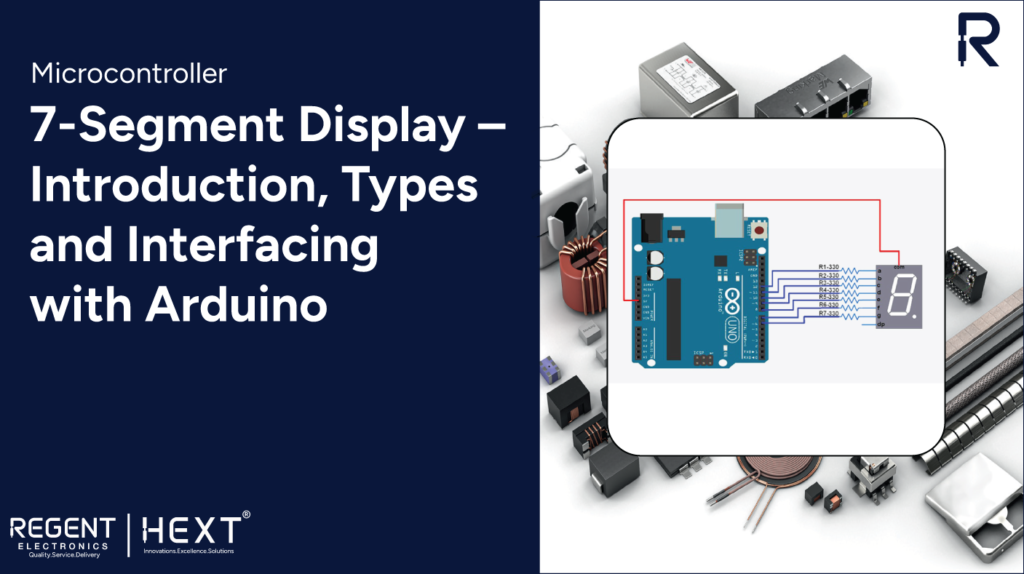
7-Segment Display: Introduction, Types, and Interfacing with Arduino
7-segment displays are commonly found in many everyday applications. In this article, we will explore what a 7-segment display is, its types, and how to interface it with an Arduino.
What is a 7-Segment Display?

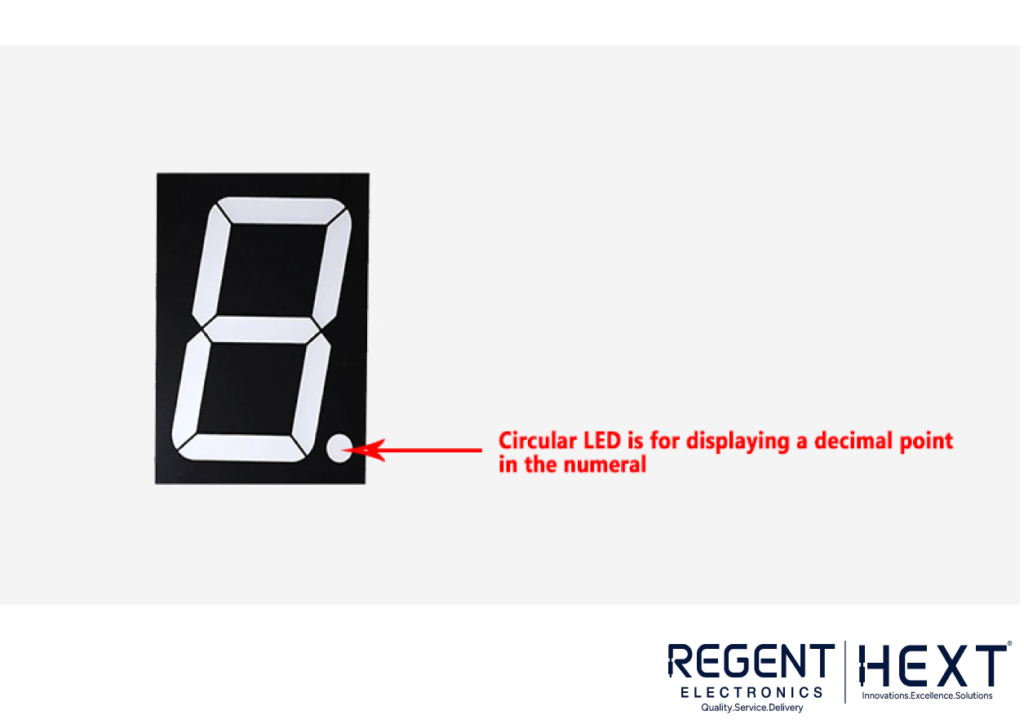
A 7-segment display is a type of electronic display used to show numerical information. It consists of seven LED segments arranged in the shape of the number 8. Each segment can be individually controlled to display numbers from 0 to 9.
These displays are widely used in counter machines, electronic meters, digital clocks, and shop banners due to their affordability compared to LCDs.
Types of 7-Segment Displays
7-segment displays are categorized into two main types based on their LED connections:
1. Common Cathode (CC)
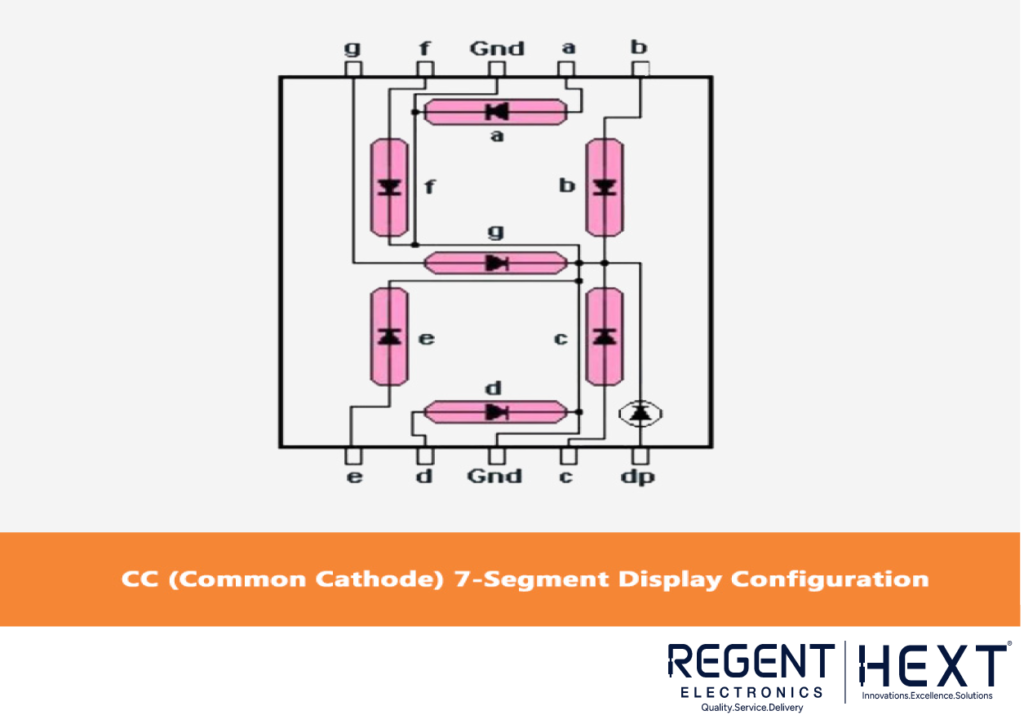
In a common cathode display, all the cathode terminals of the LEDs are connected together. The anodes are left open and must be connected to a voltage source to light up the segments.
2. Common Anode (CA)
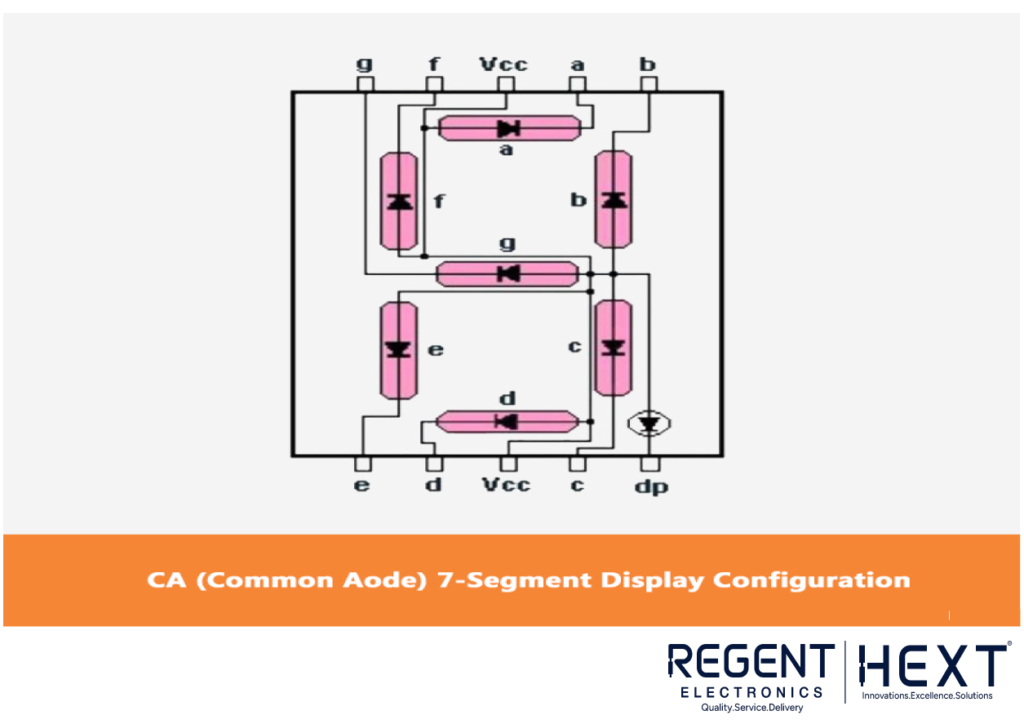
In a common anode display, all anode terminals are connected together. The cathode terminals are left open and must be connected to the ground to illuminate the segments.
Interfacing a 7-Segment Display with Arduino
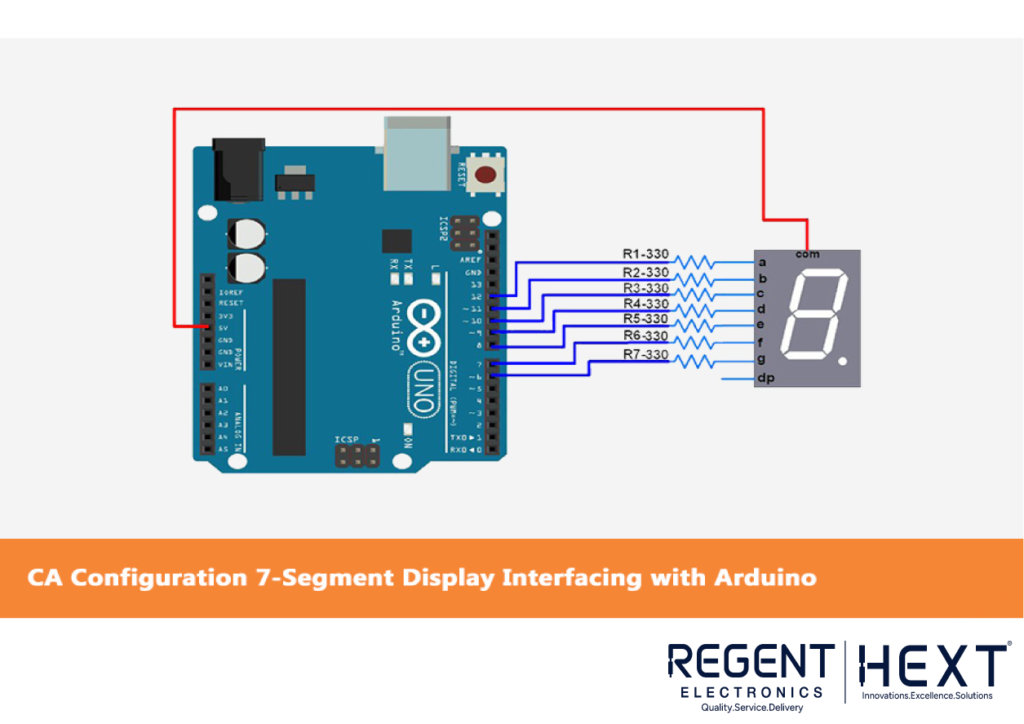
For this tutorial, we will interface a common anode 7-segment display with an Arduino board.
Circuit Connection
- Connect the common anode pin to the 5V supply on the Arduino.
- Connect the remaining segment pins (a to g) to the GPIO pins on the Arduino.
- Use appropriate resistors to protect the LEDs from excess current.
- Refer to the connection diagram for correct wiring.
Truth Table for 7-Segment Display
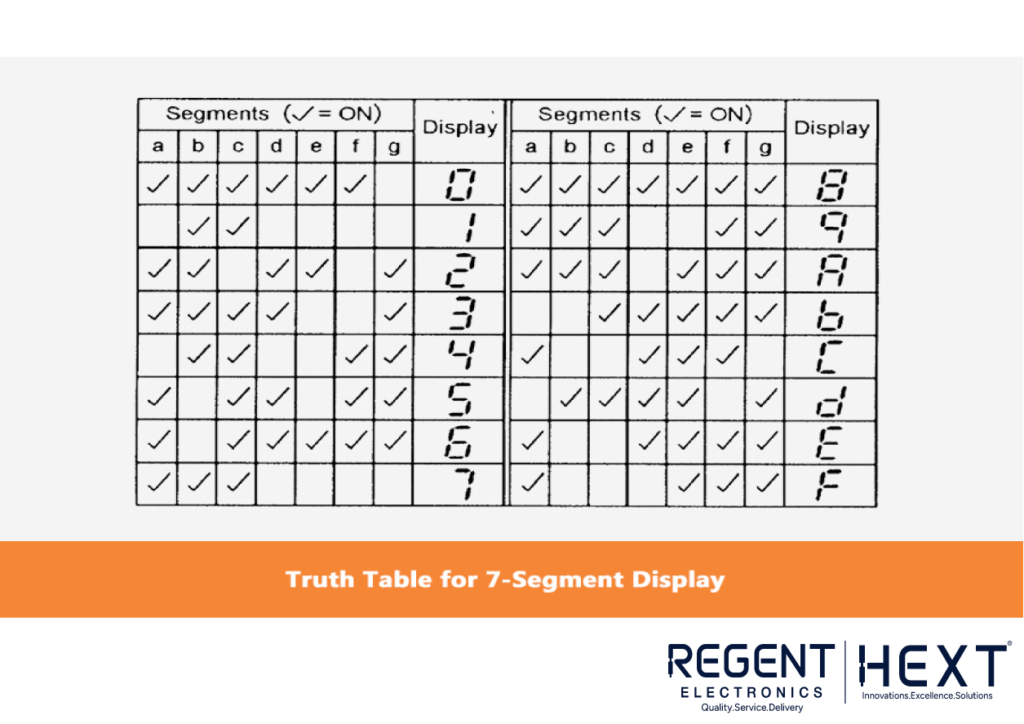
The truth table determines which segments need to be turned on to display a specific digit.
| Digit | a | b | c | d | e | f | g |
| 0 | 1 | 1 | 1 | 1 | 1 | 1 | 0 |
| 1 | 0 | 1 | 1 | 0 | 0 | 0 | 0 |
| 2 | 1 | 1 | 0 | 1 | 1 | 0 | 1 |
| 3 | 1 | 1 | 1 | 1 | 0 | 0 | 1 |
| 4 | 0 | 1 | 1 | 0 | 0 | 1 | 1 |
| 5 | 1 | 0 | 1 | 1 | 0 | 1 | 1 |
| 6 | 1 | 0 | 1 | 1 | 1 | 1 | 1 |
| 7 | 1 | 1 | 1 | 0 | 0 | 0 | 0 |
| 8 | 1 | 1 | 1 | 1 | 1 | 1 | 1 |
| 9 | 1 | 1 | 1 | 0 | 0 | 1 | 1 |
Arduino Code Examples
1. Turning ON All LEDs One by One
void setup() {
for(int i = 2; i < 9; i++) {
pinMode(i, OUTPUT);
}
}
void loop() {
for(int i = 2; i < 9; i++) {
digitalWrite(i, HIGH);
delay(1000);
}
for(int i = 2; i < 9; i++) {
digitalWrite(i, LOW);
delay(1000);
}
delay(1000);
}
This code turns on each LED segment one by one, creating a glowing effect.
2. Displaying Digits from 0 to 9
int num_array[10][7] = {
{1,1,1,1,1,1,0},
{0,1,1,0,0,0,0},
{1,1,0,1,1,0,1},
{1,1,1,1,0,0,1},
{0,1,1,0,0,1,1},
{1,0,1,1,0,1,1},
{1,0,1,1,1,1,1},
{1,1,1,0,0,0,0},
{1,1,1,1,1,1,1},
{1,1,1,0,0,1,1}
};
void setup() {
for(int i = 2; i < 9; i++) {
pinMode(i, OUTPUT);
}
}
void loop() {
for (int counter = 0; counter < 10; counter++) {
displayNumber(counter);
delay(1000);
}
}
void displayNumber(int number) {
int pin = 2;
for (int j = 0; j < 7; j++) {
digitalWrite(pin, num_array[number][j]);
pin++;
}
}
This code displays numbers from 0 to 9 in sequence.
Conclusion
Interfacing a 7-segment display with Arduino is a great project for beginners. It helps understand how numerical displays work in real-world applications.
If you’re working on an electronics project that requires numerical output, using a 7-segment display is a cost-effective solution. Try this project and share your experience with Regent Electronics!