
How to Display Custom Text/Image on OLED with NodeMCU
Introduction
In this tutorial, we will explore how to display custom text and images on an OLED display using NodeMCU. Whether you are a beginner or an experienced developer, this guide will walk you through the process step by step.
Topics Covered
- What is an OLED display?
- Understanding the OLED module
- Installing necessary libraries
- Connecting OLED with NodeMCU
- Displaying images and objects on OLED
- Pros and cons of OLED
- Common errors and troubleshooting
Hardware Requirements
To get started, you will need:
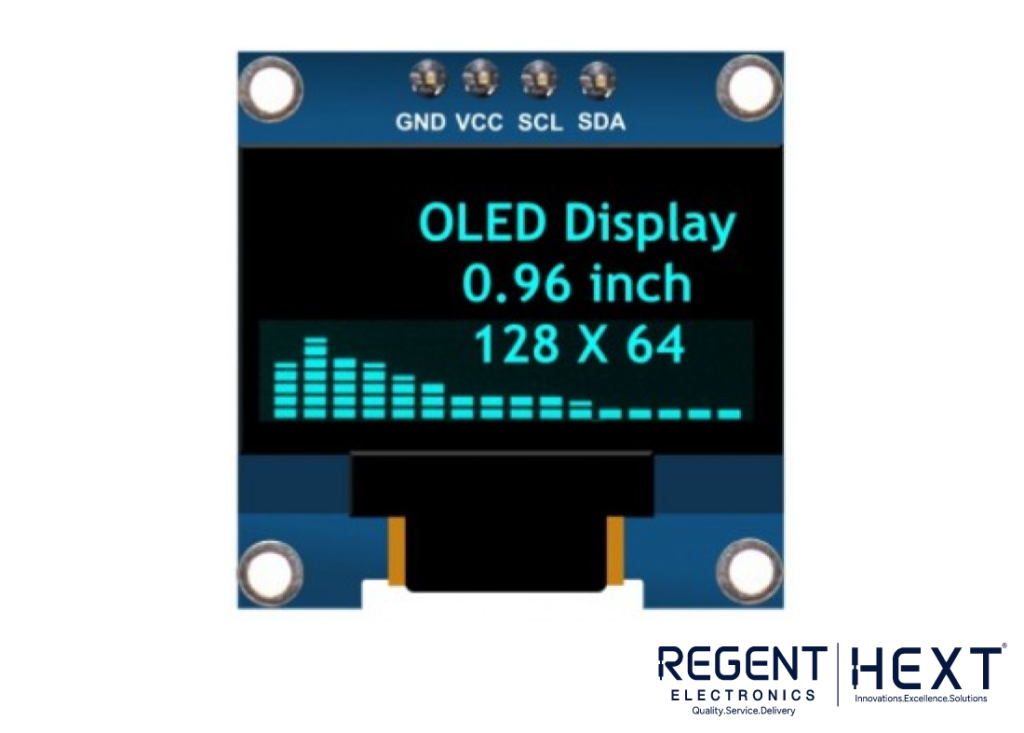
- 0.96″ (128×64) I2C OLED display
- NodeMCU
- Breadboard
- Jumper cables
- USB Type-B cable
What is an OLED Display?
OLED (Organic Light-Emitting Diodes) is a display technology that utilizes organic materials to emit light when an electrical current passes through them. Unlike LCDs, OLEDs do not require a backlight, making them thinner and more energy-efficient.
Key Features:
- OLED Driver IC: SSD1306
- Resolution: 128 x 64 pixels
- Viewing Angle: >160°
- Input Voltage: 3.3V – 6V
- Pixel Color: Blue
- Compatible with Arduino
- Working temperature: -30°C to 70°C
- Supports I2C communication
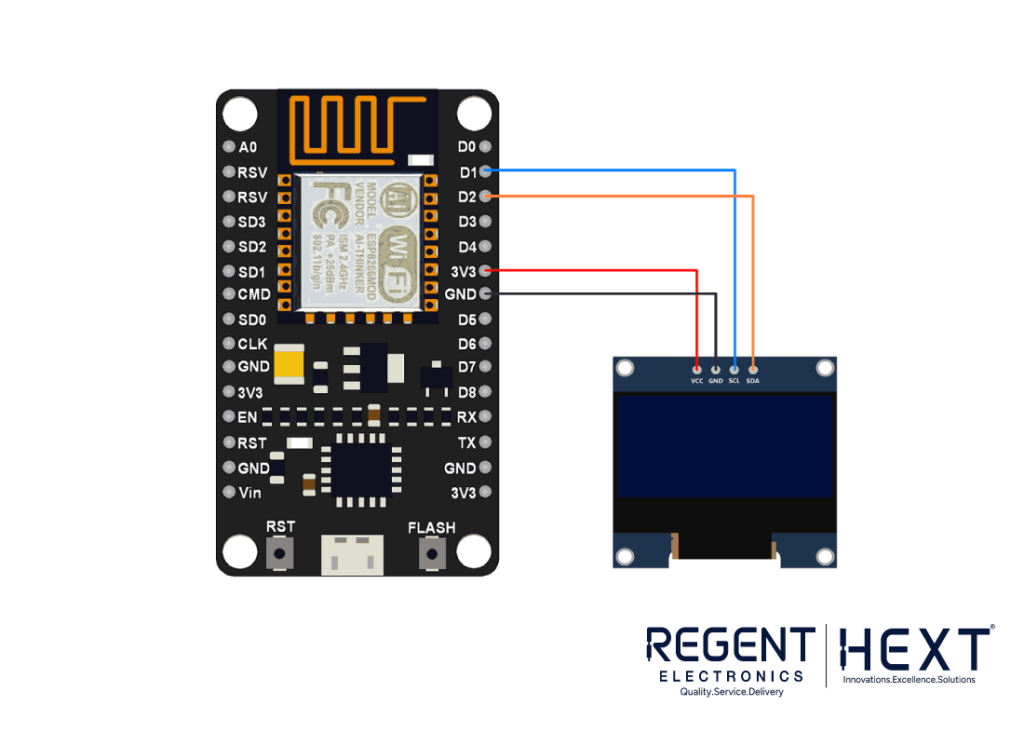
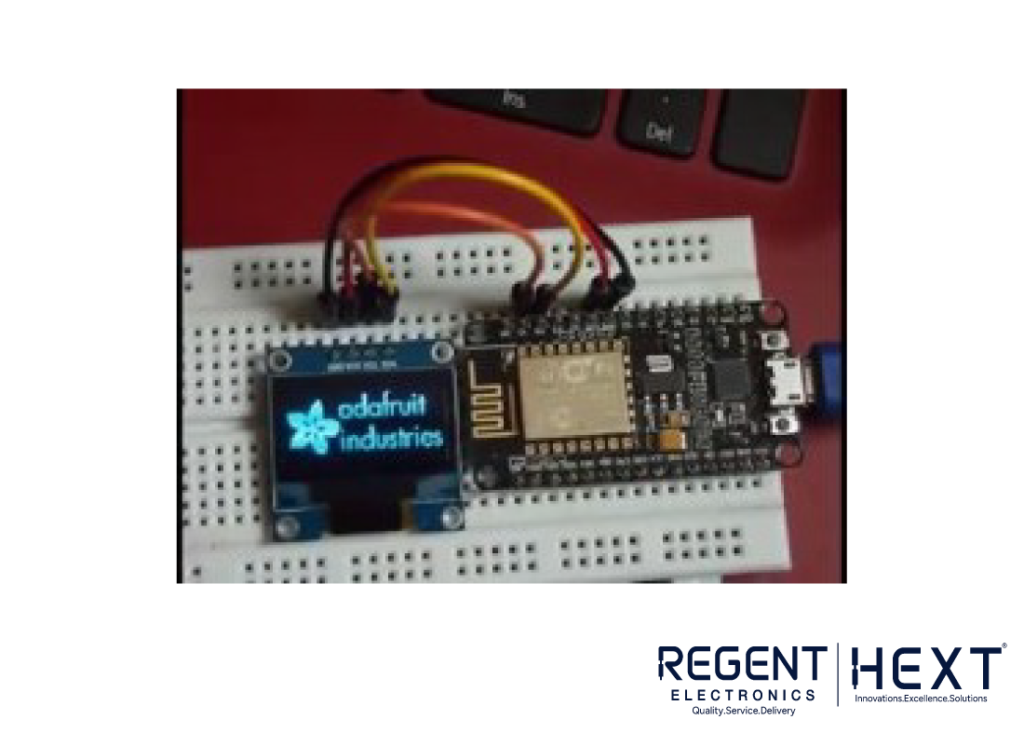
Connecting OLED to NodeMCU
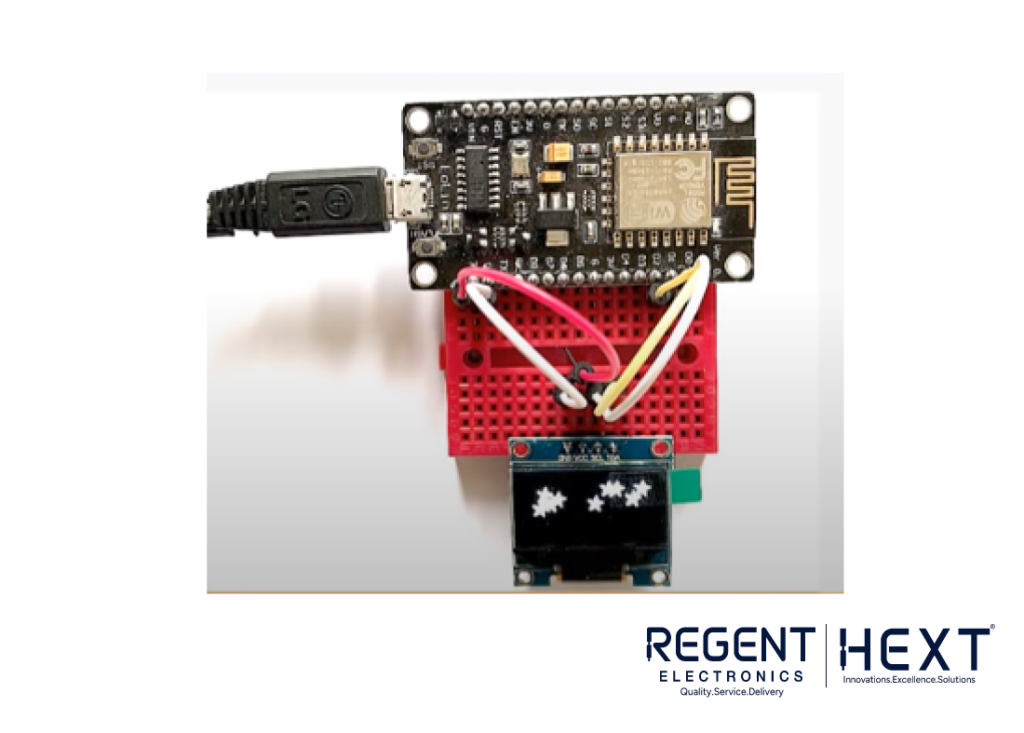
The OLED I2C module has four pins: VCC, GND, SCK, and SDA. Here is how to connect them:
- VCC -> 3.3V or 5V on NodeMCU
- GND -> GND on NodeMCU
- SCK -> D1 on NodeMCU
- SDA -> D2 on NodeMCU
Installing Required Libraries
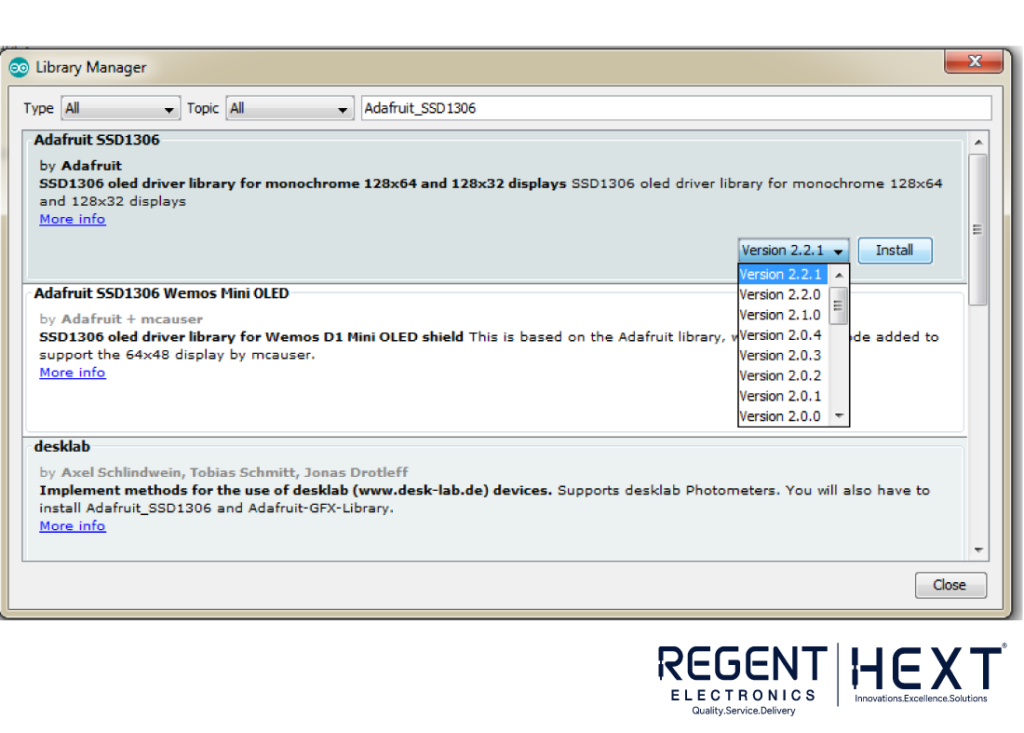

To control the OLED display, we will use the Adafruit_SSD1306 and Adafruit_GFX libraries.
Method 1: Install via Arduino IDE
- Open Arduino IDE and navigate to Sketch > Include Library > Manage Libraries.
- Search for “Adafruit SSD1306” and “Adafruit GFX”.
- Select the latest versions and install them.
Method 2: Manual Installation
- Download the libraries from GitHub.
- Extract and move the folders to Documents > Arduino > libraries.
Coding for OLED Display
Open Arduino IDE and navigate to File > Examples > Adafruit SSD1306 > ssd1306_128x64_i2c.
Modify the following line for NodeMCU compatibility:
#define OLED_RESET LED_BUILTIN // Use LED_BUILTIN instead of pin 4
Here is a basic example:
#include <Wire.h>
#include <Adafruit_GFX.h>
#include <Adafruit_SSD1306.h>
#define SCREEN_WIDTH 128
#define SCREEN_HEIGHT 64
#define OLED_RESET LED_BUILTIN
Adafruit_SSD1306 display(SCREEN_WIDTH, SCREEN_HEIGHT, &Wire, OLED_RESET);
void setup() {
Serial.begin(9600);
if (!display.begin(SSD1306_SWITCHCAPVCC, 0x3D)) {
Serial.println(“SSD1306 allocation failed”);
for (;;);
}
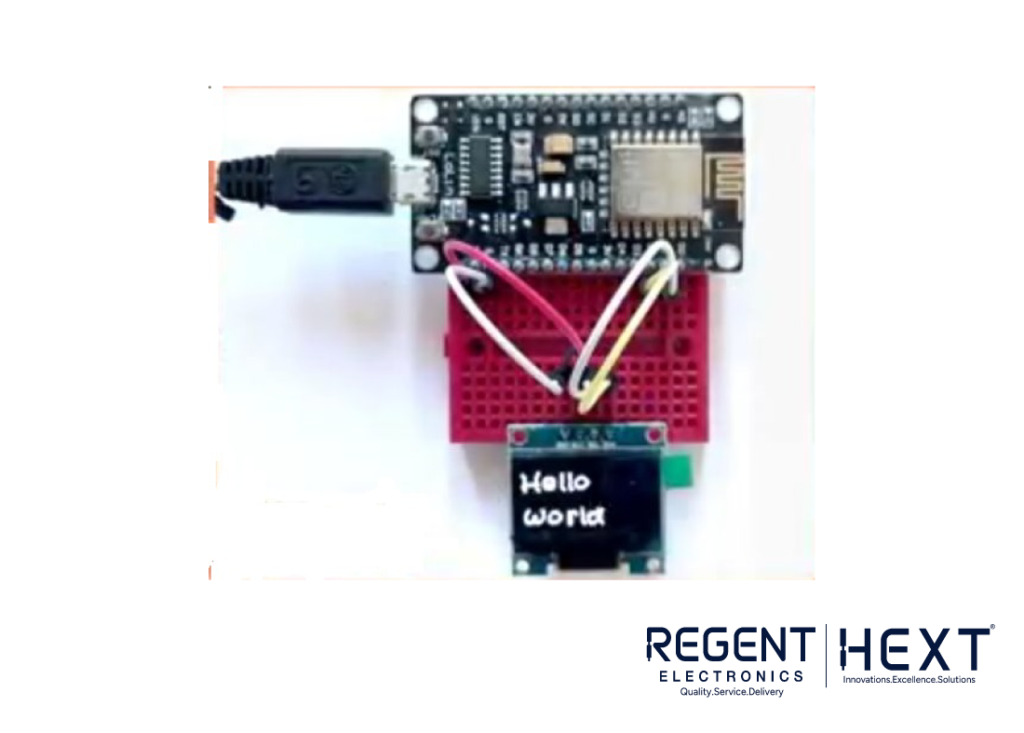
display.clearDisplay();
display.setTextSize(1);
display.setTextColor(SSD1306_WHITE);
display.setCursor(0, 0);
display.println(“Hello, World!”);
display.display();
}
void loop() {
}
Customizing Text and Adding Images
Creating Custom Fonts
To display custom fonts:
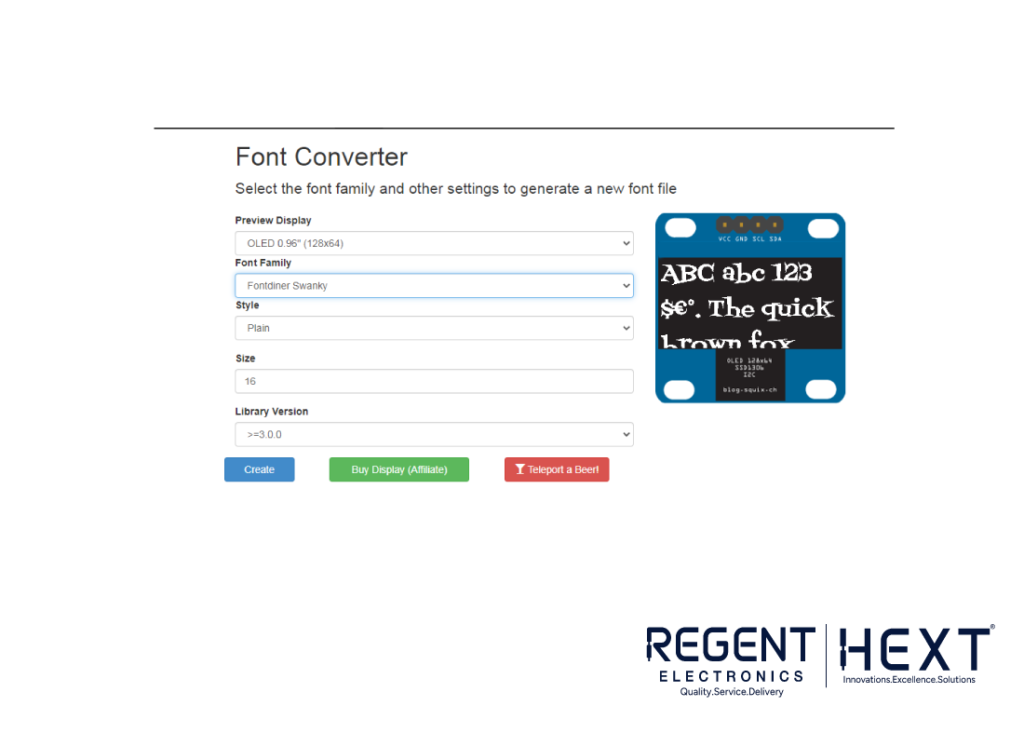
- Visit OLED Font Generator.
- Choose size, font family, and set “Adafruit GFX Font”.
- Click “Create” and download the generated file.
- Save it as modified_font.h in your Arduino project folder.
- Include it in your code:
- #include “modified_font.h”
- display.setFont(&Your_Fonts_Name);
Displaying Custom Images
For bitmap images:
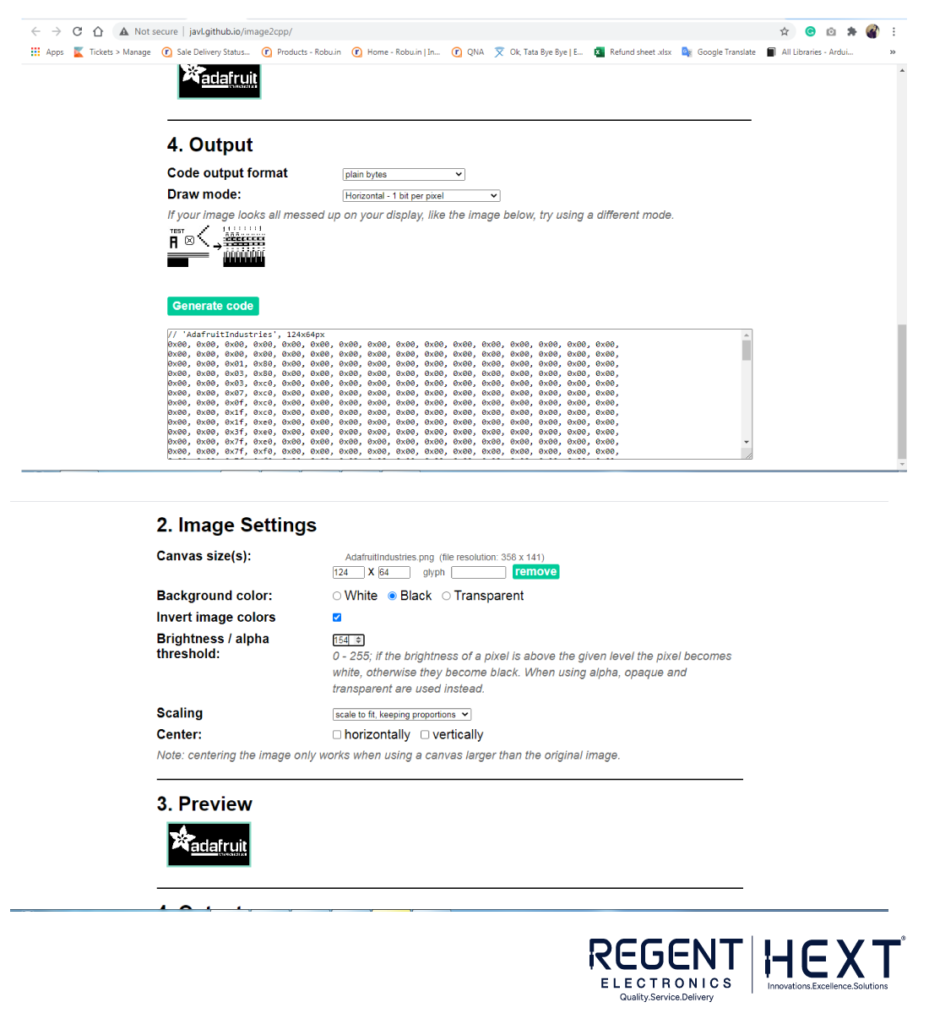
- Convert your image to 128×64 pixels using MS Paint.
- Visit Image2CPP.
- Upload your image and select “Invert colors” and “Arduino Code”.
- Copy the generated byte array into your code.
- Display the image using:
- display.drawBitmap(x, y, bitmap_name, width, height, SSD1306_WHITE);
Advantages & Disadvantages of OLED
Advantages:
- Thin and lightweight
- Low power consumption
- No backlight required
- High contrast and deep blacks
- Wide viewing angle
Disadvantages:
- More expensive than LCDs
- Shorter lifespan
- Susceptible to burn-in
- Easily damaged by water
Common Errors & Troubleshooting
- Incorrect I2C Address: Ensure the address in Adafruit_SSD1306.h matches the display.
- Wrong OLED_RESET Pin: Use #define OLED_RESET LED_BUILTIN.
- No Display Output: Check wiring and power connections.
Conclusion
OLED displays offer excellent visual quality and energy efficiency, making them ideal for IoT projects. By using the Adafruit library and online tools, displaying text and images becomes effortless. Experiment with different fonts and graphics to bring your projects to life!
For any queries, feel free to leave a comment. Happy coding!