
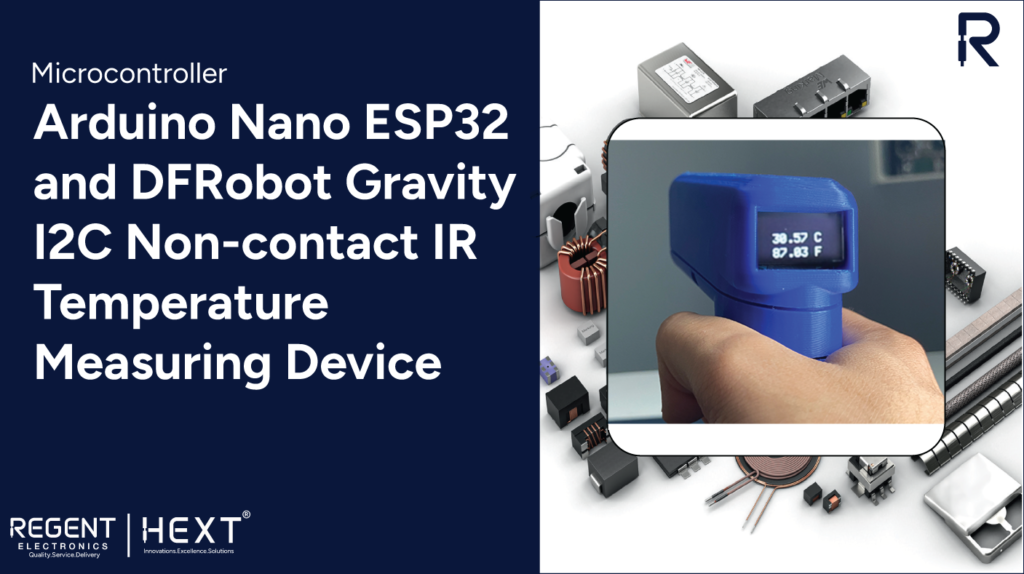
Building a Non-Contact IR Temperature Measuring Device with Arduino Nano ESP32
Are you looking for an innovative way to measure temperature without physical contact? In this project, we’ll build a non-contact infrared (IR) temperature measuring device using the Arduino Nano ESP32, DFRobot Gravity I2C IR Temperature Sensor, and an SSD1306 OLED Display. This project is perfect for IoT applications, making it easier to collect and store temperature data.
Table of Contents
- Introduction to Arduino Nano ESP32
- Hardware Requirements
- Software Requirements
- Setting Up the IDE & Libraries
- Circuit Diagram & Hardware Interfacing
- Code Implementation
- Project Workflow
- Conclusion
Introduction to Arduino Nano ESP32
The Arduino Nano ESP32 is a powerful, compact microcontroller with built-in Wi-Fi and Bluetooth capabilities. It is an excellent choice for IoT applications, allowing seamless data storage and analysis while maintaining a low power requirement.
Key Features of Arduino Nano ESP32:
- IoT-ready with built-in Wi-Fi and Bluetooth
- Low power consumption for battery-powered applications
- User-friendly interface
- Compact size for embedded projects
Hardware Requirements
To build this project, you will need the following components:
- Arduino Nano ESP32
- DFRobot Gravity IR Non-Contact Temperature Sensor
- SSD1306 I2C OLED Display
- 6mm Laser Module
- 500mAh Li-Po Battery
- 1A Li-Po Charging Module
- 5V Boost Converter
- Jumper Wires
- Flush Metal Switch & Push Switch
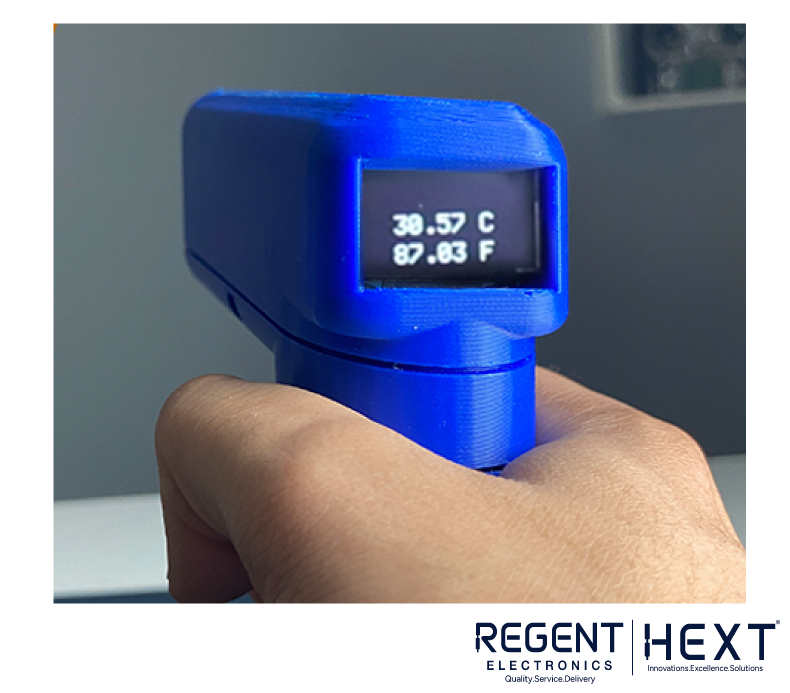
- 3D Printed Housing (for portability)
Software Requirements
To program the Arduino Nano ESP32, we need the following software tools:
- Arduino IDE (Download from the official website)
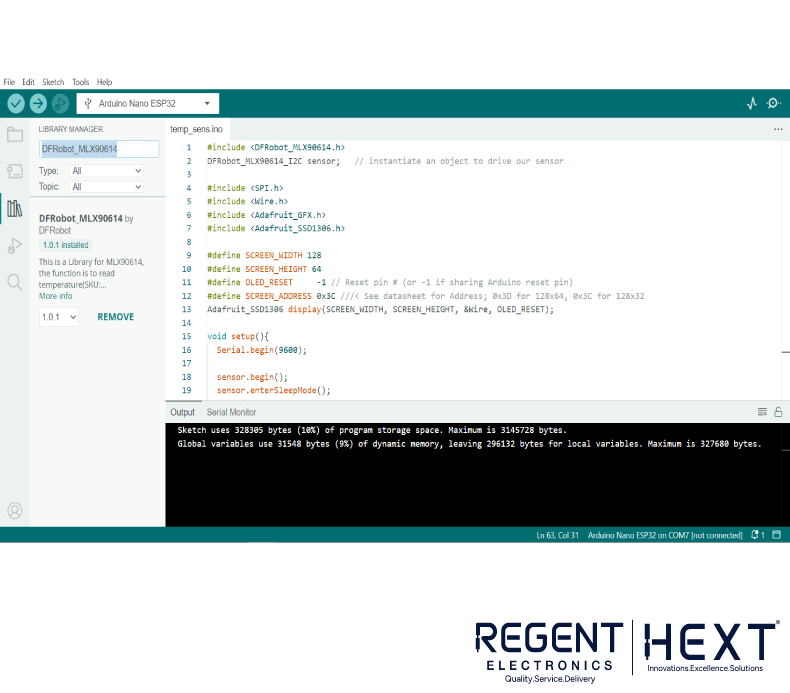
- DFRobot_MLX90614 Library (for the IR temperature sensor)
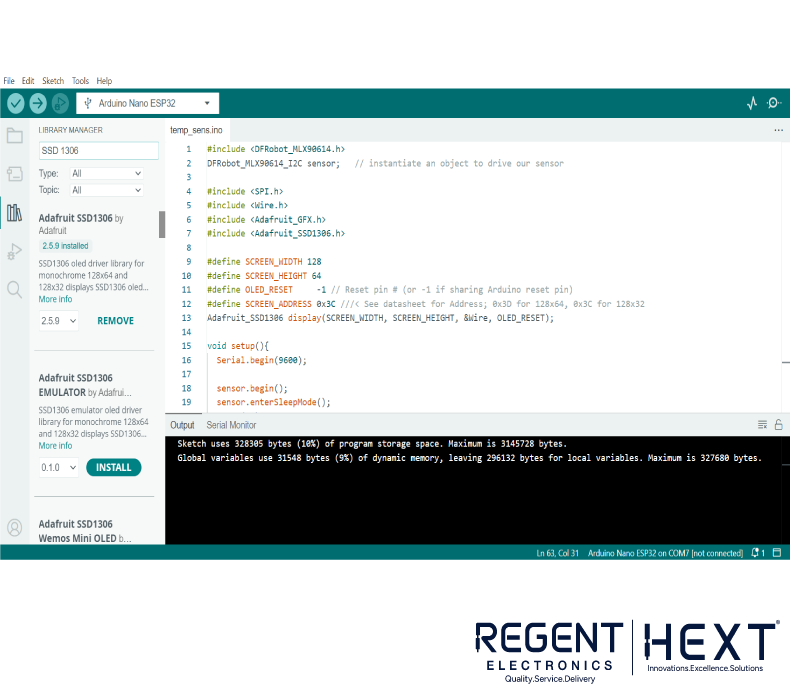
- SSD1306 OLED Display Library (Adafruit Industries)
Setting Up the IDE & Libraries
- Install Arduino IDE on your computer.
- Open the IDE and navigate to Manage Libraries.
- Search for DFRobot_MLX90614 and install it.
- For the OLED display, search for SSD1306 and install the Adafruit Industries version.
- Ensure all necessary dependencies, including GFX Library, are installed.
Circuit Diagram & Hardware Interfacing
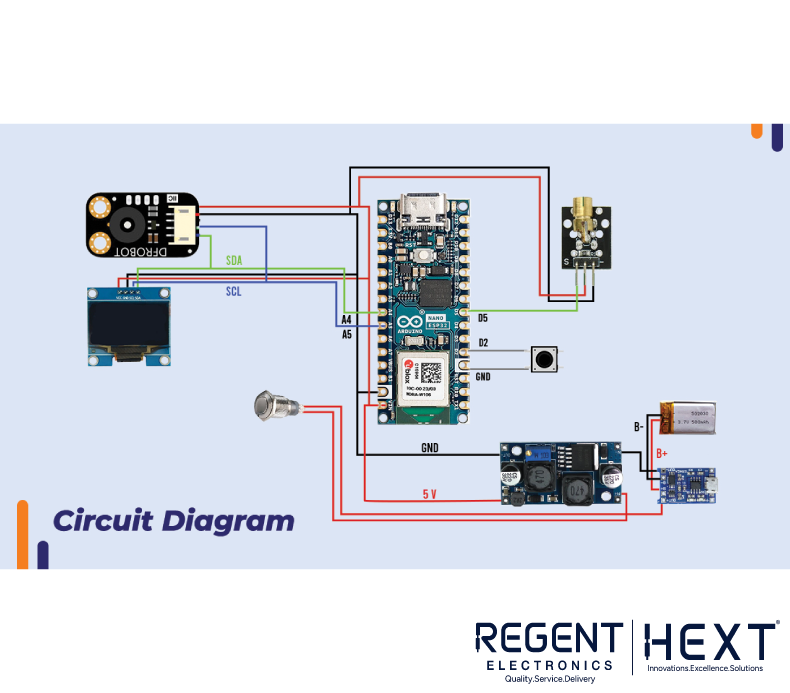
Connections for DFRobot Gravity IR Temperature Sensor
| DFRobot Sensor Pins | Arduino Nano ESP32 Pins |
| +Ve | 5V |
| -Ve | GND |
| SDA | A4 |
| SCL | A5 |
Connections for SSD1306 OLED Display
| SSD1306 Display Pins | Arduino Nano ESP32 Pins |
| +Ve | 5V |
| -Ve | GND |
| SDA | A4 |
| SCL | A5 |
Connections for Laser Module
| Laser Module Pins | Arduino Nano ESP32 Pins |
| +Ve | 5V |
| -Ve | GND |
| S | D5 |
Code Implementation
Upload the following code to your Arduino Nano ESP32:
#include <DFRobot_MLX90614.h>
#include <SPI.h>
#include <Wire.h>
#include <Adafruit_GFX.h>
#include <Adafruit_SSD1306.h>
#define SCREEN_WIDTH 128
#define SCREEN_HEIGHT 64
#define OLED_RESET -1
#define SCREEN_ADDRESS 0x3C
DFRobot_MLX90614_I2C sensor;
Adafruit_SSD1306 display(SCREEN_WIDTH, SCREEN_HEIGHT, &Wire, OLED_RESET);
void setup() {
Serial.begin(9600);
sensor.begin();
display.begin(SSD1306_SWITCHCAPVCC, SCREEN_ADDRESS);
display.clearDisplay();
display.setTextSize(2);
display.setTextColor(SSD1306_WHITE);
display.setCursor(35, 5);
display.println(“Point & Shoot”);
display.display();
delay(1000);
pinMode(2, INPUT_PULLUP);
pinMode(5, OUTPUT);
}
void loop() {
if (analogRead(2) == 0) {
float temp = 0;
for (int i = 0; i < 10; i++) {
temp += sensor.getObjectTempCelsius() + 0.60;
delay(90);
}
float objectTemp = (temp / 10) – 0.30;
digitalWrite(5, HIGH);
display.clearDisplay();
display.setTextSize(2);
display.setCursor(5, 5);
display.println(“Temp: “);
display.setCursor(20, 28);
display.println(String(objectTemp) + ” C”);
display.setCursor(20, 50);
display.println(String(objectTemp * 9 / 5 + 32) + ” F”);
display.display();
} else {
digitalWrite(5, LOW);
}
delay(300);
}
Project Workflow
- The device initializes and displays “Point & Shoot” on the OLED screen.
- When the trigger button is pressed, the Arduino collects 10 temperature readings.
- The system averages these readings to improve accuracy.
- The final temperature is displayed on the OLED screen in Celsius and Fahrenheit.
- The Li-Po battery powers the system while the boost converter ensures a stable 5V supply.
Conclusion
By combining the Arduino Nano ESP32 with the DFRobot Gravity IR Sensor, we’ve created a portable non-contact temperature measuring device. The built-in Wi-Fi capabilities allow for easy IoT integration, enabling real-time temperature monitoring and cloud storage for future analysis.
This project is perfect for home automation, healthcare, and industrial applications where accurate and remote temperature measurements are crucial.
Stay tuned for more exciting projects from Regent Electronics! 🚀