
IoT-Enabled Energy Meter with Raspberry Pi Pico & Arduino Nano | Regent Electronics
In today’s digital era, energy monitoring is essential for efficiency and cost savings. This guide walks you through building an IoT-enabled energy meter using Raspberry Pi Pico and Arduino Nano. With real-time tracking via the internet and local storage for backup, this smart meter is perfect for homes, offices, and industries.
Table of Contents
- Introduction to Smart Energy Monitoring
- Required Hardware and Software Components
- Setting Up the Development Environment
- Integrating with Ubidots IoT Platform
- Circuit Diagram and Hardware Setup
- Writing and Deploying Code
- How the System Works
- Key Benefits and Future Enhancements
1. Introduction to Smart Energy Monitoring
Why Energy Monitoring Matters
Energy wastage leads to unnecessary costs and environmental harm. A smart energy meter helps track consumption, detect anomalies, and optimize usage, all in real-time.
Why Use Raspberry Pi Pico & Arduino Nano?
- Raspberry Pi Pico: A robust microcontroller with dual-core ARM Cortex-M0+.
- Arduino Nano: A compact, low-power microcontroller for handling sensor data.
- ESP8266-01: Enables wireless connectivity for IoT integration.
- Ubidots: A cloud platform for real-time visualization of energy data.
2. Required Hardware and Software Components
Hardware:
- Raspberry Pi Pico
- Arduino Nano
- 1602 LCD Display with I2C Adapter
- ESP8266-01 WiFi Module
- SD Card Module
- Logic Level Converter
- Power Supply (5V, 1A)
- Jumper Wires and Prototype Board
- ACS712 Current Sensor
Software:
- Thonny IDE (for Raspberry Pi Pico programming)
- Arduino IDE (for Arduino Nano programming)
- Ubidots IoT Dashboard
- Required libraries for LCD, I2C, and SD card communication
3. Setting Up the Development Environment
- Install Thonny IDE & Arduino IDE
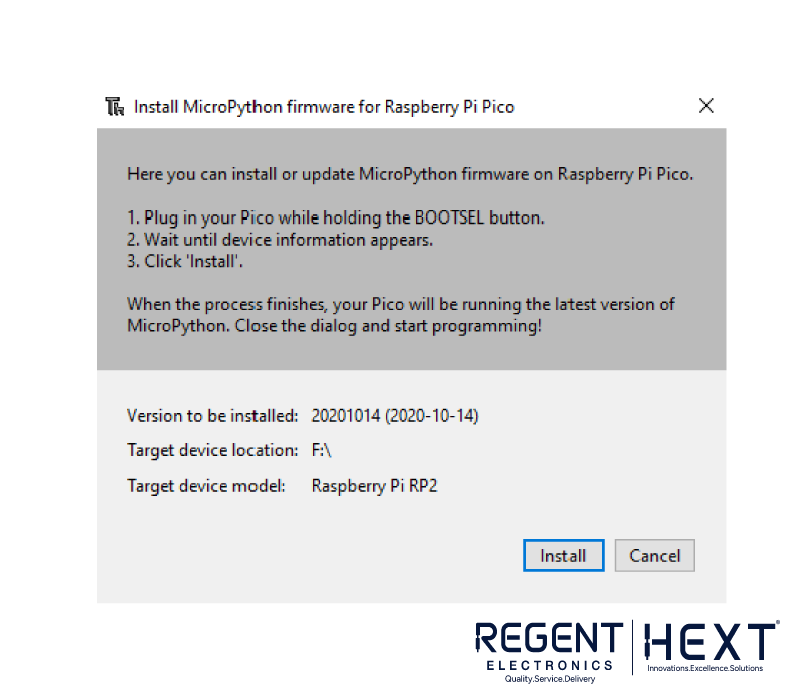
- Update Raspberry Pi Pico Firmware
- Install Necessary Libraries
- LCD and SD card libraries for Thonny IDE
- Wire and I2C libraries for Arduino IDE
4. Integrating with Ubidots IoT Platform
- Create an account on Ubidots
- Navigate to Devices > API Credentials and copy the token
- Update the token in main.py
- Power up the system, and your device should appear under Devices
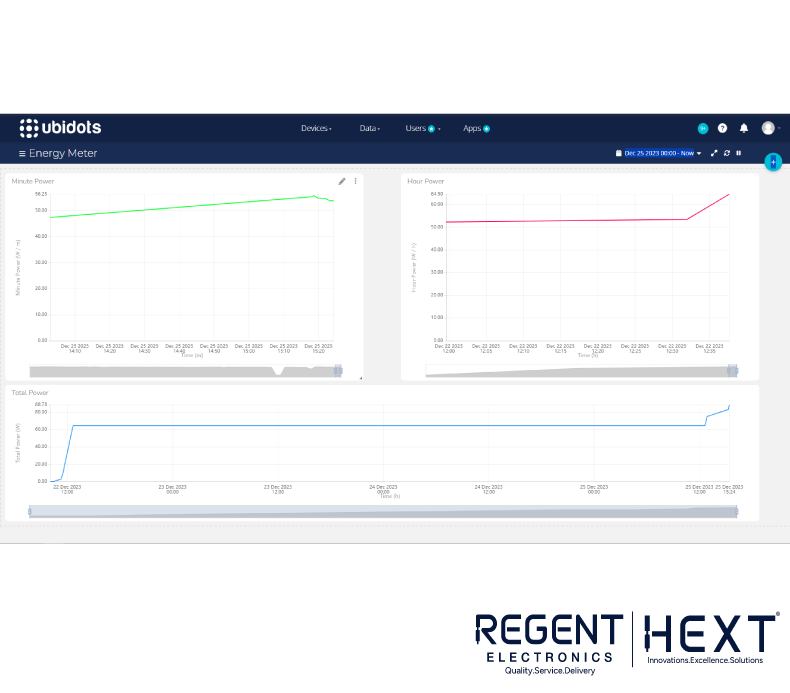
- Use the Ubidots Dashboard to visualize energy consumption trends
5. Circuit Diagram and Hardware Setup
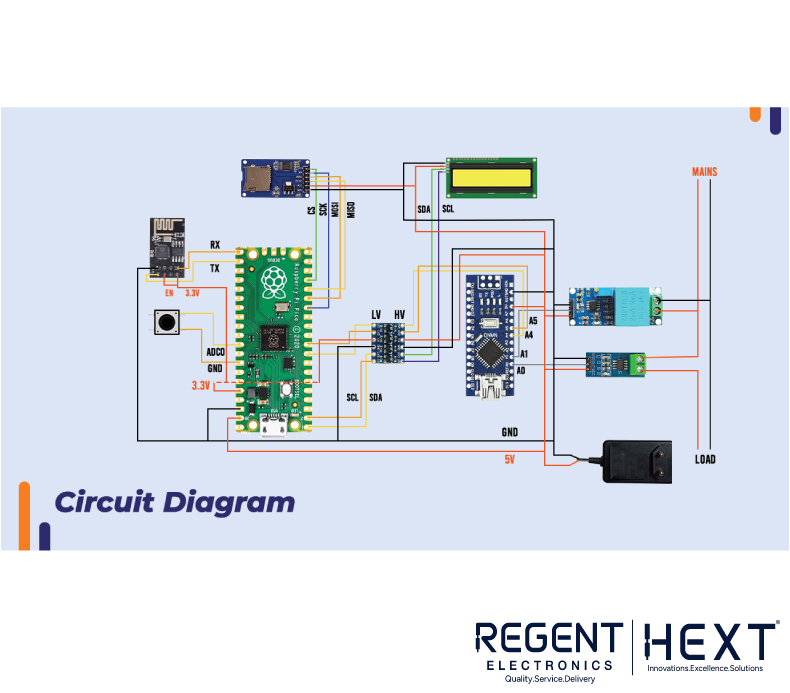
Wiring Overview
(Schematic should be illustrated using tools like Fritzing.)
| Component | Connected To |
| Arduino Nano (A4, A5) | Logic Converter (H3, H4) |
| Raspberry Pi Pico (3.3V, GND, GPIO) | Logic Converter |
| ESP8266-01 (TX, RX, 3.3V, GND) | Raspberry Pi Pico |
6. Writing and Deploying Code
Arduino Nano Code (Measuring Voltage & Current):
#include <Wire.h>
float power, voltage, current;
#define VoltagePin A1
#define CurrentPin A0
void setup() {
Serial.begin(9600);
Wire.begin(9);
}
void loop() {
voltage = analogRead(VoltagePin) * 0.1;
current = analogRead(CurrentPin) * 0.1;
power = voltage * current;
Serial.println(power);
delay(1000);
}
Raspberry Pi Pico Code (Uploading to Ubidots):
from machine import Pin, I2C
import utime
import urequests
SSID = “Your_SSID”
PASSWORD = “Your_PASSWORD”
TOKEN = “Your_Ubidots_Token”
def send_data(power):
url = f”http://things.ubidots.com/api/v1.6/devices/meter/?token={TOKEN}”
data = {“power”: power}
response = urequests.post(url, json=data)
print(response.text)
while True:
power = get_power_data() # Function to get power data from Arduino Nano
send_data(power)
utime.sleep(60)
7. How the System Works
- Data Collection:
- Arduino Nano reads voltage and current values.
- Computes power and sends data to Raspberry Pi Pico via I2C.
- Data Processing & Storage:
- Raspberry Pi Pico logs the data on an SD card.
- Transmits the data to Ubidots for real-time monitoring.
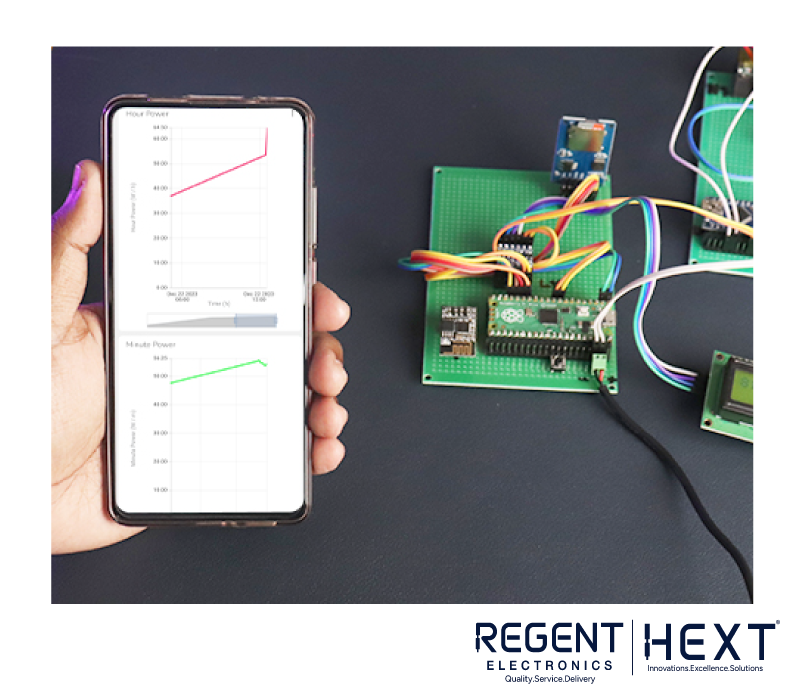
- Visualization & Insights:
- Ubidots IoT dashboard displays real-time power usage.
- Users receive insights for optimizing energy consumption.
8. Key Benefits and Future Enhancements
Key Benefits:
✅ Remote Energy Monitoring
✅ Cost and Energy Optimization
✅ Real-Time Alerts and Data Storage
✅ Scalable for Home, Office, and Industrial Applications
Future Enhancements:
🔹 AI-based energy consumption predictions
🔹 Integration with smart home automation
🔹 Mobile app for monitoring on the go
Conclusion
By integrating Raspberry Pi Pico, Arduino Nano, and cloud-based monitoring via Ubidots, this IoT-based energy meter offers an efficient solution for tracking and optimizing energy consumption. Whether for a home, office, or industry, this project provides an effective and scalable energy management system.
Start monitoring your energy usage today with Regent Electronics!