
IoT-Based Soil Moisture Monitoring with Arduino Nano ESP32 and Arduino Cloud
Introduction
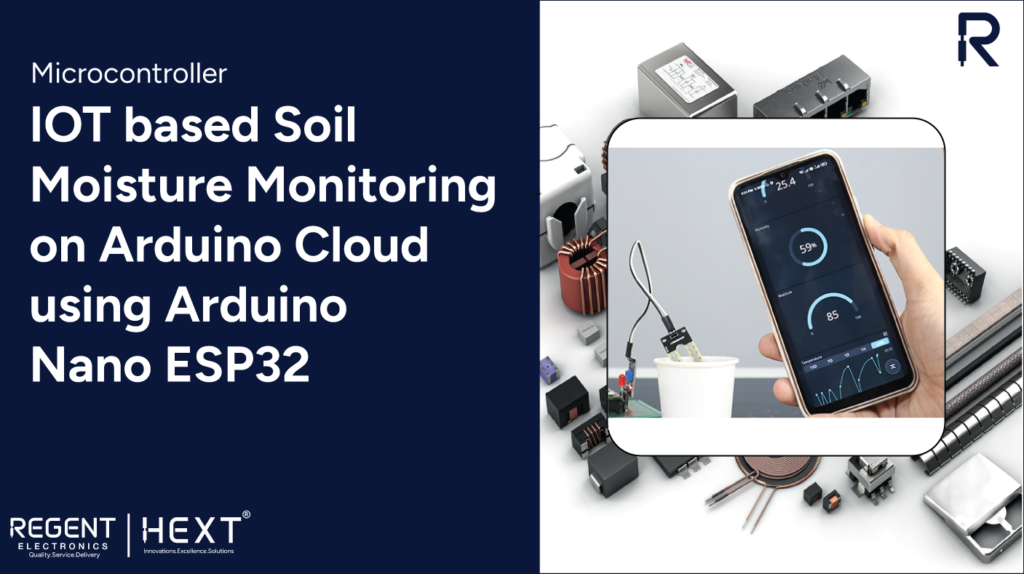
In this project, we will create a smart irrigation system using the Arduino Nano ESP32, DHT22 (temperature and humidity sensor), soil moisture sensor, and Arduino Cloud. This system enables real-time monitoring of environmental conditions via a mobile app and web dashboard. Additionally, the setup allows remote operation of a switch through an intuitive cloud-based interface.
What is Arduino Nano ESP32 Cloud?
Arduino Cloud is a cloud-based platform developed by Arduino that facilitates the integration of IoT devices. It allows users to connect, monitor, and manage their devices remotely with enhanced security and automation features.
Key Features of Arduino Cloud:
- Remote Monitoring & Control
- IoT Integration
- Data Storage & Analysis
- User-Friendly Interface
- Security & Automation Alerts
Project Requirements
Hardware Components:
- Arduino Nano ESP32
- DHT22 (Temperature and Humidity Sensor)
- Soil Moisture Sensor
- LED
- Universal PCB
- Breadboard
- Jumper Wires
- USB Data Cable
Software Requirements:
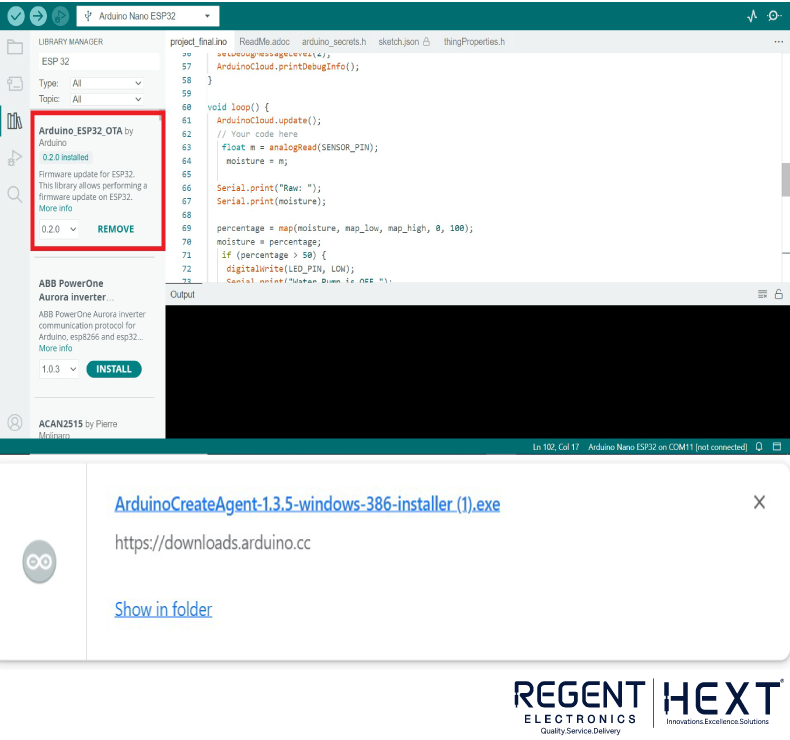
- Arduino IDE
- Arduino Cloud Web Platform
- Arduino IoT Remote App
- Arduino Create Agent
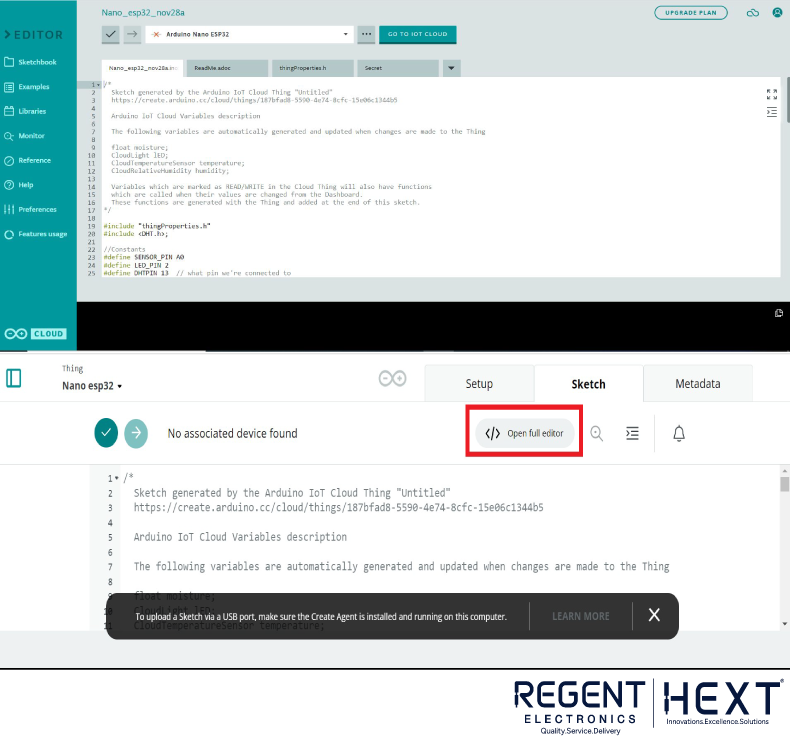
Setting Up Arduino Cloud

Step 1: Create an Arduino Cloud Account
- Log in to Arduino Cloud.
- Navigate to Things > Create Thing.
Step 2: Add Variables
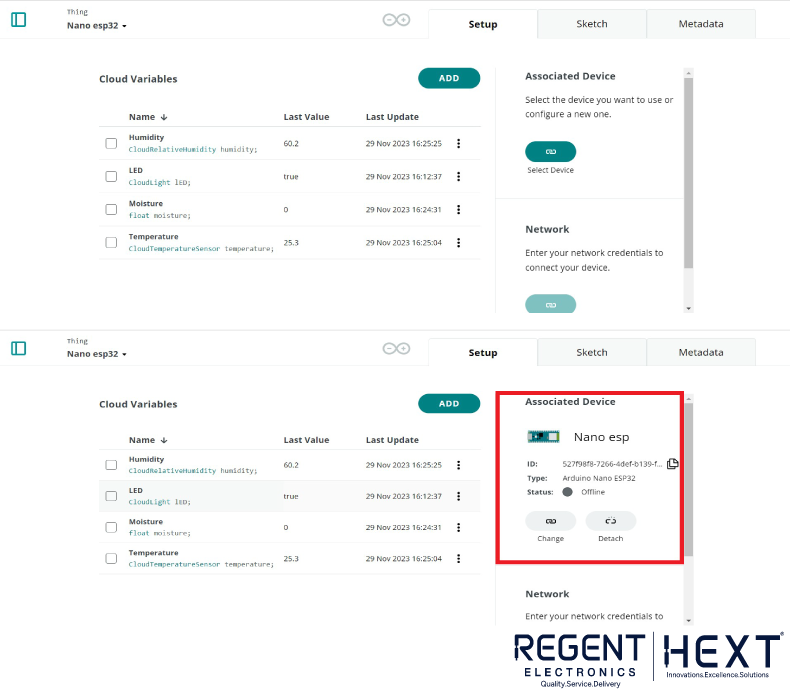
- Click on Add Variable and create the following variables:
- Humidity: Type – Relative Humidity, Read-Only, Update on Change.
- Temperature: Type – Temperature Sensor (°C), Read-Only, Update on Change.
- Soil Moisture: Type – Floating Point Number, Read-Only, Update on Change.
- LED: Type – Switch, Read & Write, Update on Change.
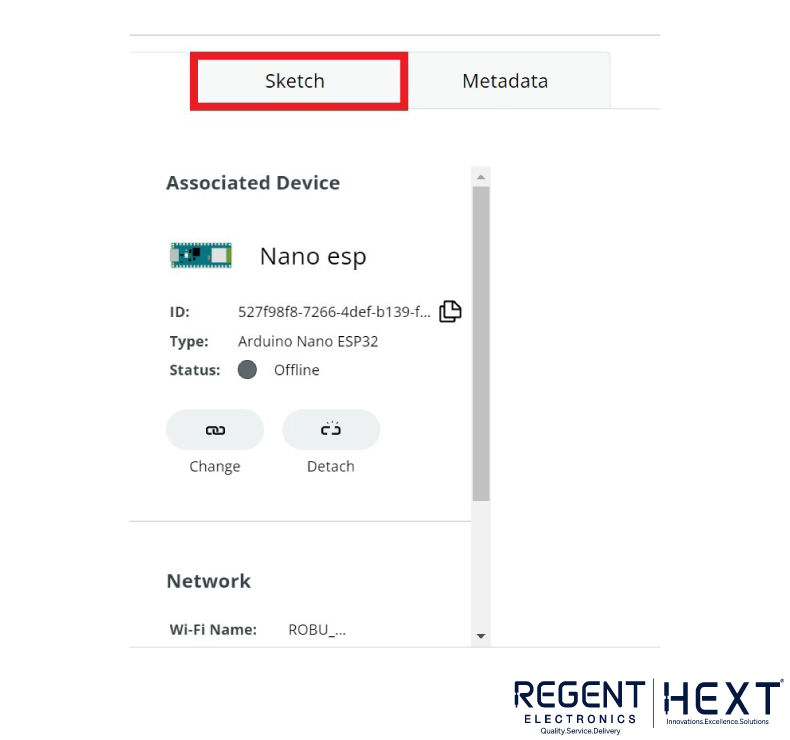
Step 3: Associate Device
- Select Arduino Nano ESP32.
- Copy and save the Device ID and Device Secret Key.
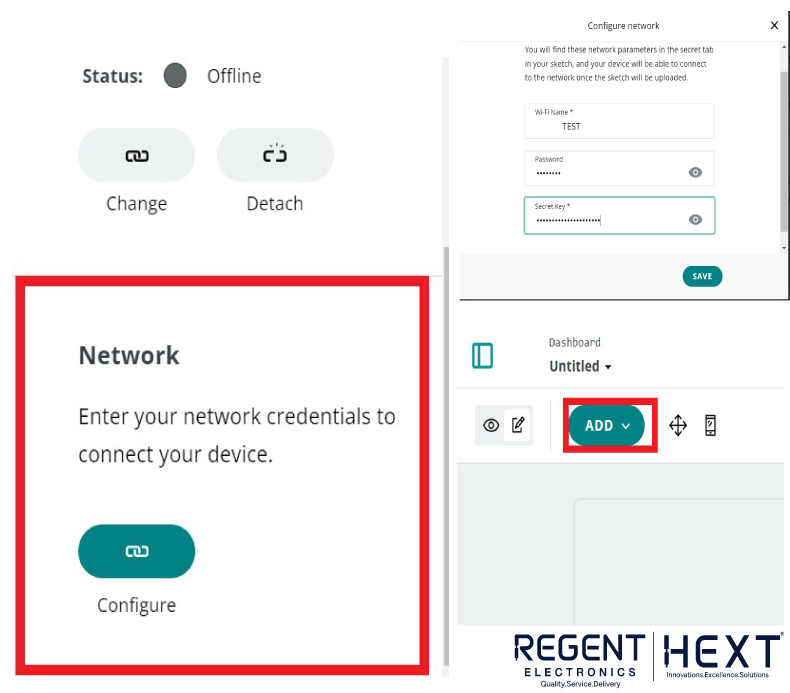
- Configure Wi-Fi credentials and enter the Device Secret Key.
Step 4: Create a Dashboard


- Navigate to Dashboards > Create Dashboard > Add Widget.
- Link widgets to variables:
- Switch: Link to LED.
- Gauge: Link to Temperature.
- Percentage Meter: Link to Humidity and Soil Moisture.
- Chart: Link to Temperature.
Circuit Diagram & Hardware Interfacing
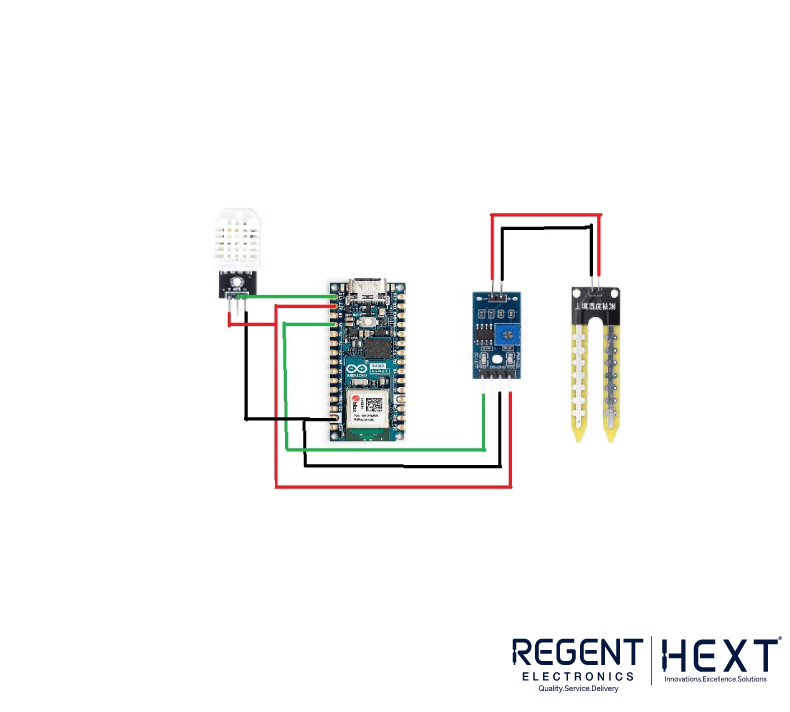
DHT22 Sensor Connections
| DHT22 Pins | Arduino Nano ESP32 Pins |
| +V | 3.3V |
| -V | GND |
| OUT | D13 |
Soil Moisture Sensor Connections
| Soil Moisture Sensor | Arduino Nano ESP32 Pins |
| VCC | 3.3V |
| GND | GND |
| A0 | A0 |
LED Connection
| LED Pin | Arduino Nano ESP32 Pin |
| Anode | D2 |
| Cathode | GND |
Arduino Code
#include “arduino_secrets.h”
#include “thingProperties.h”
#include <DHT.h>
#define LED_PIN 2
#define DHTPIN 13
#define DHTTYPE DHT22
DHT dht(DHTPIN, DHTTYPE);
int SENSOR_PIN = A0;
float percentage;
float map_low = 4100;
float map_high = 2700;
void setup() {
Serial.begin(9600);
pinMode(LED_PIN, OUTPUT);
pinMode(DHTPIN, INPUT);
pinMode(SENSOR_PIN, INPUT);
delay(1500);
dht.begin();
initProperties();
ArduinoCloud.begin(ArduinoIoTPreferredConnection);
setDebugMessageLevel(2);
ArduinoCloud.printDebugInfo();
}
void loop() {
ArduinoCloud.update();
float m = analogRead(SENSOR_PIN);
moisture = map(m, map_low, map_high, 0, 100);
if (moisture > 50) {
digitalWrite(LED_PIN, LOW);
} else {
digitalWrite(LED_PIN, HIGH);
}
Serial.print(“Soil Moisture: “);
Serial.println(moisture);
delay(1000);
float h = dht.readHumidity();
float t = dht.readTemperature();
temperature = t;
humidity = h;
Serial.print(“Temperature: “); Serial.println(t);
Serial.print(“Humidity: “); Serial.println(h);
delay(2000);
}
void onLEDChange() {
digitalWrite(LED_PIN, lED ? HIGH : LOW);
}
Final Testing & Demonstration

- Connect all components on a PCB as per the circuit diagram.
- Ensure Wi-Fi connectivity for Arduino Nano ESP32.
- Observe the dashboard for real-time updates.
- Simulate soil moisture changes:
- If the soil is dry, the LED (water pump) turns ON.
- If the soil is moist, the LED remains OFF.


Conclusion
This IoT-enabled soil moisture monitoring system provides a smart, automated approach to irrigation. By integrating Arduino Nano ESP32 with Arduino Cloud, users can efficiently track temperature, humidity, and soil moisture levels while remotely controlling irrigation systems.
This system enhances water efficiency, promotes data-driven farming, and ensures optimal soil moisture for improved crop yield.
For more exciting IoT projects, visit our YouTube Channel or check out this tutorial.