
Host Your Own Discord Bot on Raspberry Pi 5
Introduction
In this guide, we will walk you through the process of creating and hosting your own Discord bot on a Raspberry Pi 5. Whether you’re a beginner or an experienced developer, this tutorial will help you set up a bot using Python and run it efficiently on your Raspberry Pi 5.
So, without further ado, let’s get started!
Table of Contents
- What is Discord?
- What is a Discord Bot?
- Raspberry Pi 5 Overview
- Python for Bot Development
- Hardware Requirements
- Software Requirements
- Setting Up Raspberry Pi 5
- Using Discord Developer Portal
- Installing Visual Studio Code
- Writing the Bot Code
- Running the Bot
- Conclusion
What is Discord?
Discord is an instant messaging and VoIP platform that allows users to communicate via text, voice, and video in private chats or community servers. It is widely used by gamers, developers, and professionals for collaborative communication.
What is a Discord Bot?
A Discord bot is an automated program that can perform various tasks within a Discord server, such as moderating chats, sending automated messages, playing music, and even integrating with third-party applications.
Raspberry Pi 5 Overview
The Raspberry Pi 5 is a powerful single-board computer that offers significant performance improvements over its predecessors. Some key features include:
- Processor: 2.4GHz quad-core, 64-bit Arm Cortex-A76 CPU
- GPU: VideoCore VII
- Memory: 4GB / 8GB LPDDR4X-4267 RAM
- Connectivity: Dual-band Wi-Fi, Bluetooth 5.0
- Ports: 2 x USB 3.0, 2 x USB 2.0, Gigabit Ethernet
- Power: 5V/5A DC with USB-C support
Python for Bot Development
Python is a versatile programming language that supports multiple programming paradigms, making it an excellent choice for developing Discord bots. The discord.py library is commonly used for building and running bots on Discord.
Hardware Requirements
- Raspberry Pi 5
- MicroSD card (minimum 16GB, Class 10 recommended)
- Raspberry Pi 5 case and cooler
- Power supply (5V/5A DC)
- Keyboard, mouse, and monitor
- Stable internet connection
Software Requirements
- Python 3
- Visual Studio Code
- discord.py library
- Raspberry Pi Imager Tool
Setting Up Raspberry Pi 5
- Prepare the MicroSD Card:
- Download and install Raspberry Pi Imager from the official Raspberry Pi website.
- Insert the MicroSD card into your PC and open the Imager tool.
- Select Raspberry Pi 5 and choose Raspberry Pi OS (64-bit).
- Configure network settings and administrator credentials before starting the flashing process.
- Once completed, remove the SD card and insert it into the Raspberry Pi 5.
- Booting Up and Initial Configuration:
- Power on the Raspberry Pi and wait for it to complete its first boot.
- Open the terminal and update the system:
- sudo apt update
- sudo apt upgrade -y
- Install Python and necessary libraries:
- sudo apt install python3-pip
- pip3 install discord.py
Using Discord Developer Portal
- Create a New Application:
- Log in to the Discord Developer Portal.
- Click New Application, enter a name, and create it.
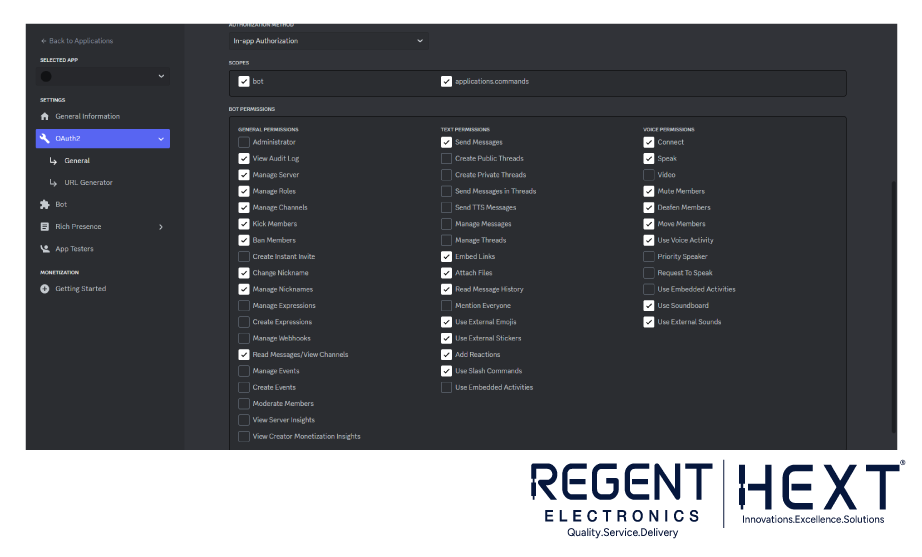
- Set Up Bot Permissions:
- Navigate to OAuth2 > URL Generator.
- Select Bot under the scopes section.
- Assign necessary permissions for the bot.
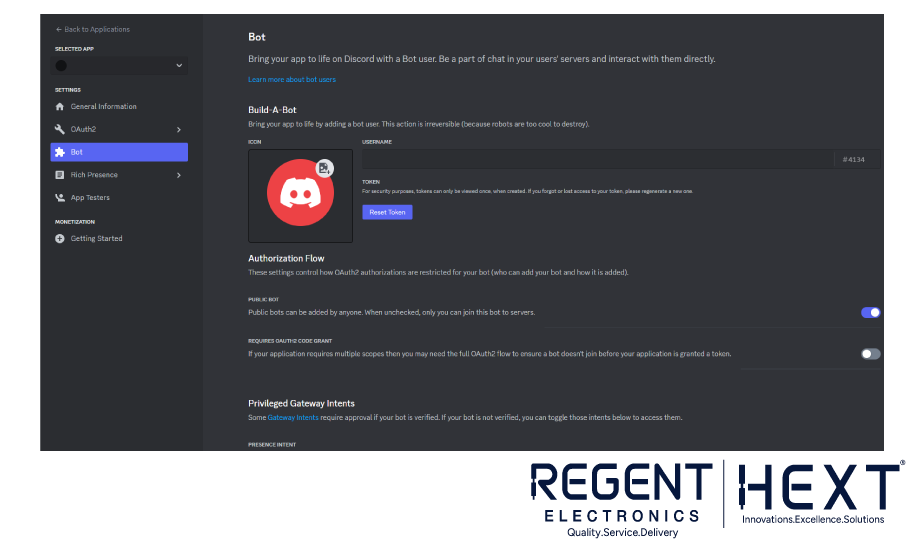
- Obtain the Bot Token:
- Under the Bot section, reset and copy the bot token securely.
- Enable all privileged intents for full functionality.
Installing Visual Studio Code

- Open the Raspberry Pi Recommended Software section.
- Install Visual Studio Code.
- Open VS Code, go to Extensions, and install the Python Extension.
Writing the Bot Code
Create a Python script for the bot (bot.py):
import discord
from discord.ext import commands
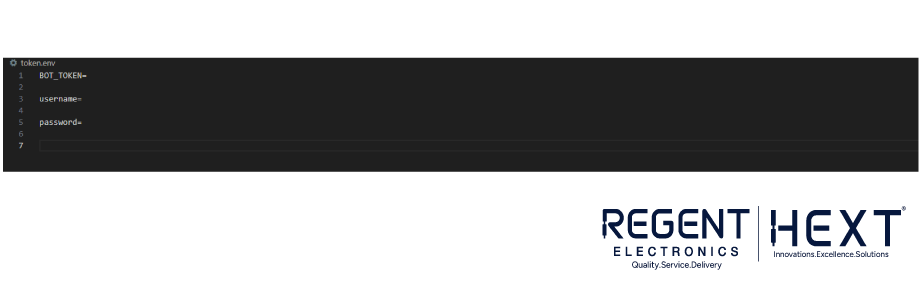
token = “YOUR_BOT_TOKEN”
intents = discord.Intents.default()
client = commands.Bot(command_prefix=”/”, intents=intents)
@client.event
async def on_ready():
print(f”Bot {client.user} is online!”)
@client.command()
async def hello(ctx):
await ctx.send(“Hello! How can I assist you today?”)
client.run(token)
Running the Bot
- Open the terminal and navigate to the bot directory.
- Run the bot:
- python3 bot.py
- Invite the bot to your server using the generated OAuth2 URL.
- Test the bot using /hello in your Discord server.
Conclusion
Congratulations! You have successfully created and hosted your own Discord bot on a Raspberry Pi 5. With this setup, you can expand the bot’s functionality, integrate it with other applications, and even automate server management tasks. Happy coding!
For more tutorials, stay tuned to Regent Electronics!