
Installation of Ubuntu MATE and ROS Kinetic on Raspberry Pi 2 and Pi 3
If you’re looking to enhance your Raspberry Pi with Ubuntu MATE and ROS Kinetic, this step-by-step guide from Regent Electronics will help you get started. Whether you’re a hobbyist, a student, or a professional working on robotics and automation, installing these tools on your Raspberry Pi will unlock a world of possibilities.
Why Use Ubuntu MATE and ROS on Raspberry Pi?
Ubuntu MATE 16.04.2 LTS is a lightweight and user-friendly operating system, perfect for Raspberry Pi. ROS Kinetic is a powerful framework for robotics applications, widely used for research and industrial automation. Combining them allows for easy development and deployment of robotics projects.
Step-by-Step Installation Guide
Step 1: Download Ubuntu MATE Image
Visit the official Ubuntu MATE download page: Ubuntu MATE Download
- The file is in XZ format, so extract it using software like 7-Zip to obtain the IMG file.
Step 2: Download and Install Win32 Disk Imager
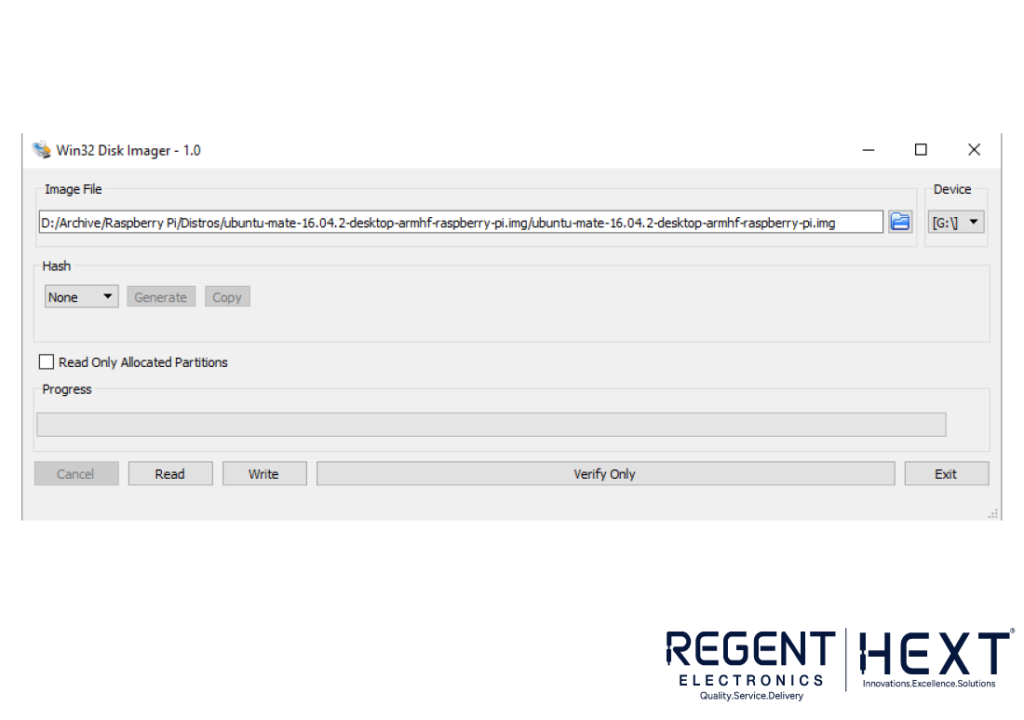
- Download it from Win32 Disk Imager
- Insert your microSD card into the computer using a USB reader.
- Open Win32 Disk Imager, select the extracted Ubuntu MATE IMG file, choose the SD card drive letter, and click “Write.”
- The process takes about 10 minutes.
Step 3: Boot Raspberry Pi with Ubuntu MATE
- Insert the microSD card into your Raspberry Pi and power it on.
- Connect it to a monitor via HDMI.
- Select the preferred language and click Continue.
- Skip Wi-Fi connection setup for now.
- Set up time zone, keyboard layout, and user credentials.
- The installer will configure the system, and once done, you’ll see the Ubuntu MATE welcome screen.
Step 4: Configure Network Settings
- Navigate to System Menu > Preferences > Network Connections.
- Select “Wired connection 1” and click Edit.
- Under the IPv4 Settings tab, choose Manual and enter IP Address, Netmask, Gateway, and DNS.
- Save the settings and restart the network service.
Installing ROS Kinetic on Raspberry Pi
ROS (Robot Operating System) Kinetic is compatible with Raspberry Pi 3 running Ubuntu MATE 16.04.2. Follow these steps for installation:
Step 1: Enable Software Repositories
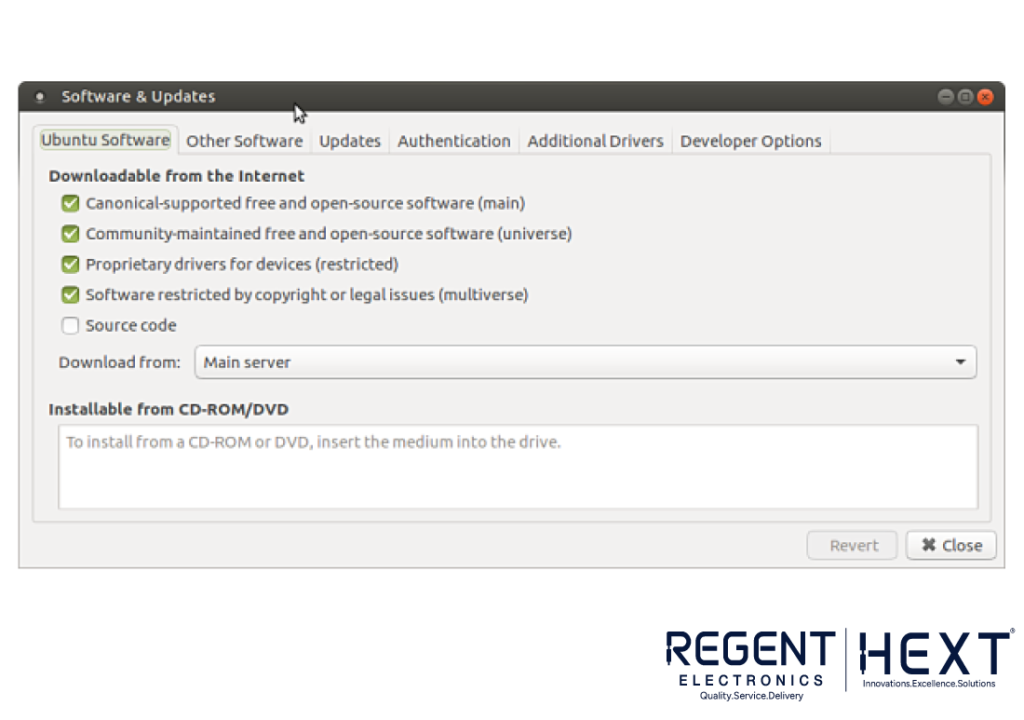
- Go to System > Administration > Software & Updates
- Enable Restricted, Universe, and Multiverse repositories.
Step 2: Setup Sources and Keys
sudo sh -c ‘echo “deb http://packages.ros.org/ros/ubuntu $(lsb_release -sc) main” > /etc/apt/sources.list.d/ros-latest.list’
wget http://packages.ros.org/ros.key -O – | sudo apt-key add –
Step 3: Update and Install ROS Kinetic
sudo apt-get update
sudo apt-get install ros-kinetic-desktop-full
Step 4: Initialize rosdep
sudo rosdep init
rosdep update
Step 5: Setup ROS Environment Variables
echo “source /opt/ros/kinetic/setup.bash” >> ~/.bashrc
source ~/.bashrc
Step 6: Create and Initialize Catkin Workspace
mkdir -p ~/catkin_workspace/src
cd ~/catkin_workspace/src
catkin_init_workspace
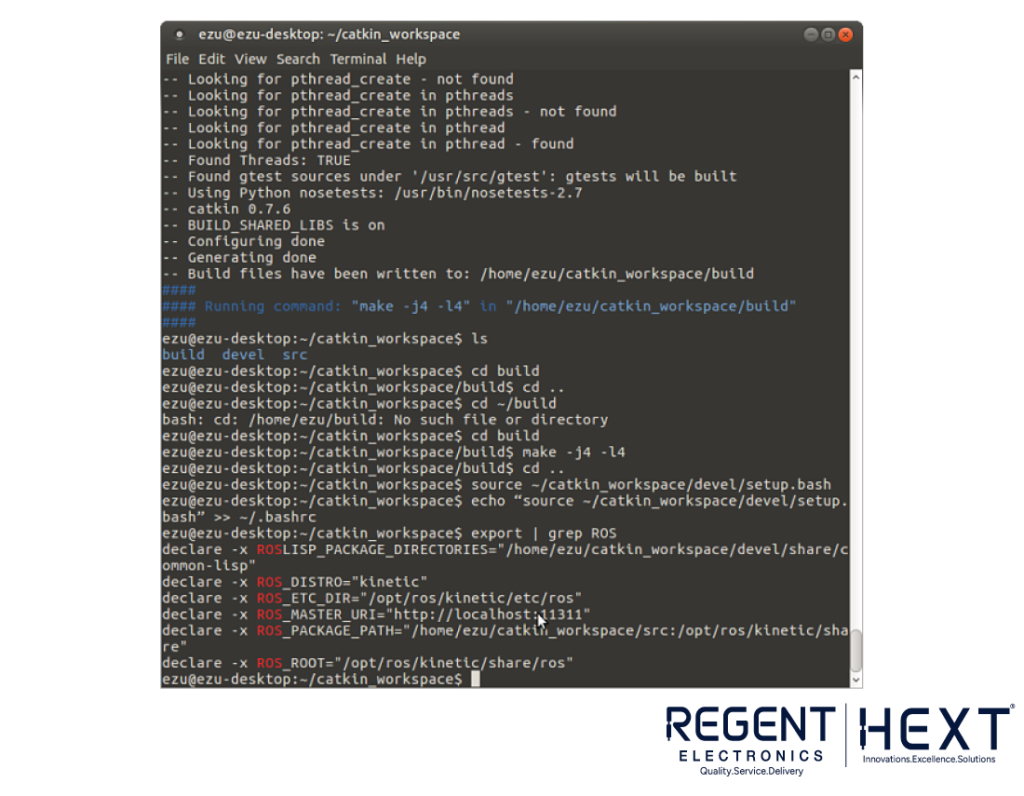
cd ~/catkin_workspace
catkin_make
Step 7: Add Catkin Workspace to ROS Environment
source ~/catkin_workspace/devel/setup.bash
echo “source ~/catkin_workspace/devel/setup.bash” >> ~/.bashrc
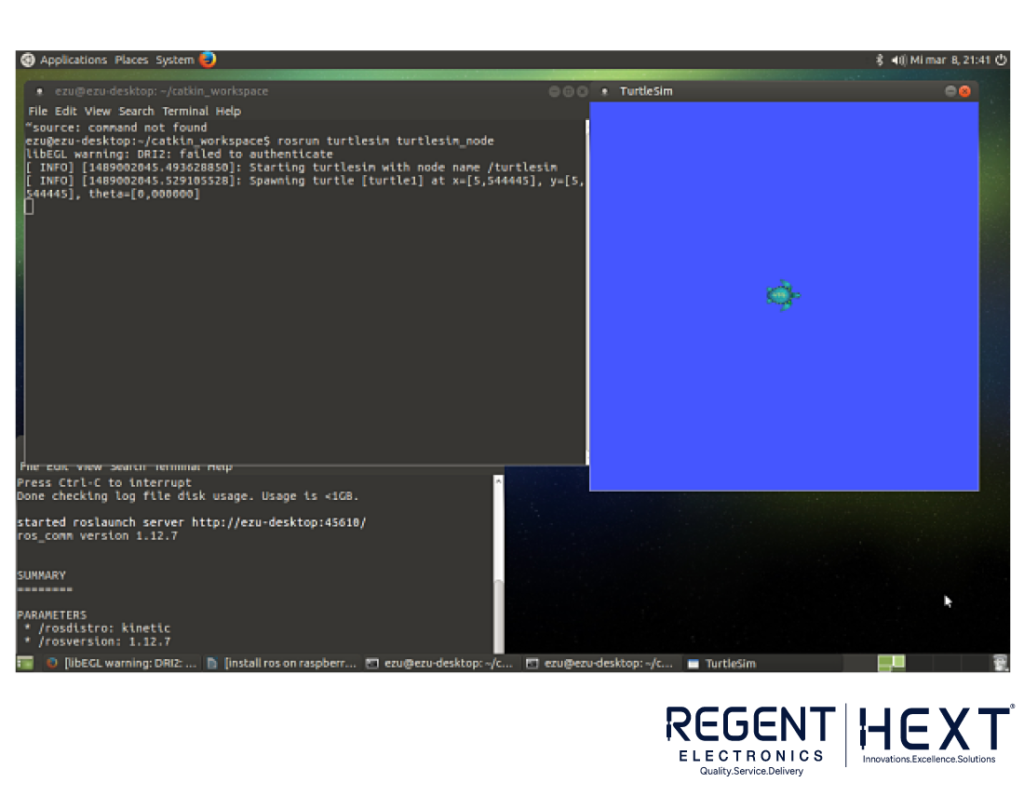
Step 8: Verify ROS Installation
export | grep ROS
roscore
Testing ROS and RPLidar
Create a ROS Workspace
mkdir -p ~/catkin_ws/src
cd ~/catkin_ws/src
catkin_init_workspace
Clone the ROS Node for RPLidar
git clone https://github.com/robopeak/rplidar_ros.git
Build with Catkin
cd ~/catkin_ws
catkin_make
source devel/setup.bash
Launch RPLidar Demo in Rviz
ls -l /dev |grep ttyUSB
sudo chmod 666 /dev/ttyUSB0
roslaunch rplidar_ros view_rplidar.launch
Results and Final Thoughts
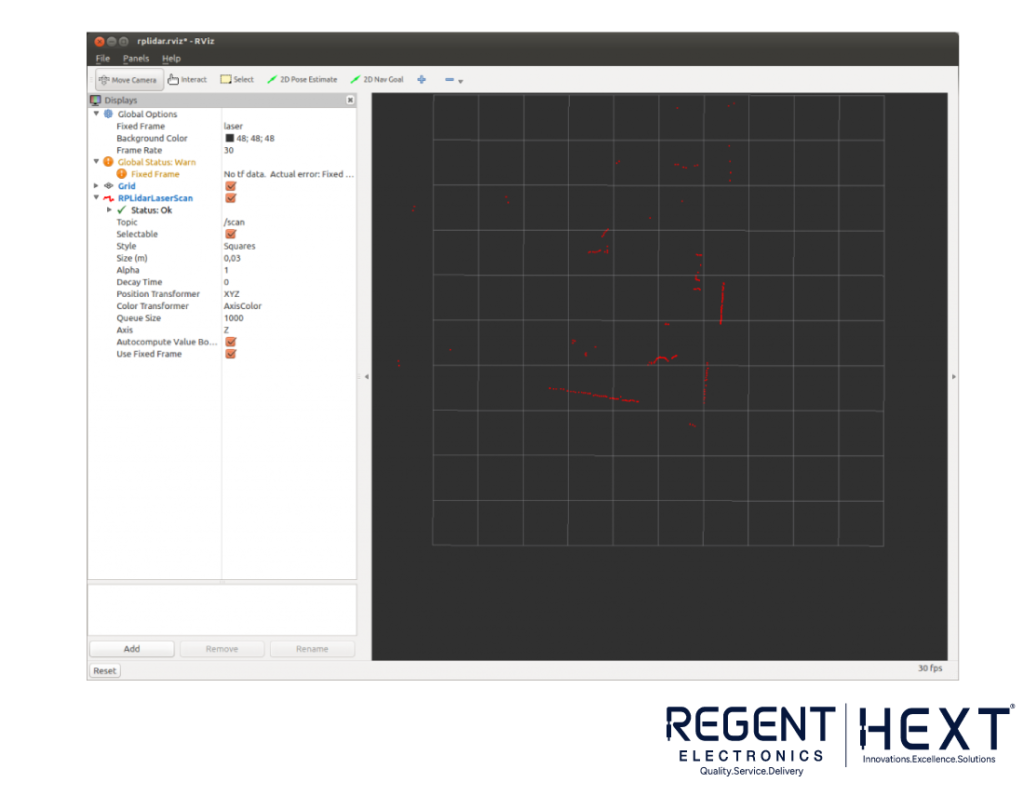
After running the above commands, Rviz will open, displaying the laser scanner’s detection grid. The scanner detects objects within a range of 15cm to 6m, making it an ideal tool for mapping and navigation projects.
By following this guide, you’ve successfully installed Ubuntu MATE and ROS Kinetic on your Raspberry Pi, opening doors to advanced robotics applications. Whether you’re exploring IoT, automation, or AI-driven robotics, this setup is a great starting point.
For more tutorials and electronic solutions, stay connected with Regent Electronics!