

Using Phone or Laptop as a Display for Raspberry Pi [Headless Mode]
Introduction
Setting up a Raspberry Pi without a dedicated monitor can be challenging, but with the headless mode setup, you can easily use your phone or laptop as a display. This guide will walk you through flashing and setting up your Raspberry Pi in headless mode, making it a portable and wireless solution.
Why Use Headless Mode?
- Eliminates the need for an external display
- Makes the Raspberry Pi portable
- Convenient wireless connectivity
What You Need:
- Raspberry Pi (any model)
- MicroSD card (Class 10, 16GB or higher)
- Laptop or Android phone
- Power supply for Raspberry Pi
- Wi-Fi connection
- SD card adapter or reader
Step 1: Download and Install Raspbian OS
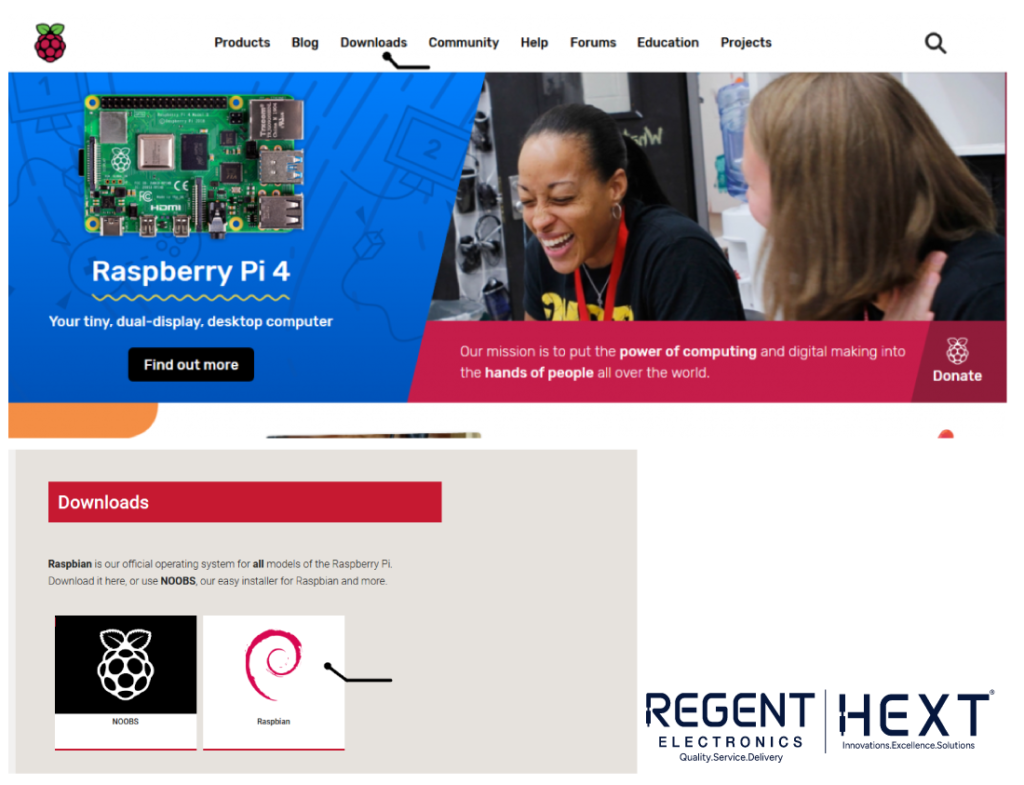
- Visit the official Raspberry Pi website and go to the Downloads section.
- Select Raspberry Pi OS (Raspbian). It is optimized for Raspberry Pi and offers better performance.
- Choose the version that fits your needs:
- With Desktop and Recommended Software (Best for beginners)
- Lite Version (Minimal setup for advanced users)
- Download the image file (.img) to your computer.
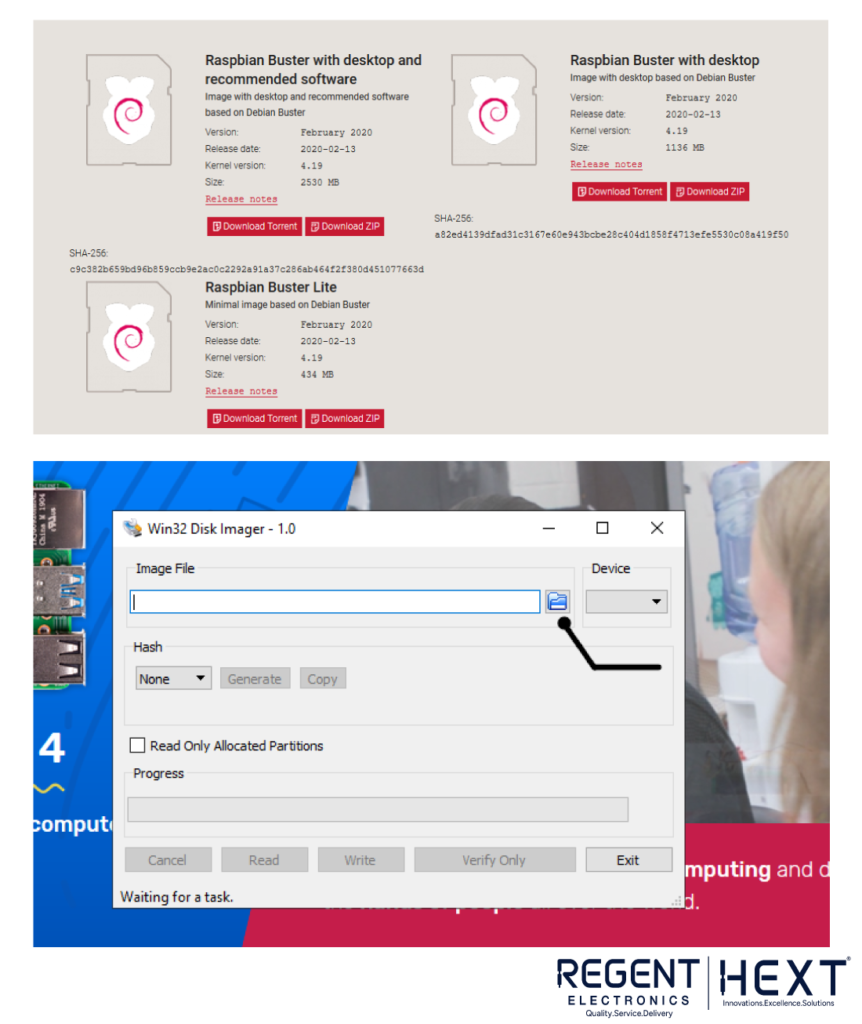
Step 2: Prepare the SD Card

- Format the SD card using any SD card formatter (ensure it is in FAT32 format).
- Flash the OS Image:
- Use Balena Etcher (recommended) or Win32 Disk Imager.
- Select the downloaded Raspbian .img file and write it to the SD card.
- After writing, safely eject the SD card.
Step 3: Enable SSH for Remote Access

- Insert the SD card into your computer.
- Open the BOOT directory on the SD card.
- Create a new file named ssh (without any extension). This will enable SSH access when the Raspberry Pi boots.
Step 4: Configure Wi-Fi (Optional for Wireless Setup)
- Create a file named wpa_supplicant.conf in the BOOT directory.
- Open it with Notepad++ or any text editor.
- Copy and paste the following configuration:
- country=US
- ctrl_interface=DIR=/var/run/wpa_supplicant GROUP=netdev
- update_config=1
- network={
- ssid=”Your_WiFi_Name”
- psk=”Your_WiFi_Password”
- key_mgmt=WPA-PSK
- }
- Save the file and eject the SD card.
Step 5: Boot the Raspberry Pi and Connect via SSH
- Insert the SD card into your Raspberry Pi and power it on.
- Connect your laptop/phone to the same Wi-Fi network.
- Find the Raspberry Pi’s IP address using a network scanner or your router’s connected devices list.
- Download and install PuTTY (for Windows) or use the terminal (Linux/macOS) to SSH into your Raspberry Pi.
- Open PuTTY and enter the IP address.
- Select SSH and click Open.
- Login using default credentials:
- Username: pi
- Password: raspberry
Step 6: Enable VNC for Remote Desktop Access
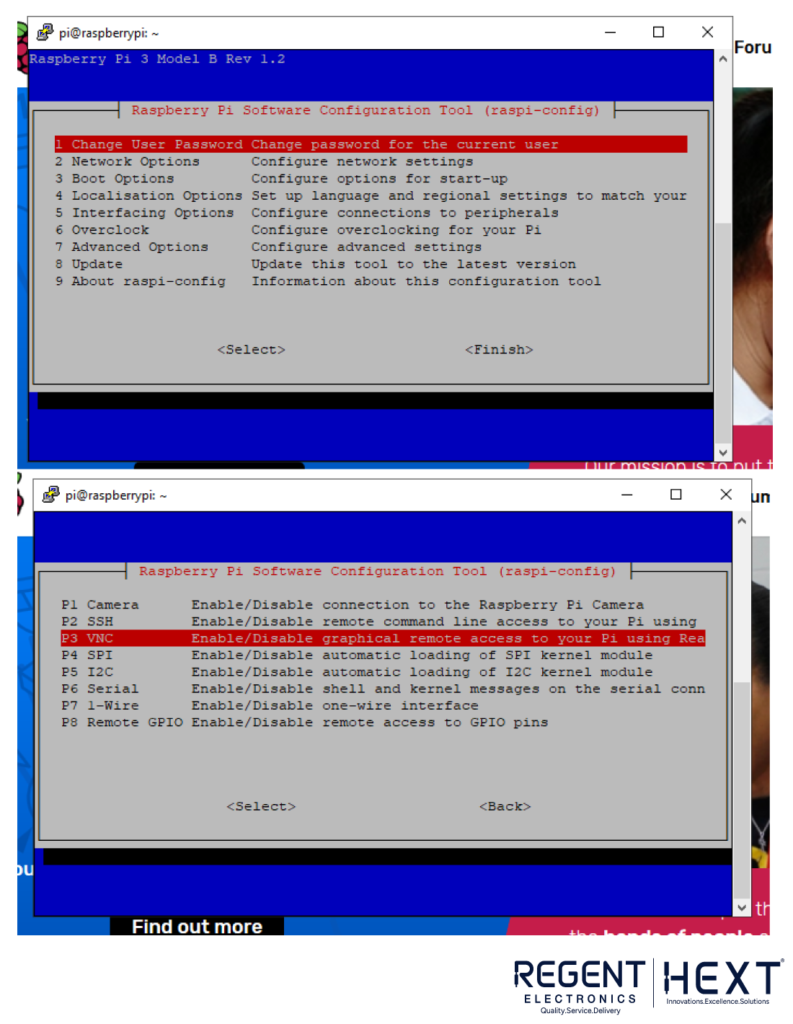
- In the terminal, type:
- sudo raspi-config
- Navigate to Interfacing Options > VNC > Enable.
- Restart your Raspberry Pi:
- sudo reboot
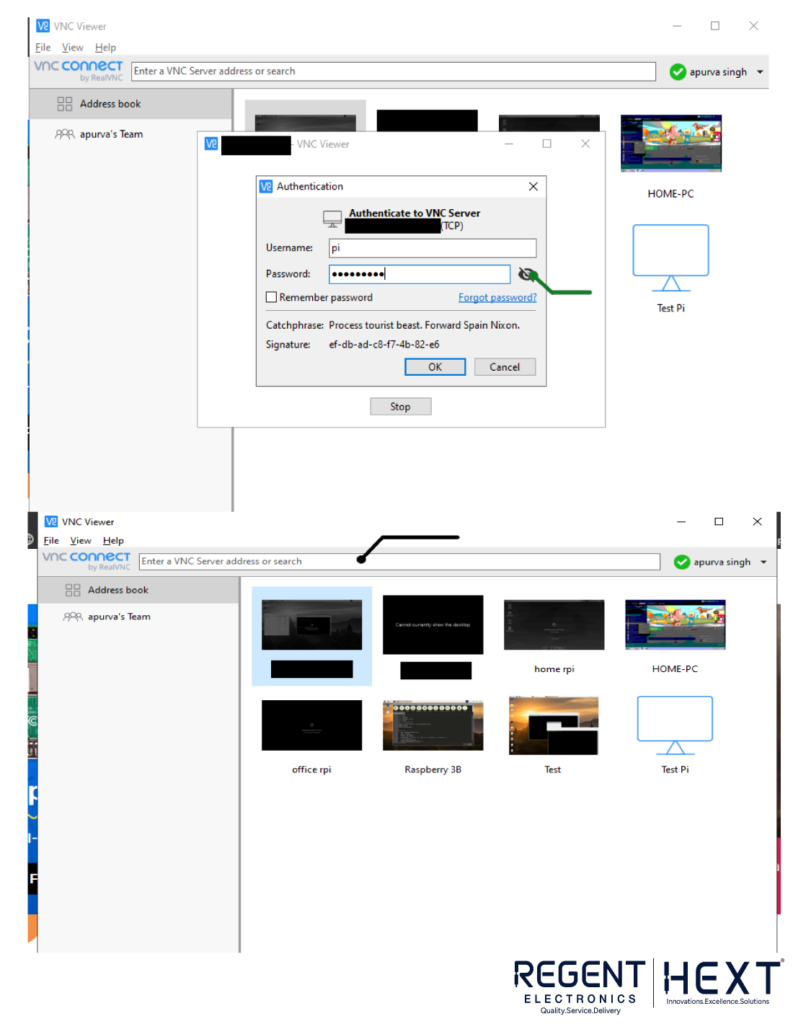
- Download VNC Viewer on your laptop/phone.
- Enter your Raspberry Pi’s IP address and login.
- Now, you can remotely access the Raspberry Pi desktop!


Conclusion
Congratulations! You have successfully set up your Raspberry Pi in headless mode. Now, you can control it wirelessly from your laptop or phone, making it more portable and efficient. If you have any questions or suggestions, feel free to comment below!