
How to Build a pH Meter Using Arduino – A Detailed Guide
Introduction
A pH meter is a scientific instrument used to measure the hydrogen ion concentration in a solution, determining its acidity or alkalinity. It works by comparing the electrical potential difference between a pH electrode and a reference electrode. To obtain accurate readings, a pH meter must be calibrated using buffer solutions.
In this guide, we will explore how to interface different pH sensors with an Arduino to measure pH levels effectively. Let’s get started!
What is pH?

pH is a measure of the acidity or basicity of a liquid solution, ranging from 0 to 14:
- pH < 7: Acidic solution
- pH = 7: Neutral solution
- pH > 7: Basic (alkaline) solution
pH measurement is crucial in various industries, including food processing, pharmaceuticals, cosmetics, and environmental monitoring.
Importance of a pH Meter
Many industries require precise pH monitoring for product stability and quality control. For example:
- Food industry: Ensures food safety and taste consistency.
- Pharmaceuticals: Maintains drug efficacy and stability.
- Water treatment: Regulates safe drinking water and wastewater disposal.
- Electrochemical industries: Used in battery assembly, metal etching, and plating processes.
Components Required
- Arduino Uno
- 16×2 Alphanumeric LCD
- I2C Module for LCD
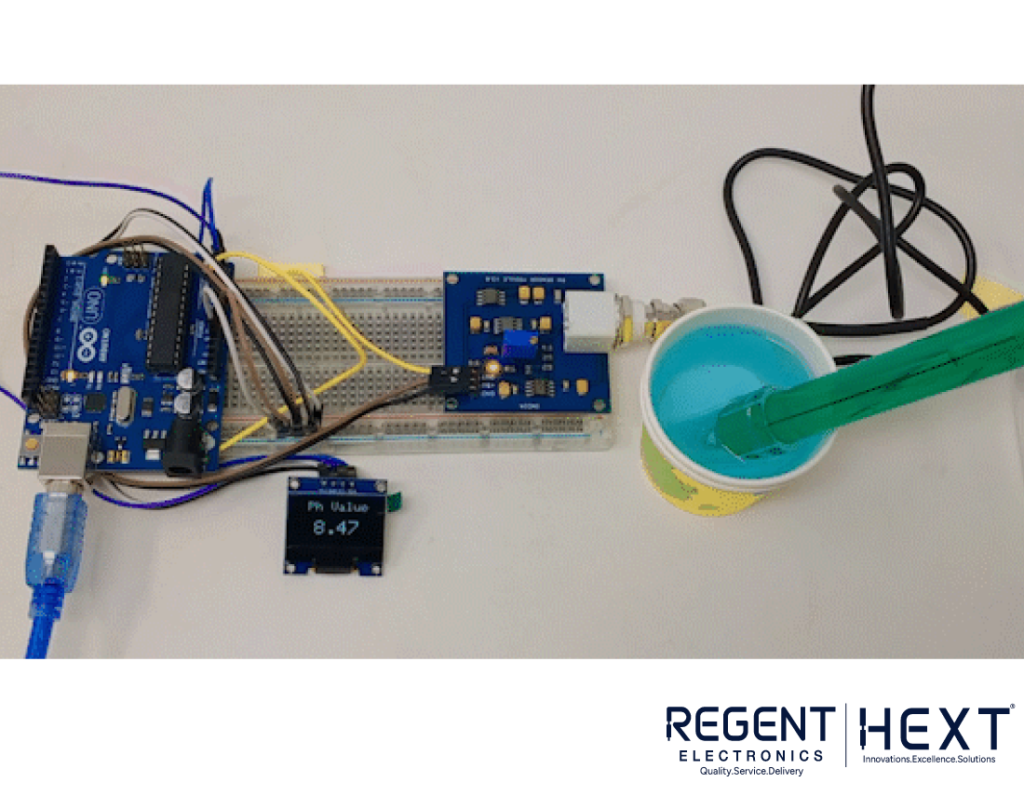
- Gravity Analog pH Sensor
- Dupont Cables
- Breadboard
Comparing Different pH Sensors
1. Grove pH Sensor Kit
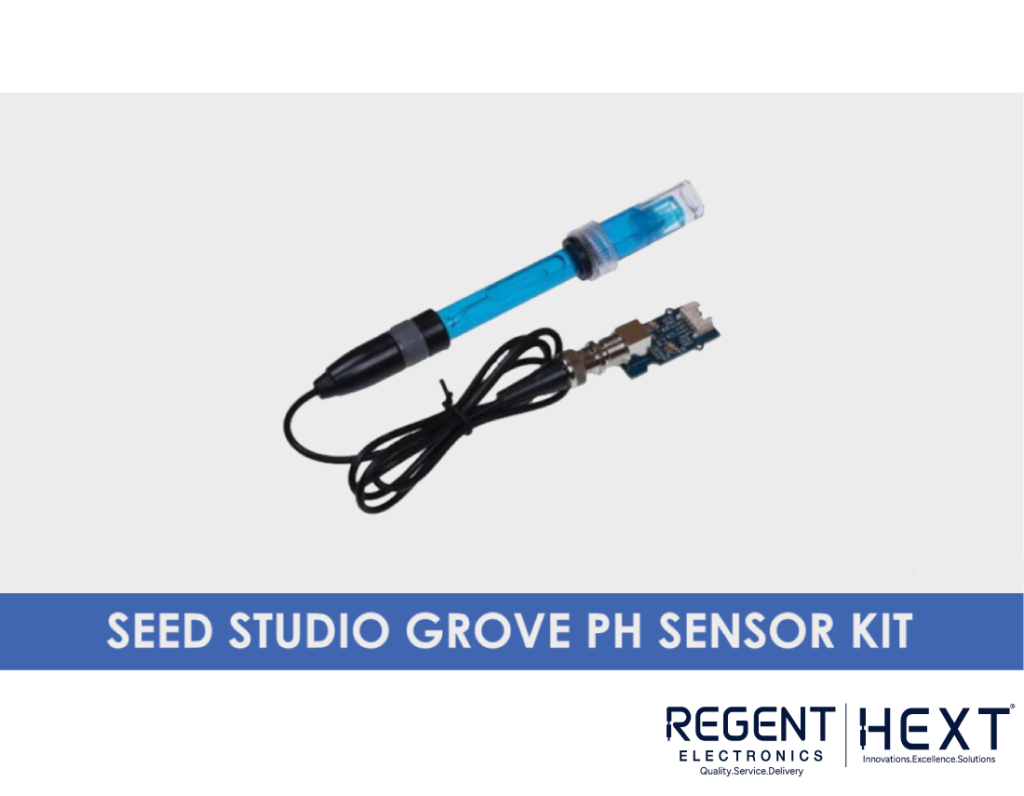
This low-cost sensor is compatible with both Arduino and Raspberry Pi. It provides digital output values and is easy to interface.
Technical Specifications:
- Operating Voltage: 3.3V/5V
- Measurement Range: 0-14 pH
- Resolution: ±0.15 pH
- Response Time: < 1 minute
- Operating Temperature: 0-60°C
2. Gravity Analog pH Sensor
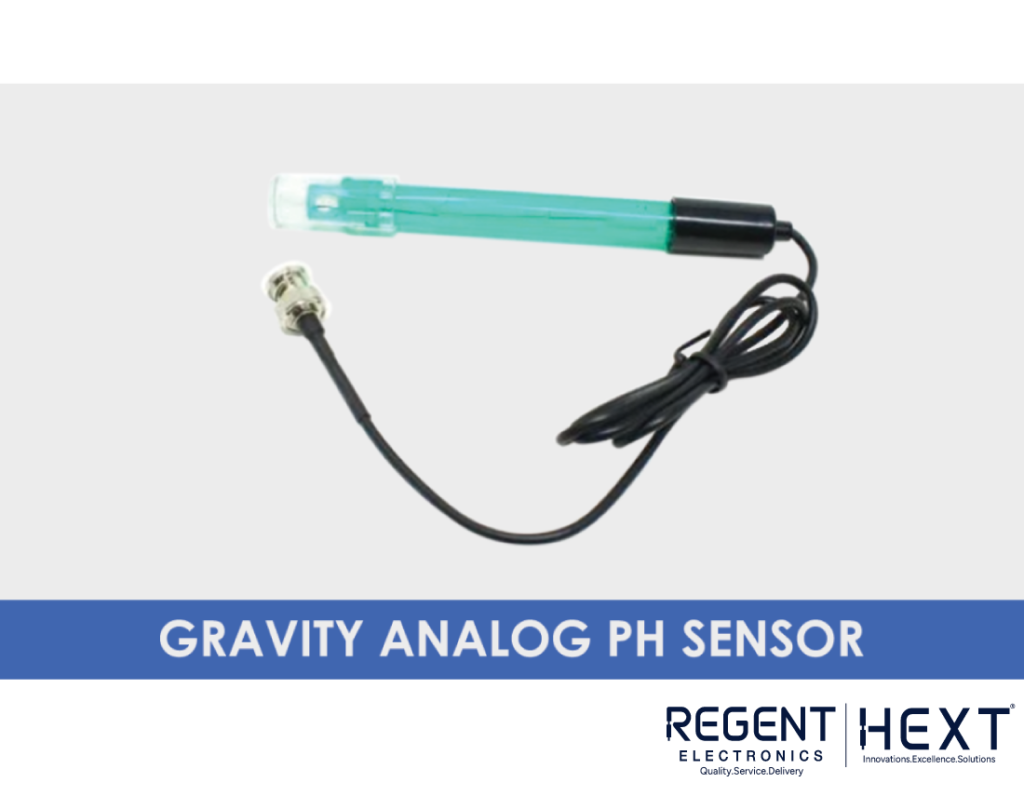
This sensor is specifically designed for Arduino and offers analog output readings.
Technical Specifications:
- Operating Voltage: 3.3V/5V
- Measurement Range: 0-14 pH
- Resolution: ±0.15 pH
- Response Time: < 1 minute
- Operating Temperature: 0-60°C
Interfacing Gravity Analog pH Sensor with Arduino
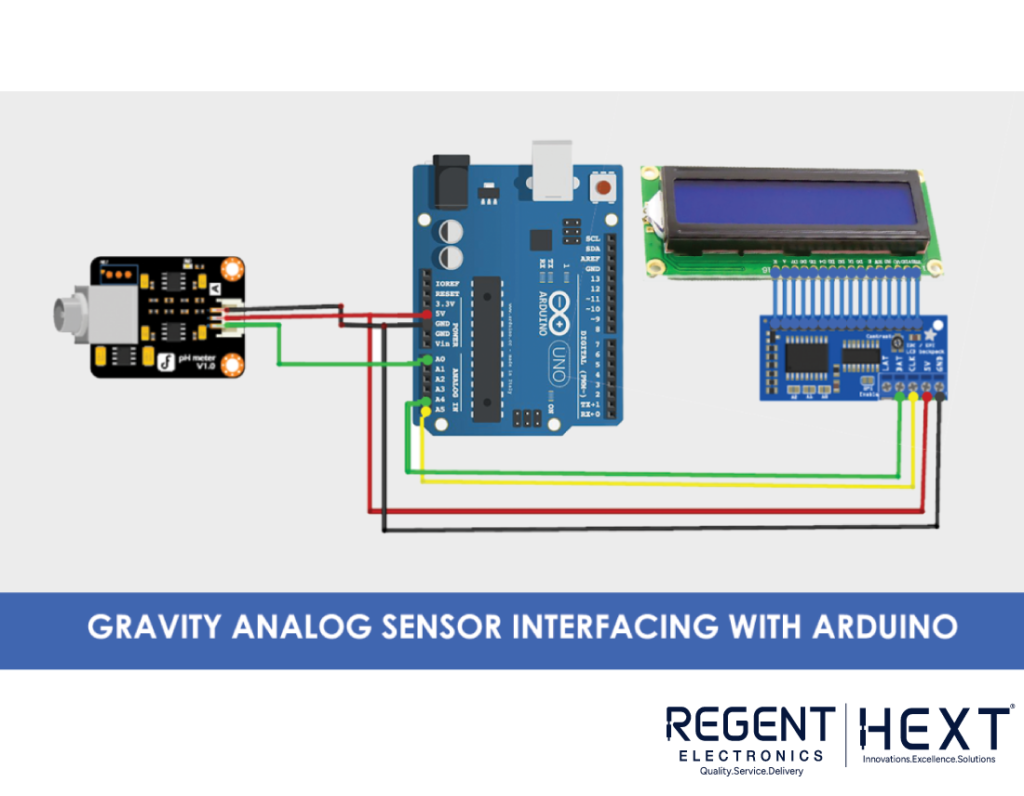
The connection process is straightforward. Follow the wiring diagram:
- Connect the pH sensor:
- VCC to Arduino 5V
- GND to Arduino GND
- Signal pin to Arduino A0
- Connect the I2C LCD Module:
- 5V and GND to Arduino 5V and GND
- CLK to A5
- DAT to A4
Arduino Code for pH Meter
Once the connections are complete, install the Arduino IDE and upload the following code:
#include <Wire.h>
#include <LiquidCrystal_I2C.h>
LiquidCrystal_I2C lcd(0x27, 16, 2);
float calibration_value = 21.34;
int phval = 0;
unsigned long int avgval;
int buffer_arr[10], temp;
void setup() {
Serial.begin(9600);
lcd.init();
lcd.begin(16, 2);
lcd.backlight();
lcd.setCursor(0, 0);
lcd.print(” Welcome to “);
lcd.setCursor(0, 1);
lcd.print(” Regent Electronics “);
delay(2000);
lcd.clear();
}
void loop() {
for(int i=0; i<10; i++) {
buffer_arr[i] = analogRead(A0);
delay(30);
}
for(int i=0; i<9; i++) {
for(int j=i+1; j<10; j++) {
if(buffer_arr[i] > buffer_arr[j]) {
temp = buffer_arr[i];
buffer_arr[i] = buffer_arr[j];
buffer_arr[j] = temp;
}
}
}
avgval = 0;
for(int i=2; i<8; i++) avgval += buffer_arr[i];
float volt = (float)avgval * 5.0 / 1024 / 6;
float ph_act = -5.70 * volt + calibration_value;
lcd.setCursor(0, 0);
lcd.print(“pH Val:”);
lcd.setCursor(8, 0);
lcd.print(ph_act);
delay(1000);
}
Final Thoughts
Building a pH meter using Arduino is an exciting project for electronics enthusiasts, students, and professionals. With this guide, you can easily measure pH levels for various applications. If you found this article helpful, let us know in the comments below!